Using the Cucumber WiFi API
Oct 29, 2015
This doc is outdated. Please view our new documents here:
docs.ct-networks.io
This guide will show you how to setup your own application to use the CT WiFi API. The API will let you do loads of handy things, like create locations, generate vouchers and reboot your boxes.
If you’re not a developer, please forget this exists.
Anything that can be done in the dashboard (and more) can be done using the API.
Getting Started
We use the Oauth2 for our authenticaion mechanism. Oauth is an authorisation framework that’s used all over the web. It enables applications to obtain limited access to user accounts, data or HTTP services like Facebook, Google, Twitter and millions more.
If you don’t know anything about Oauth, there’s a load of resources online.
In this guide, we’ll walk you through creating an Application on CT WiFi, authorising some requests using Curl. We’ll obtain an access token and then show you how to use it to get some location info.
Create an Application
Firstly, make sure you’ve created a Cucumber WiFi account. After you’ve logged in, please visit:
https://my.ctapp.io/#/apps
Click “New Application”.
Fill-in all the fields, they’re all required.
-
- Application Name: this will be seen on any user-facing authorisation screens. Keep it short and descriptive.
-
- Callback URL: the site we’ll send the user to after they’ve logged in. Must be https.
-
- Application Website: the site that contains your details and information about your service.
-
- Description: some details about your site.
Click the create button to save your App.

Authentication Example
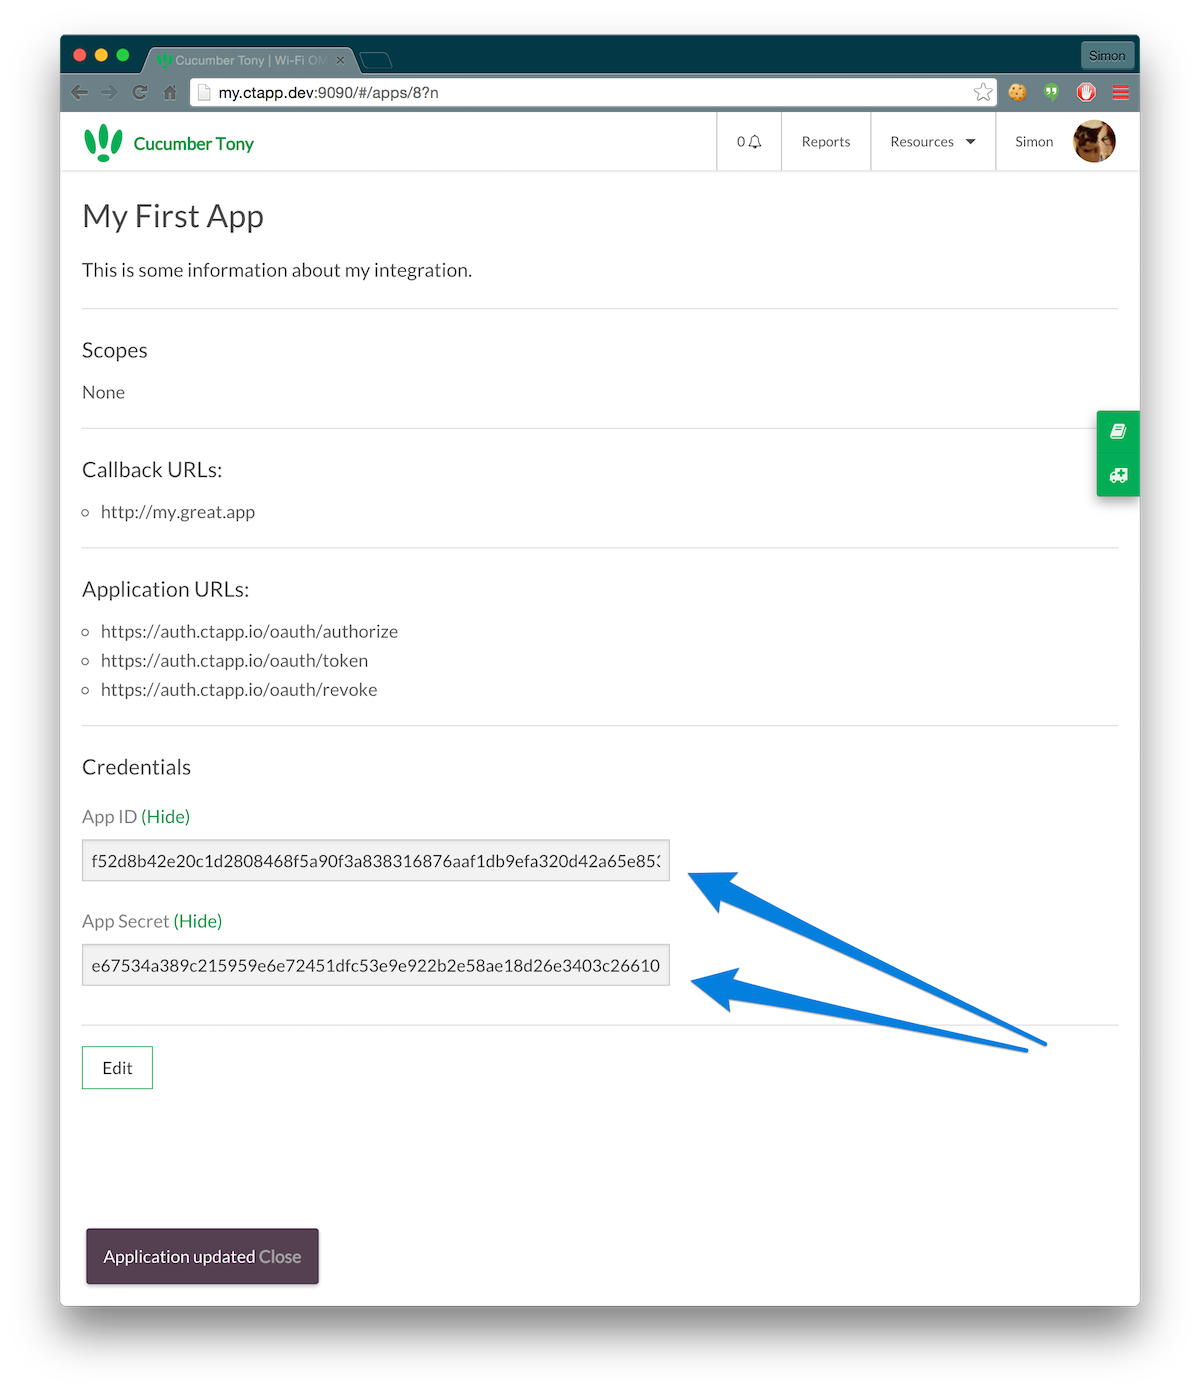
You’ll need your App ID and App Secret to authorise your requests. You use these details to create a unique code and then exchange this for an access token.
You can use the access token to authorise your API calls. Alongside the access token, you will also receive a refresh token which you can use to refresh the access token when it’s expired.
Make a note of your App ID and App Secret. Do not let anyone else have your secret!
Requesting the Grant / Code
If you’re using plain old curl, this is how you get your code.
Open a browser and open the following URL, replacing the values with your details:
https://auth.ctapp.io/oauth/authorize?client_id=XXX&response_type=code&redirect_url=YYY
- XXX is your App ID, obtained from your Cucumber dash.
- YYY is your callback URL, this must match your Cucumber App Settings.
It’s hugely important that you encode the redirect URL, otherwise you’ll see an error. The request should look like this:
https://auth.ctapp.io/oauth/authorize?client_id=18273618253765123&redirect_uri=https%3A%2F%2Fwww.great-site.com&response_type=code
After visiting the URL, login with your Cucumber credentials and you should be sent to a confirmation page.
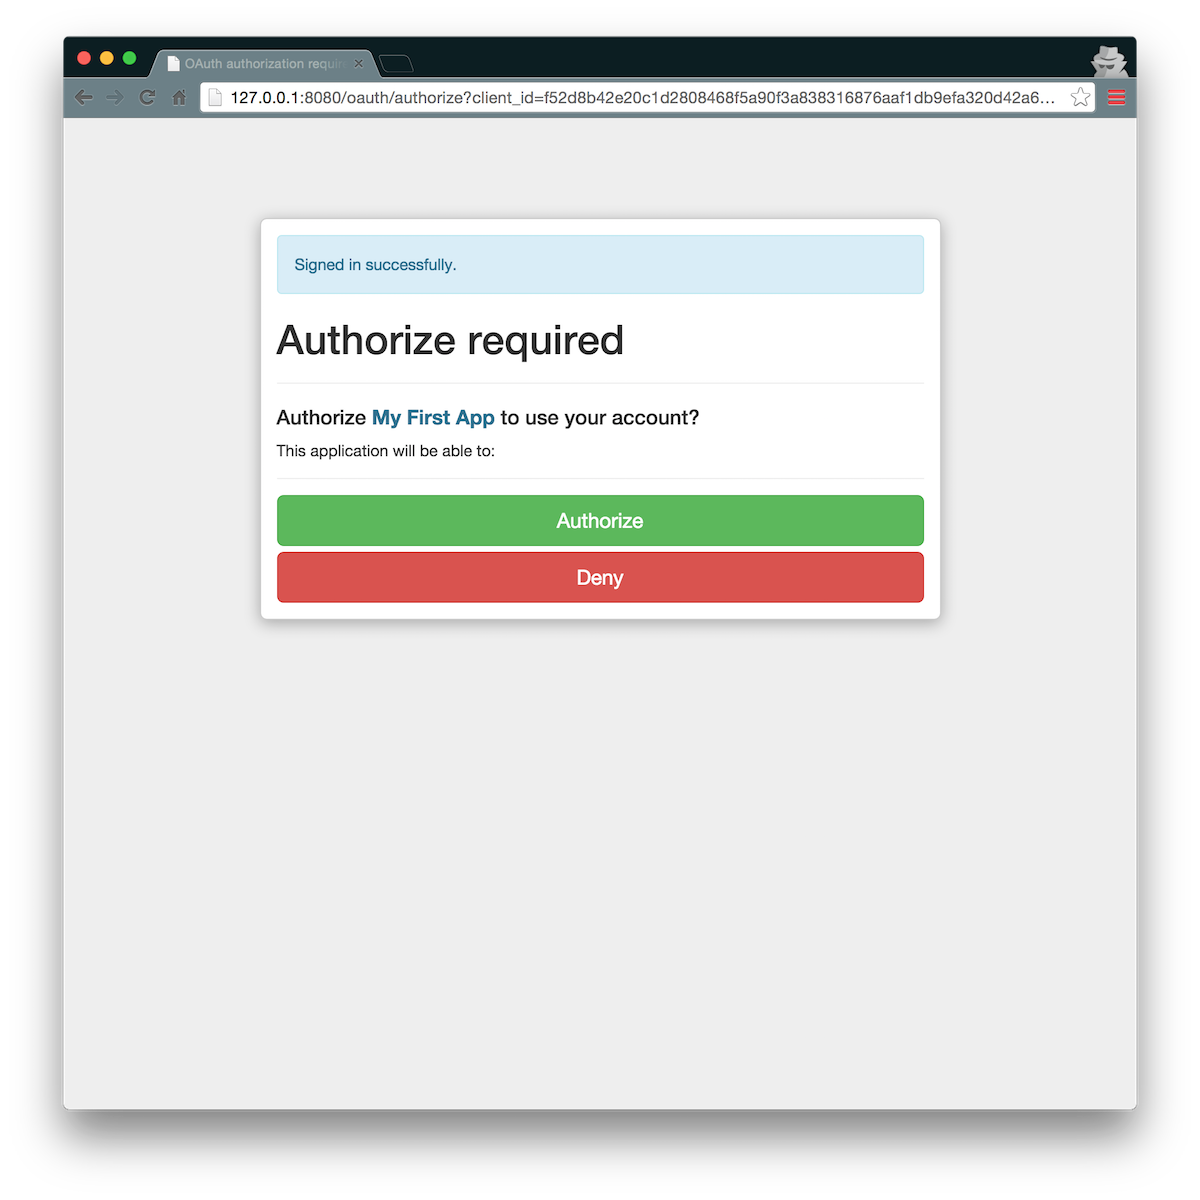
Exchange the Code for an Access Token
After confirming you authorize the app to access your account, you will be redirected back to your site. Grab the code from the URL.
You will need to do a POST request to:
https://auth.ctapp.io/oauth/token
Ensure you include the following params:
client_id: The client ID issued in the first step.
client_secret: The client secret issued in the first step.
redirect_uri: The callback URI we defined previously.
grant_type: This is **authorization_code**.
code: The authorization code received in the previous step.
For example, using curl:
curl -F grant_type=authorization_code \
                   -F client_id=f52d8b42e20c1d2808468f5a90f3a838316876aaf1db9efa320d42a65e853a49 \
                   -F client_secret=e67534a389c215959e6e72451dfc53e9e922b2e58ae18d26e3403c26610b36f7 \
                   -F code=223085fc4382abfde011c2c32eb354889533db2d10c2cf84f0e1a39373481a37 \
                   -F redirect_uri=http://my.great.app \
                   -X POST https://auth.ctapp.io/oauth/token
The response will look like this:
{
  "access_token": "461becda8d301b32b7caaf14772b42ba71a341818462301e0ab5bf2826ea1885",
  "token_type": "bearer",
  "expires_in": 7200,
  "refresh_token": "595a01d24a3d57d3a9217c08b81c937b73fad462ba14388f418d46f7a41f6e8b",
  "created_at": 1446315704
}
Accessing Cucumber
Now you have your access token, you can use this to authorise your requests. Simply add this token to your HTTP headers:
Authorization: Bearer 461becda8d301b32b7caaf14772b42ba71a341818462301e0ab5bf2826ea1885
For example, if you want to get a list of your locations:
curl https://api.ctapp.io/api/v1/locations -H 'Authorization: Bearer a9303468170b75ad64cff5c6d0541378c13366219322b5cfb174d065ba8e13e6'
You must use api.ctapp.io for all requests
{
  "locations": [
  {
    "id": "1813",
      "archived": false,
      "location_name": "Stuff got real",
      "slug": "stuff-got-real-iajpng9akeztfqknmlfusw",
      "location_address": "One Long Road",
      "street": null,
      "phone1": null,
      "location_website": null,
      "location_type": null,
      "development_mode": "Beta",
      "daily_limit": true,
      "created_at": 1418395686,
      "updated_at": 1440330154,
      "user_id": 103,
      "lat": 40.4039,
      "lng": -121.971,
      "clients_total": 4,
      "clients_online": 0,
      "boxes_count": 17,
      "meraki_secret": null
  },
    ],
    "_links": {
      "current_page": 1,
      "total_pages": 1,
      "next_page": null,
      "total_entries": 3,
      "size": 15
    }
}
Using the Refresh Token
Your access token WILL expire reguarly and without notice. Sometimes daily. In order to deal with this, you can use your refresh token to request a new access token.
Do another POST request with the following params:
client_id: The client ID issued in the first step.
client_secret: The client secret issued in the first step.
grant_type: This is **refresh_token**.
refresh_token: The refresh token your received in the previous step.
For example:
curl -F grant_type=refresh_token \
-F client_id=f52d8b42e20c1d2808468f5a90f3a838316876aaf1db9efa320d42a65e853a49 \
-F client_secret=e67534a389c215959e6e72451dfc53e9e922b2e58ae18d26e3403c26610b36f7 \
-F refresh_token=595a01d24a3d57d3a9217c08b81c937b73fad462ba14388f418d46f7a41f6e8b \
-X POST http://localhost:8080/oauth/token
Some people might run a cron job to retreive this token on a daily basis. Others will save the token and only refresh when the access_token gets rejected (this is how we do it).
Doing it with Ruby
Ok, so now we’ve done it with Curl, we’ll show you how to do with Ruby and the Oauth2 gem. Make sure you’ve installed oauth2:
gem install oauth2
Open up a Rails or irb console.
Create a Client
client = OAuth2::Client.new(app_id, app_secret, :site => 'https://auth.ctapp.io')
That should give you something like this:
#<OAuth2::Client:0x007fc76195cad8 @id="f52d8b42e20c1d2808468f5a90f3a838316876aaf1db9efa320d42a65e853a49", @secret="e67534a389c215959e6e72451dfc53e9e922b2e58ae18d26e3403c26610b36f7", @site="http://127.0.0.1:8080", @options={:authorize_url=>"/oauth/authorize", :token_url=>"/oauth/token", :token_method=>:post, :connection_opts=>{}, :connection_build=>nil, :max_redirects=>5, :raise_errors=>true}>
Get the URL
client.auth_code.authorize_url(redirect_uri: callback)
Where callback is your callback URL - it must match.
The output will look like this:
=> "https://auth.ctapp.io/oauth/authorize?client_id=f52d8b42e20c1d2808468f5a90f3a838316876aaf1db9efa320d42a65e853a49&redirect_uri=http%3A%2F%2Fmy.great.app&response_type=code"
Paste this into your browser. Login as before and confirm the authorisation.
Exchanging the Code
You should be redirected back to your site. Grab the code from the URL.
token = client.auth_code.get_token(code, :redirect_uri => callback)
That should return an object. To get the access token, just use:
token.token
=> 66d3af95e474eb7eba7111e9644247dab60f2fe8f18d53bc968caaf1110e9595
And there you go!
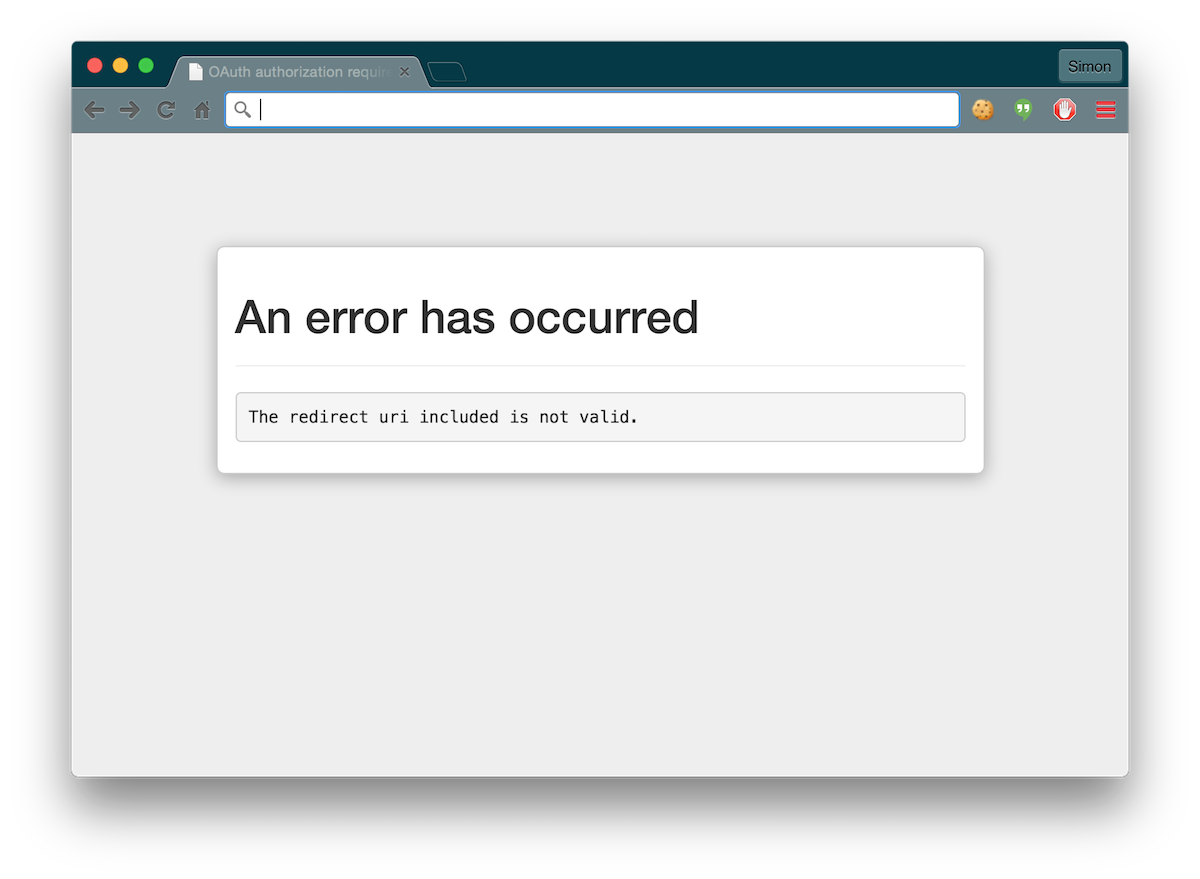
Common Problems
The redirect uri included is not valid.
If you’re using curl to test, please make sure your redirect URL is properly encoded. For example, the request should look like this:
https://auth.ctapp.io/oauth/authorize?client_id=18273618253765123&redirect_uri=https%3A%2F%2Fwww.great-site.com&response_type=code
You should also ensure your redirect url matches the callback url you’ve set in your application settings. Make sure there’s no trailing slashes etc.
Read the API docs
Don’t forget, the API docs are here:
http://docs.polkaspots.apiary.io/#
CT WiFi is a cloud based WiFi management platform for businesses. The firmware gives consumer-grade WiFi access points enterprise-like capabilities.Or you can utlise the captive portal solution with your existing infrastructure. Create a free account and check it here ct-networks.io