Installing firmware on a UniFi access point
Jul 31, 2015
This doc is outdated. Please view our new documents here:
docs.ct-networks.io
Option One - TFTP
There are two ways of installing the firmware on a UniFi access point. This is option one and involves physically resetting the unit. If you don’t have the access points in front of you use option two.
You can install the PolkaSpots firmware on the Ubiquiti UniFi Pro, Ubiquiti UniFi UAP, Ubiquiti UniFi UAP LongRange and Ubiquiti UniFi Outdoor. If you have bought your box from PolkaSpots you don’t need to install the firmware - we’ve already done this for you.
You will need:
- A computer with ethernet ports
- A UniFi access point
- 2 x Ethernet cables
- Access to the terminal on your PC
- A download of the PolkaSpots firmware
Let’s get flashing…
1 - Connect your access point to your PC. Connect one end of the Ethernet to the LAN port on the PoE adapter and the other end to the Ethernet port on your computer.
2 - Plug the second Ethernet cable into the other port POE adapter. The other end of the cable will plug into your UniFi access point.
3 - You will now need to put your AP into recovery mode. As you connect the Ethernet cable to your access point to power it up, press and hold the restart button using a sharp point (e.g. a paperclip) until the lights on the box cycle between the following colours:
Unifi UAP - Green > Orange > Off
Unifi Outdoor - Green > Orange > Off
Unifi Pro - Blue > White > Off
Unifi Outdoor+ - Blue > White > Off
4.1 - Windows TFTP instructions (MAC users, further down to 4.2):
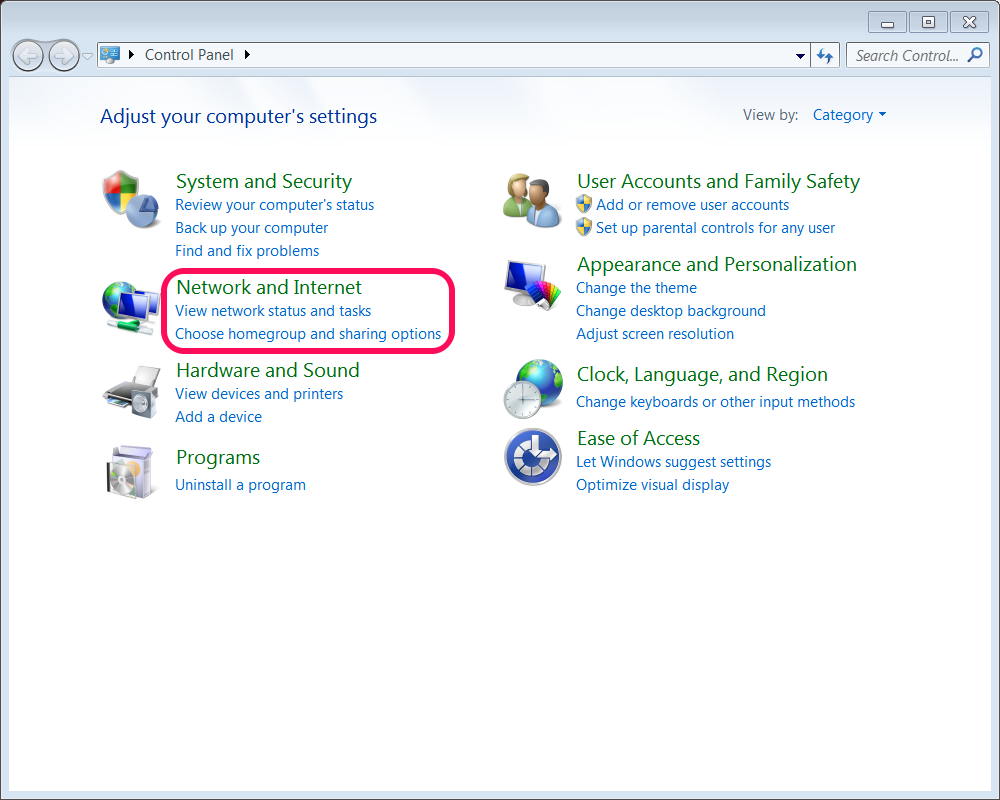
a. Go to your Windows Control Panel and Click on Network and Internet (Names may vary depending on Windows Version)
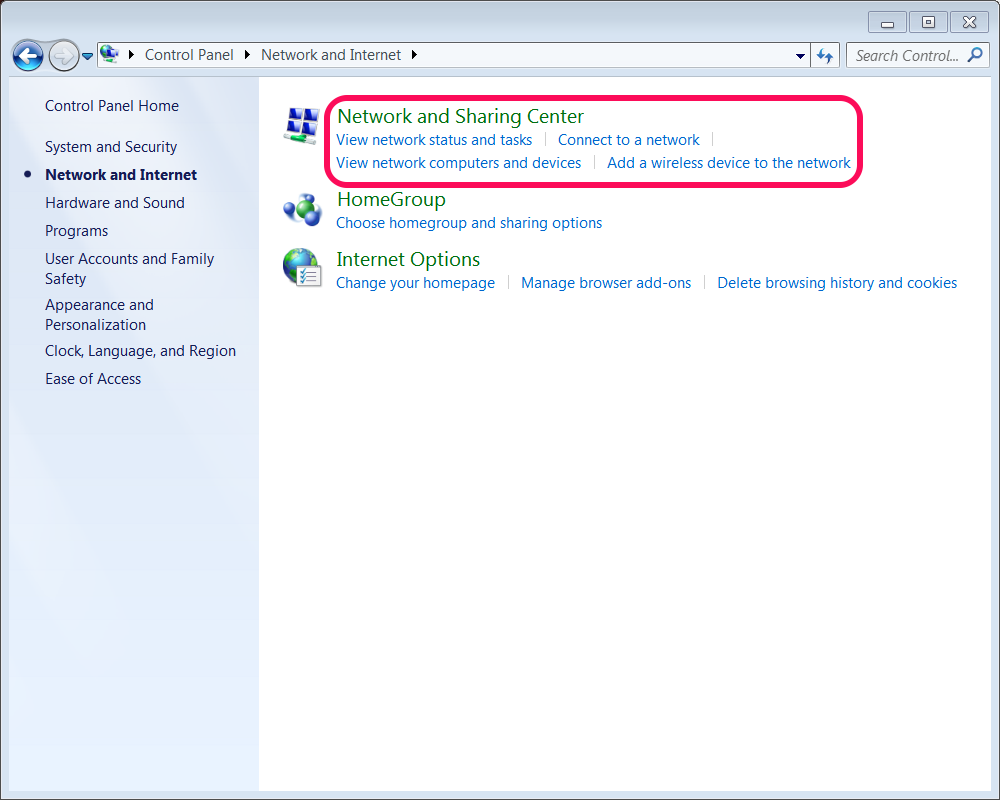
b. Click on Network and Sharing Centre (Names may vary depending on Windows Version)
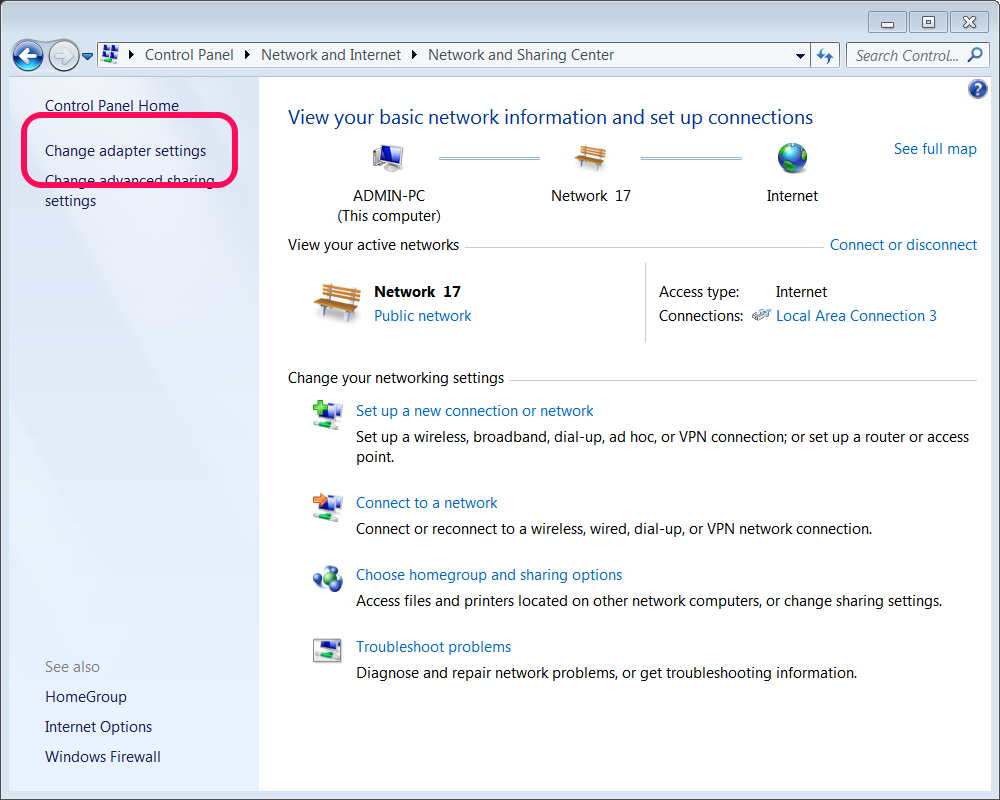
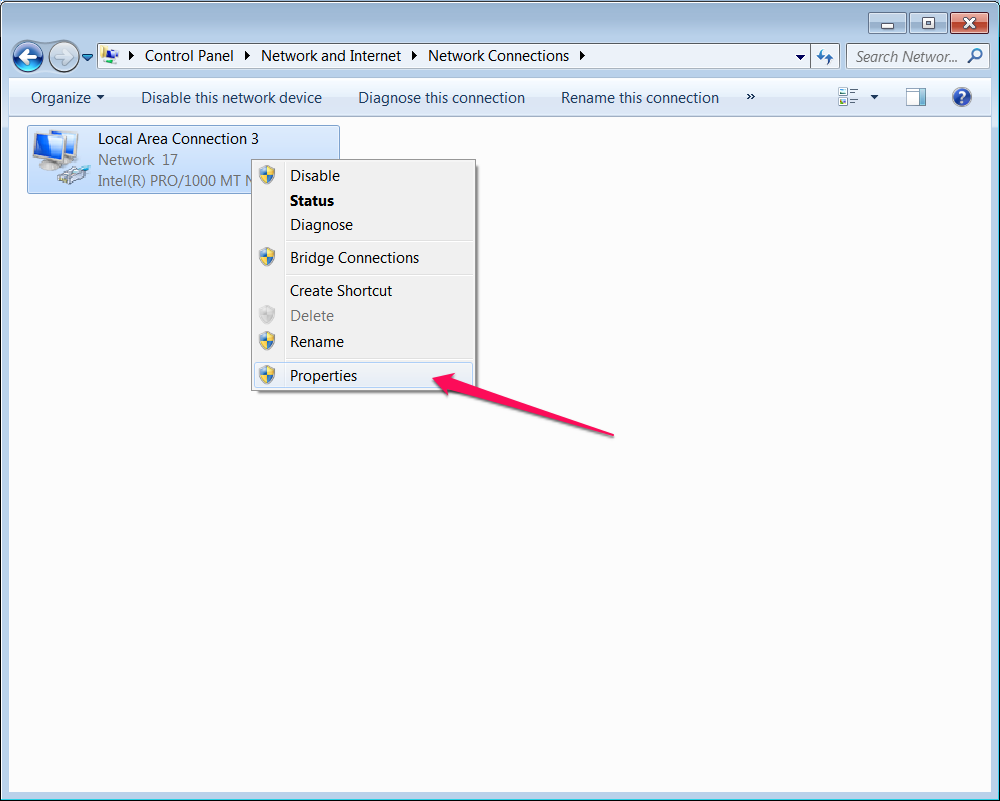
c. Click on Change Adapter Settings
d. Right click on your Ethernet adapter and select properties
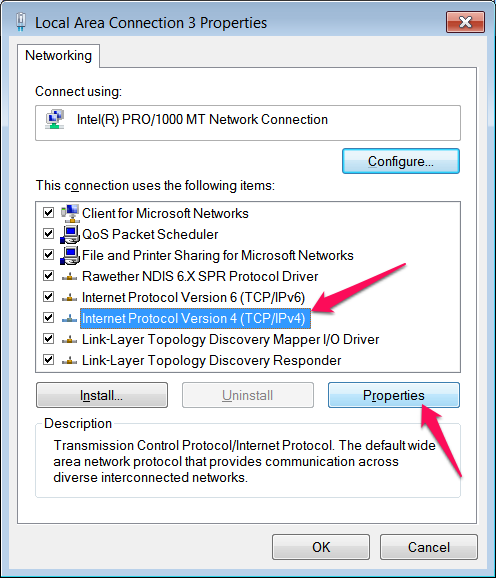
e. Select Internet Protocol Version 4 (TCP/IPv4) and select Properties
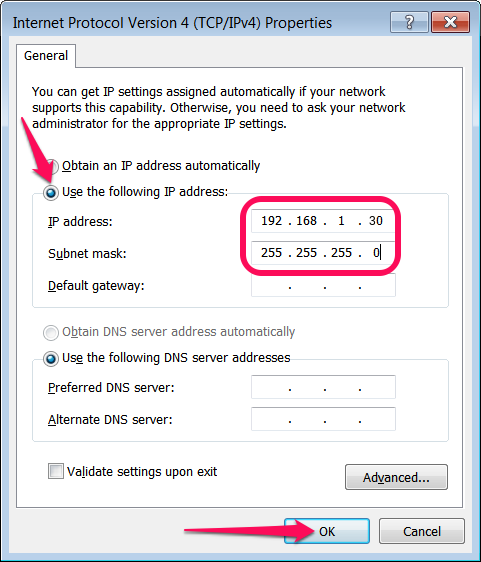
f. Select Use the following IP addresses, input the IP and Subnet and click OK
g. Download TFTP2.exe from here and run it. In the Server field add 192.168.1.20 (this is the IP of the Ubiquiti device in failsafe mode)
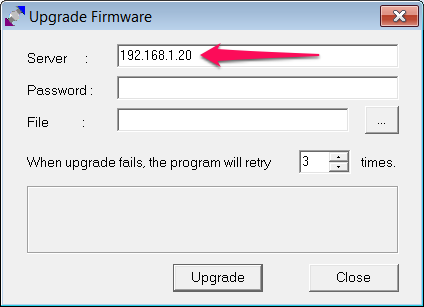
h. In the File row, click on the 3 dots button and select the firmware downloaded from CT WiFi. Then Click Upgrade.
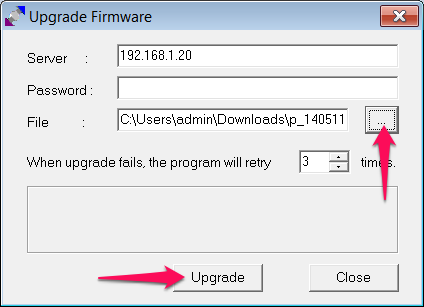
If everything is set up correctly and the box is in failsafe mode, the status bar should get to full.
4.2 - MAC TFTP instructions:
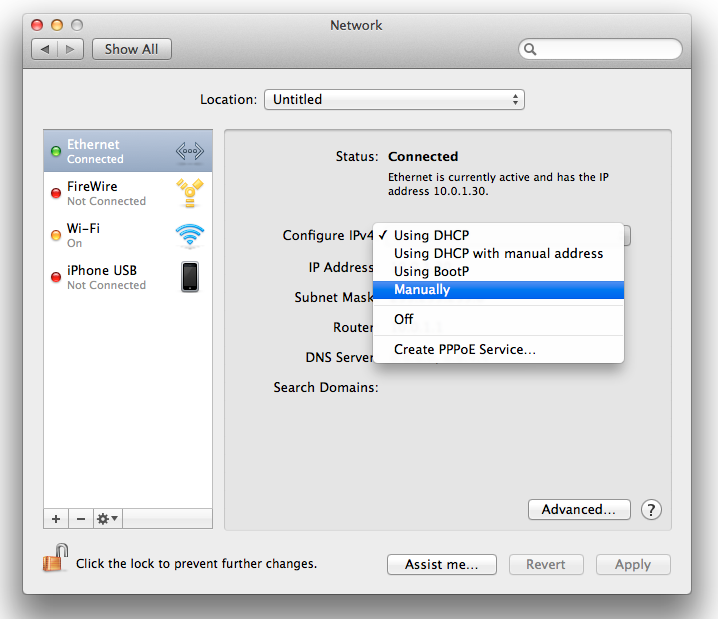
a. On your computer, set your IP network settings to ‘manual’.
On a Apple computer go to System Preferences> Networks> select Ethernet on the left and on the setting for IPV4 select ‘Manually’ from the drop down menu. You will need to unlock the padlock on the bottom left to do this.
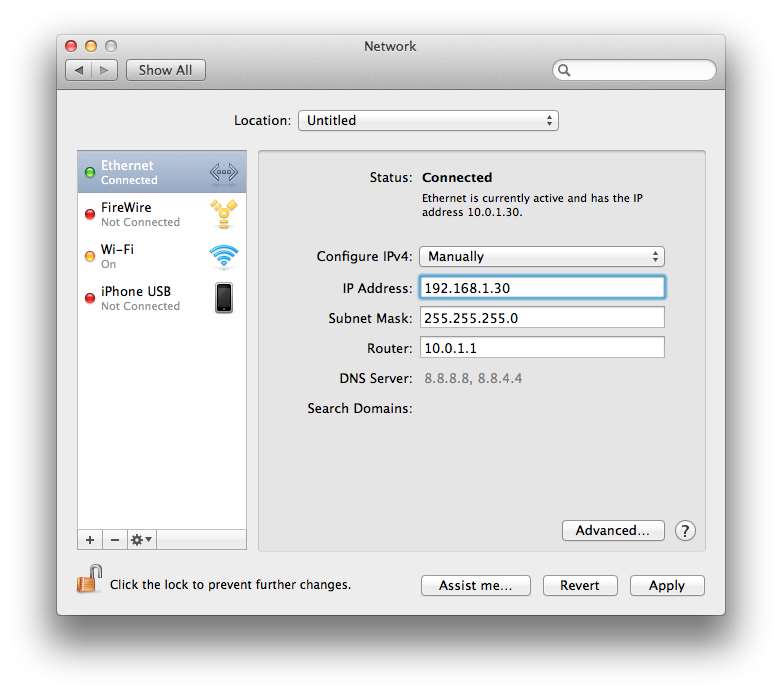
b. Now change your IP address to 192.168.1.30, and click Apply once the changes have been made.
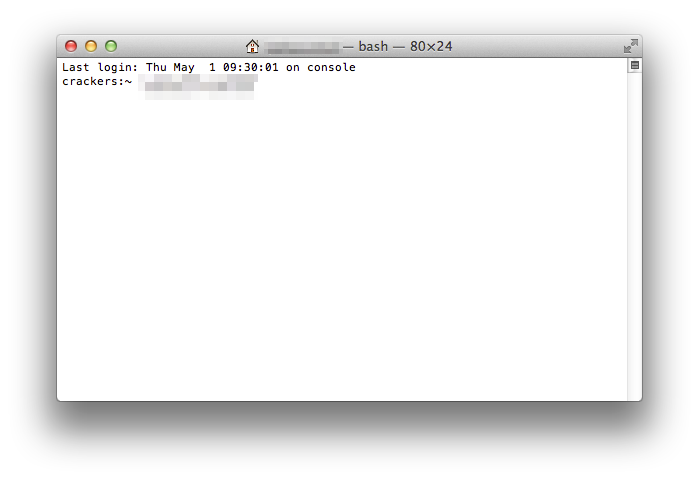
c. Now open the terminal on your computer. If you’re using a Windows machine you’ll need to use an application like Putty.
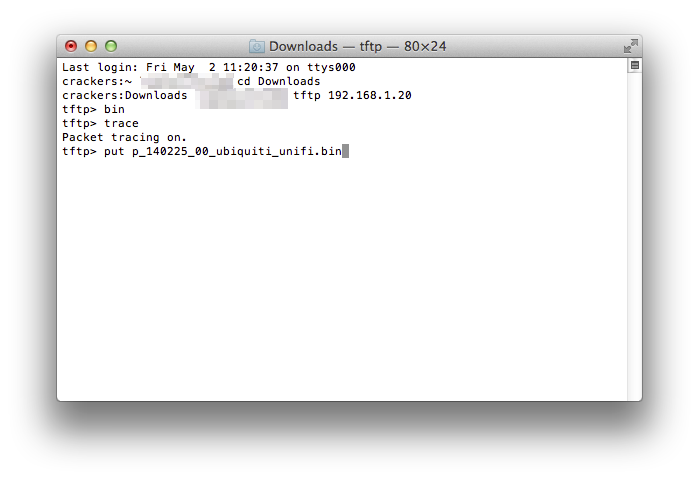
d. Go to the location that you have the firmware saved (default is the Download folder) via the terminal by typing e.g:
cd Downloads
e. Make sure that you file is in there by typing:
ls
You should see the name of your firmware image with a ‘.bin’ at the end
Copy the entire name to your clipboard, including .bin
f. Type in your terminal:
tftp 192.168.1.20
bin
trace
put FIRMWARE-NAME.bin
Replace FIRMWARE-NAME.bin with the name of the file you previously downloaded
5 - Press return. Lines of code should appear rapidly in your terminal.
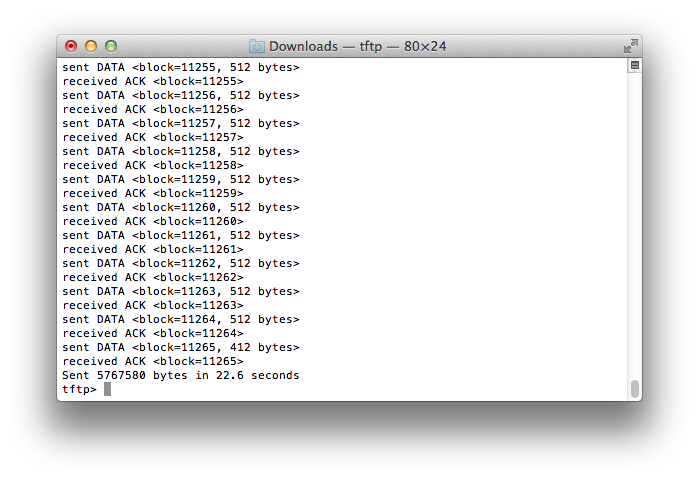
The lights on the box will now flash as the firmware installs and the box updates itself. When the lights stop flashing and turn solid, the install is complete.
You have successfully installed Stinky Panda on your UniFi access point.
Now go ahead and add your box into your dashboard if you havent already.
Option Two - UniFi Controller
Please note: Flashing over SSH may not work with UniFi version v3.2.7 and above
1 - Open the terminal on your computer. If you’re using a Windows machine you’ll need to use an application to do this.
2 - Type in the terminal:
ssh ubnt@ip-address
Sometimes the default user may not be ubnt - it may be admin or whatever you’ve set up on the UniFi controller.
The default password is ubnt (again, you may have changed this).
3 - After logging in to your access point type:
cd /tmp
wget http://FIRMWARE-URL-PROVIDED-BY-POLKASPOTS
To get the firmware URL, follow the normal steps to download the firmware, but rather than left clicking on the final step to download it, right click and copy the URL.
Please ensure that you change the beginning to http:// otherwise you will get certificate errors.
4 - Make sure that you have downloaded the image by typing in the same window:
ls
You should see the name of your firmware - for example “firmware.bin”. Please note, this will be different depending on what firmware version you download.
Please make a note of it, you will need it for the next step.
5 - Now type the following into the terminal:
fwupdate.real -m FIRMWARE-NAME.bin -d
Replace FIRMWARE-NAME.bin with the name of the file you previously downloaded
The installation should now begin. Please do not disconnect your box from electrical supply.
6 - Press return. Lines of code should appear rapidly in your terminal.
The lights on the box will now flash as the firmware installs and the box updates itself. When the lights stop flashing and turn solid, the install is complete.
You have successfully installed the Stinky Panda firmware.
Now go ahead and add your box into your dashboard if you haven’t already.