Setting up a splash page for a Ruckus ZD network
Jul 31, 2015
This doc is outdated. Please view our new documents here:
docs.ct-networks.io
In order to use Ruckus with the CT WiFi logins and radius, you’ll need to make some changes in your Ruckus Zone Director.
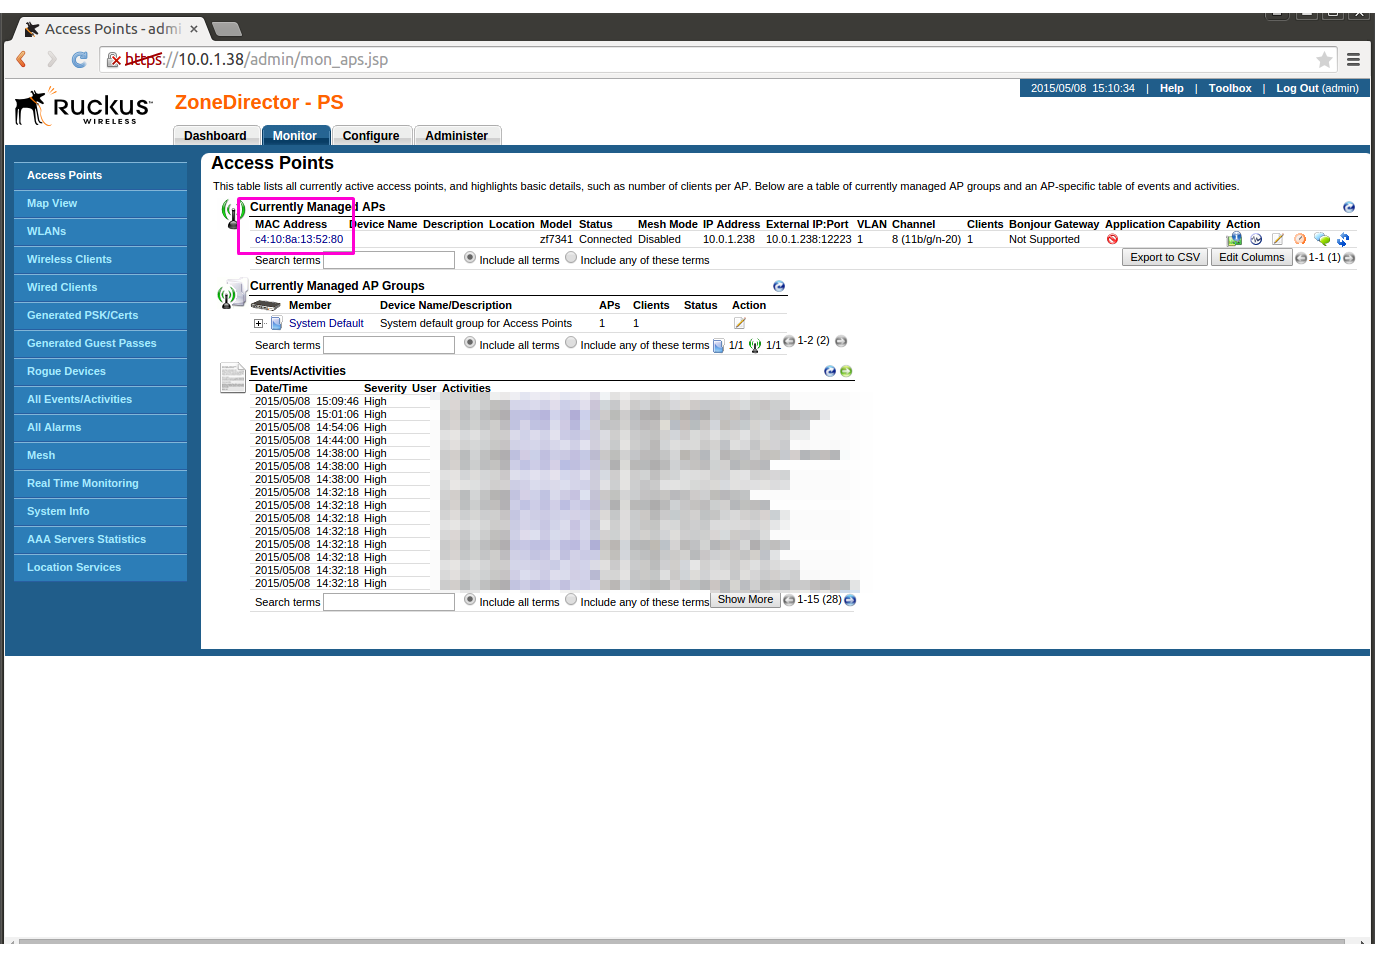
Add your Access Points into CT by adding their MAC addresses.
You can find the MAC addresses under the Monitor tab of the </b>Zone Director</b>. You should add the MAC addresses of all access points that are going to be in use with the splash pages.
When you have added these to CT, go into the settings page of your box, scrolling down for the section labelled PolkaSpots Settings.
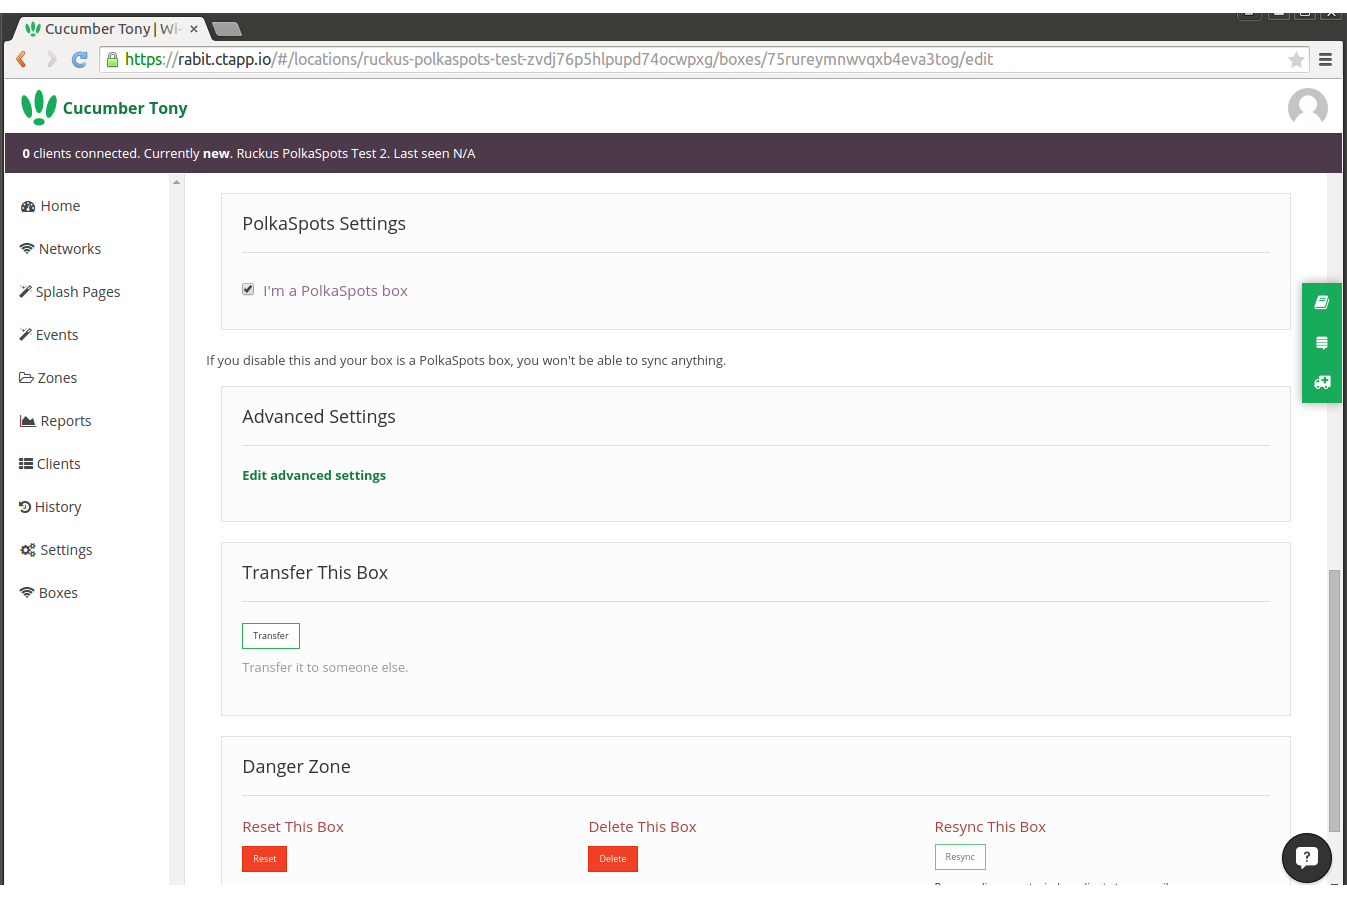
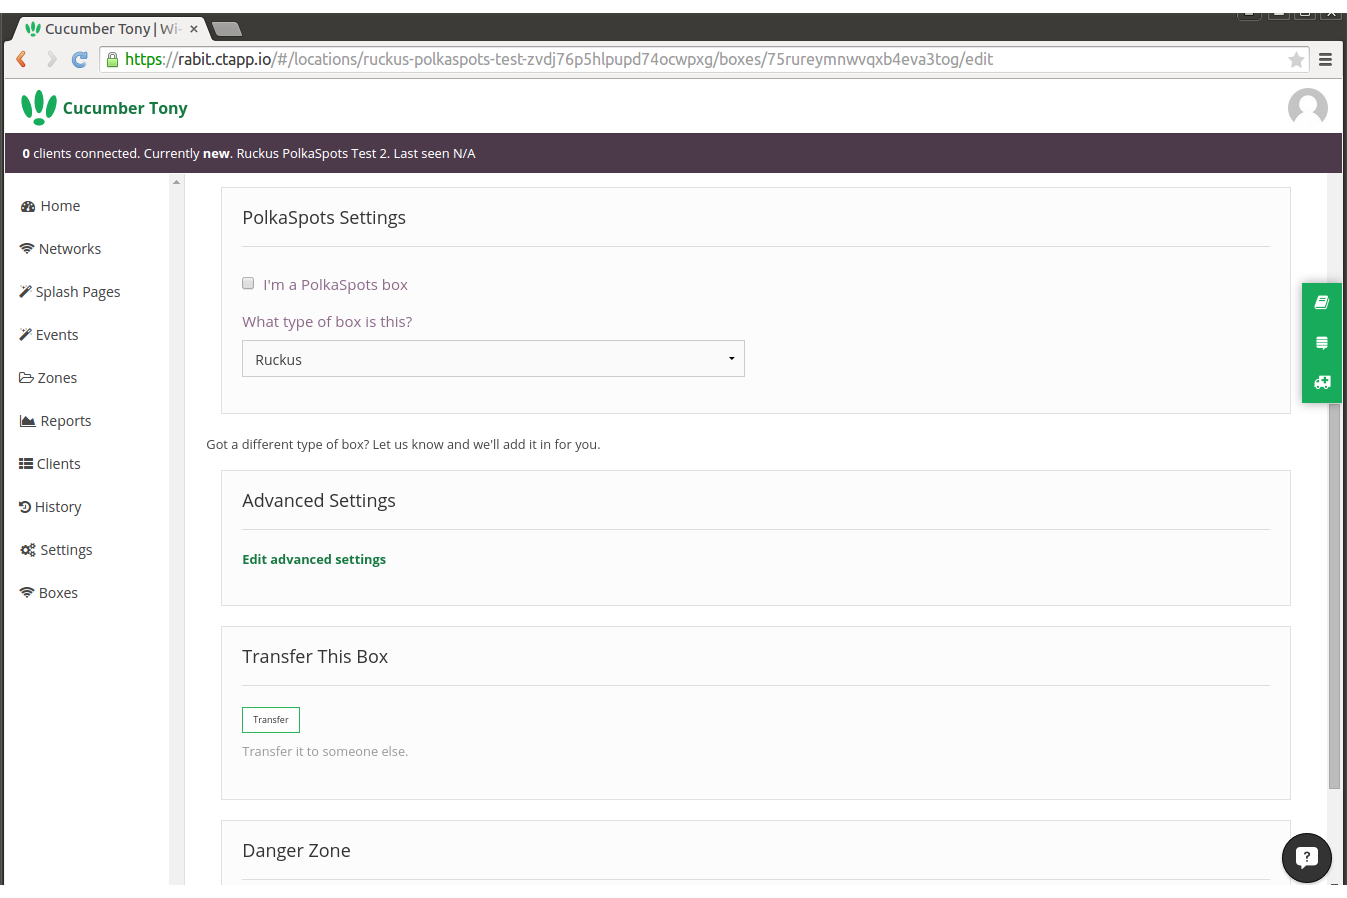
Untick I’m a PolkaSpots Box, and select Ruckus from the droplist then update your changes.
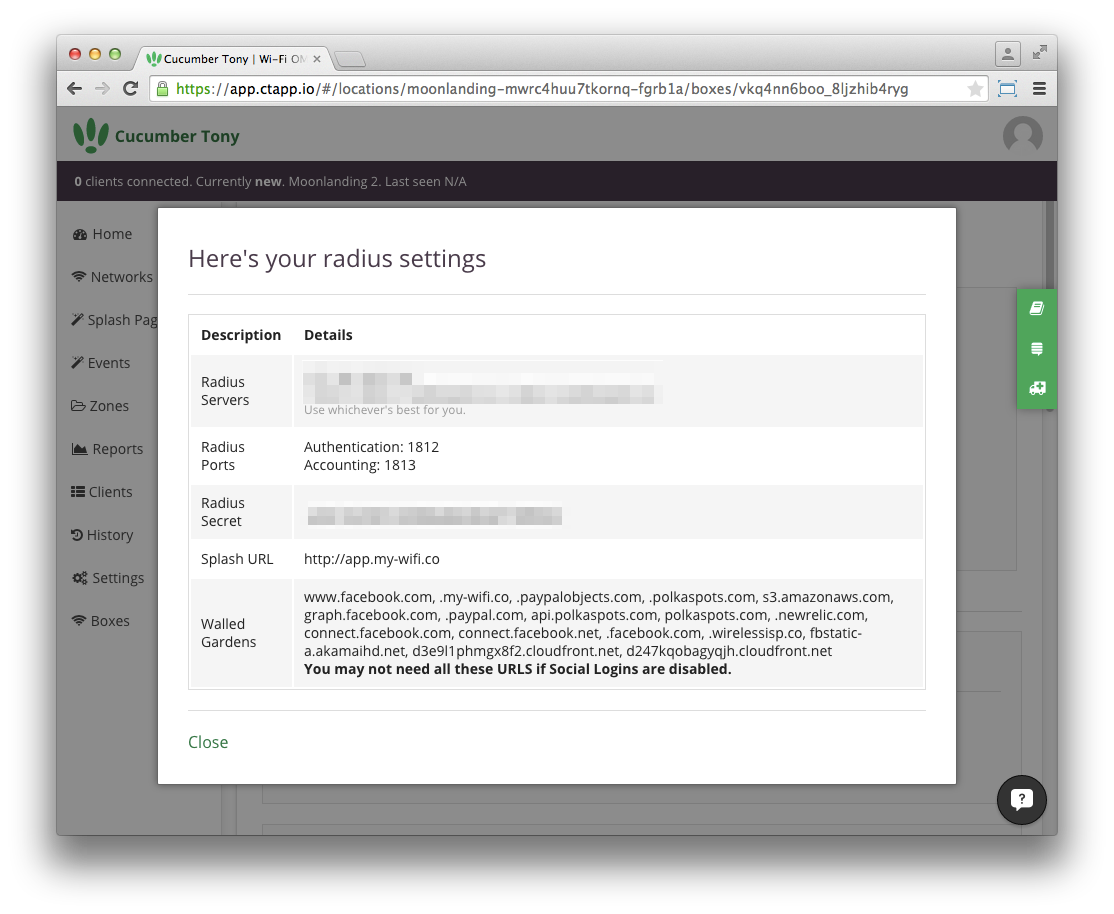
Head back to boxes and click on the box you just set to a non PolkaSpots Box. You should now see a green Radius Settings button.
Clicking this will open a box with details that you will need to refer back to at later stages.
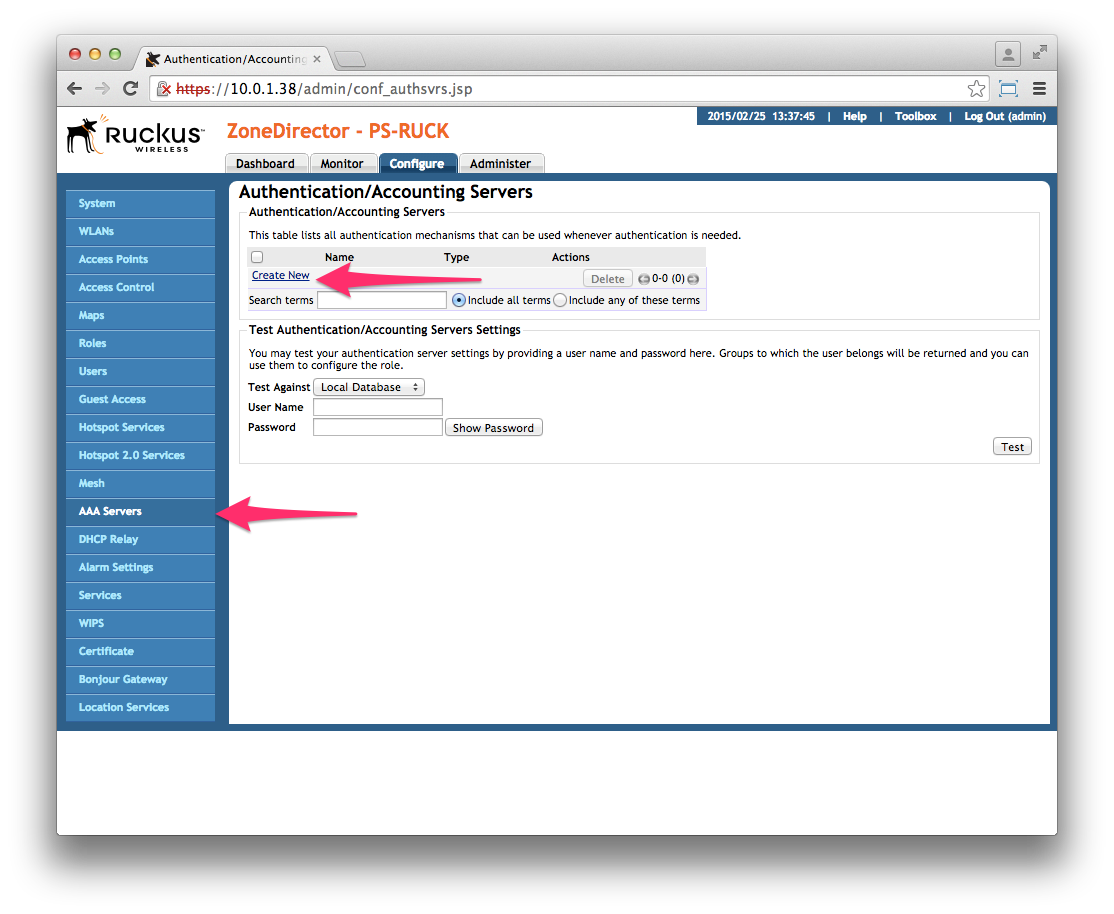
Connect to your Zone Director device and click on the Configure tab, then click AAA Servers on the sidebar, and then click Create New.
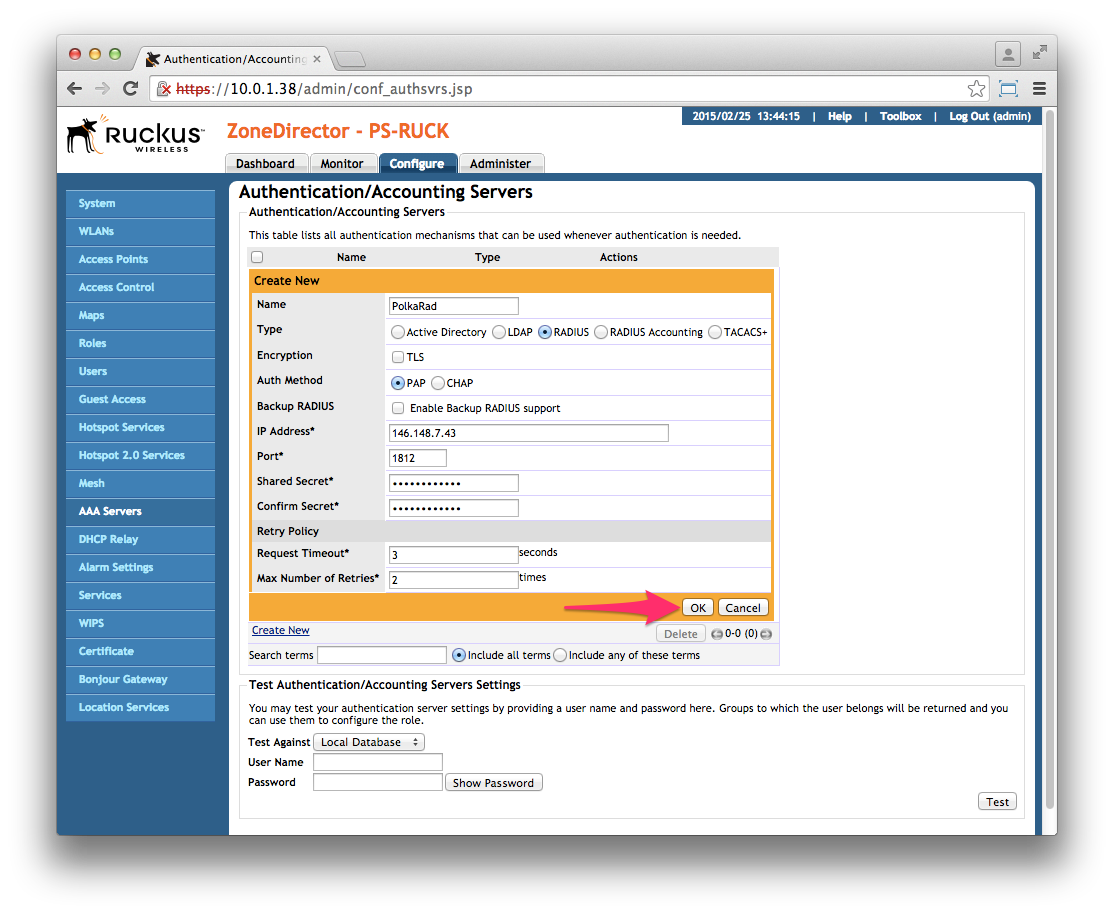
A selection of fields will appear, which will need to be filled in with the following information:
- Name: e.g PolkaRad
- Type: RADIUS
- Auth Method: PAP
- IP Address: (Refer to CT Radius Settings - Radius Servers)
- Port: 1812
- Secret: (Refer to CT Radius Settings - Radius Secret)
- Confirm Secret: (As above)
And then click OK
Complete the same again, creating a new entry, but this time with the following information:
- Name: PolkaAcc
- Type: RADIUS Accounting
- IP Address: (Refer to CT Radius Settings - Radius Server)
- Port: 1813
- Shared Secret: (Refer to CT Radius Settings - Radius Secret)
- Confirm Secret: (As above)
And then save your changes by clicking OK

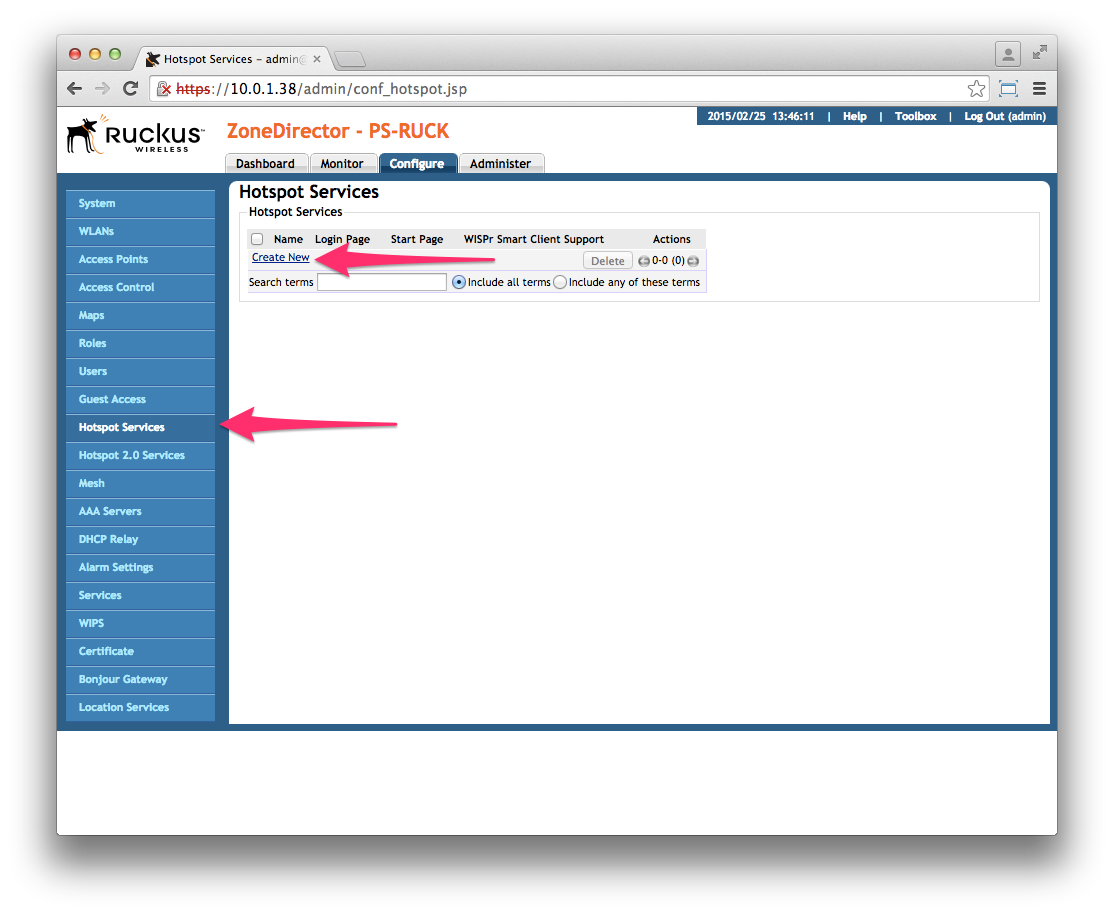
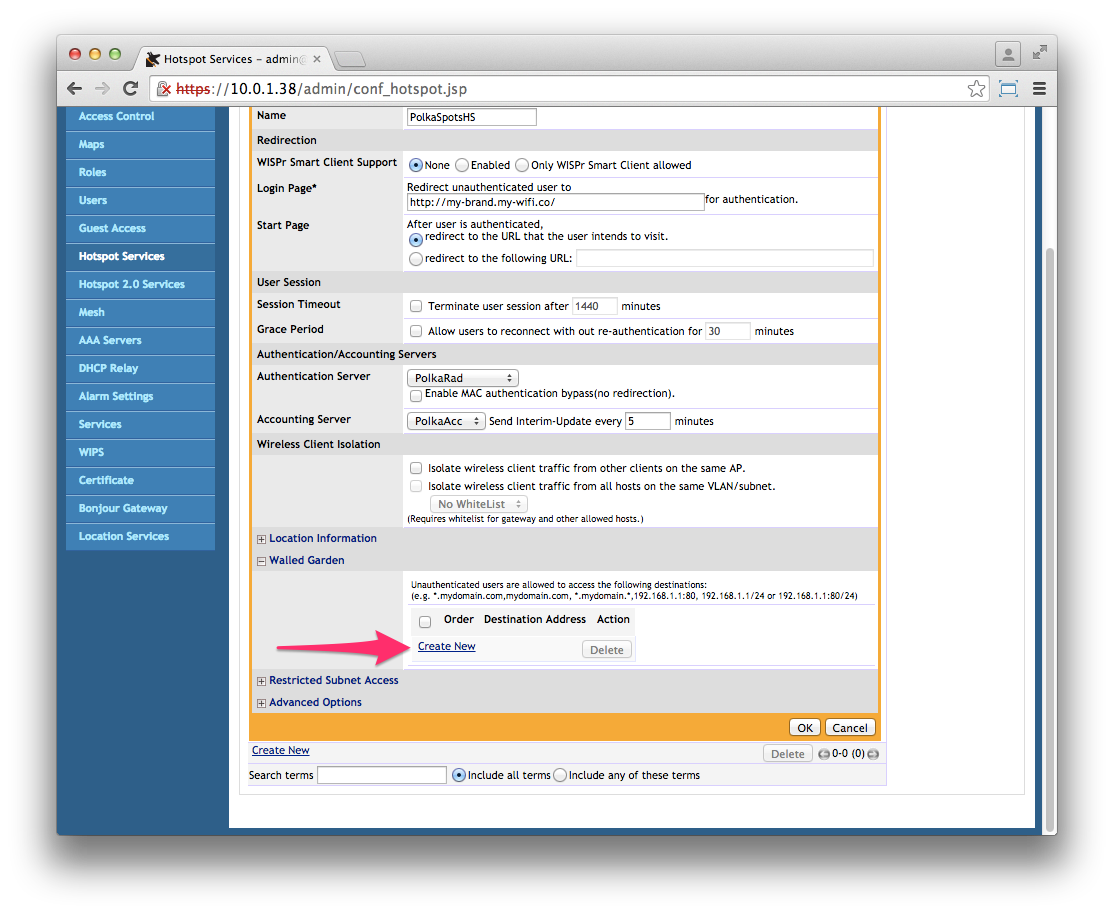
Click Hotspot Services on the sidebar, and then click Create New
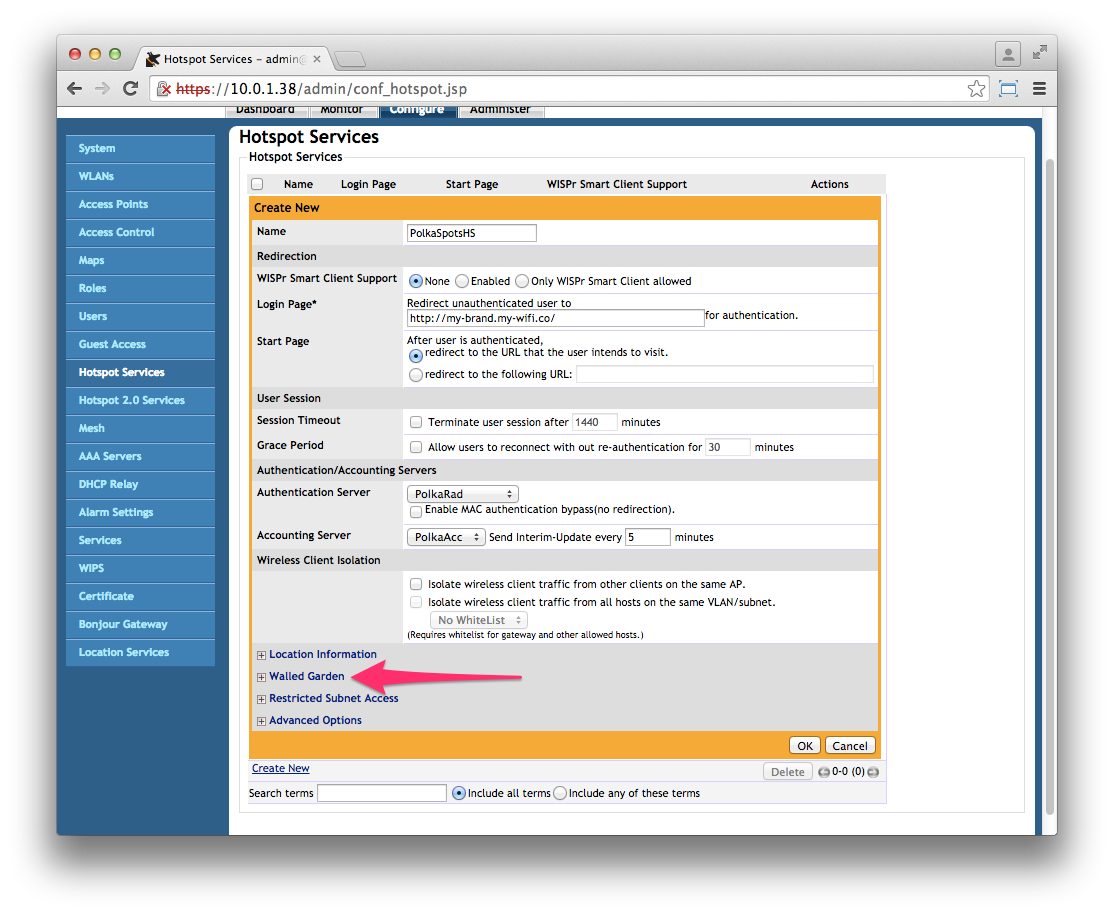
A selection of fields will appear which will need to be filled with the following information:
- Name: e.g PolkaSpotsHS
- Login Page: (Refer to CT Radius Settings - Splash URL)
- Authentication Server: PolkaRad (the RADIUS entry you created in step 3)
- Accounting Server: PolkaAcc (the RADIUS Accounting entry you created in step 4)
Then click on Walled Gardens.
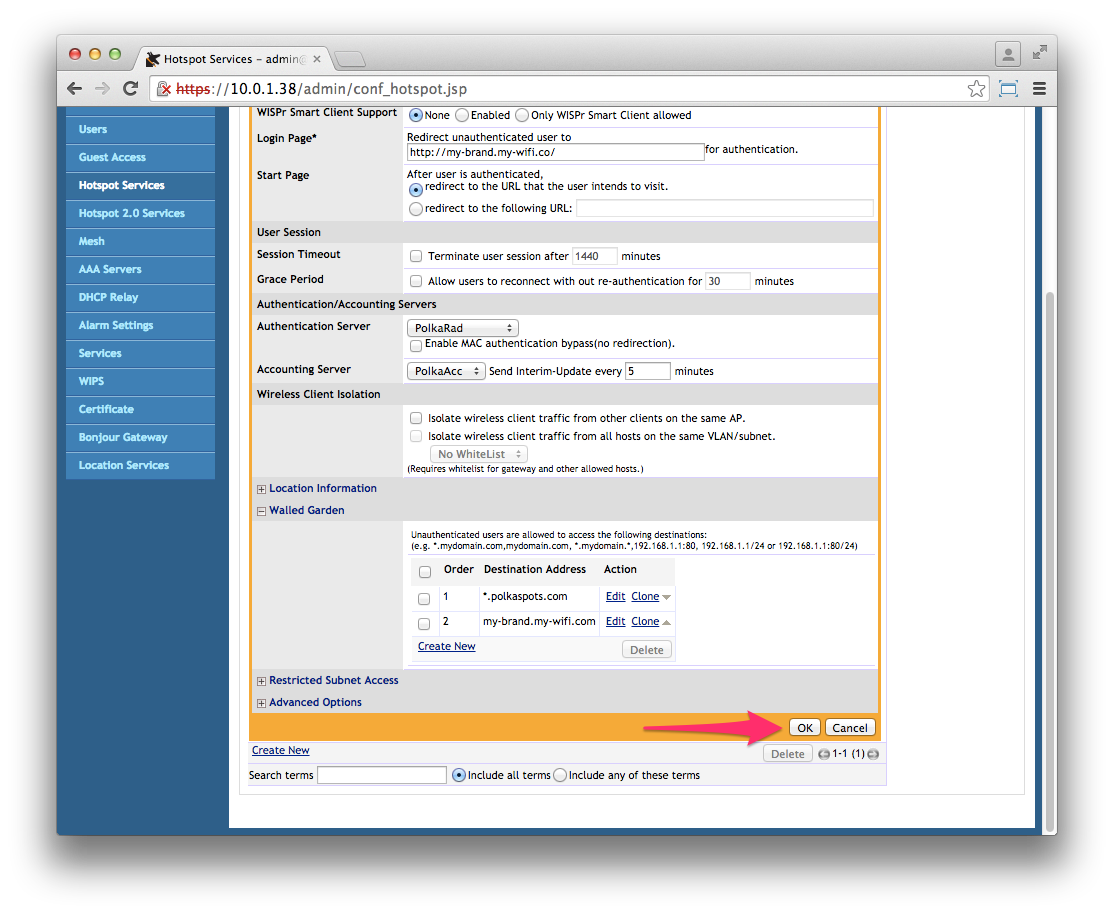
You will now see the Walled Garden entries. Click Create New to add the entries needed
add the following to the Walled garden:
You can find the most up to date list of Walled Gardens here.
And then save the changes by clicking OK
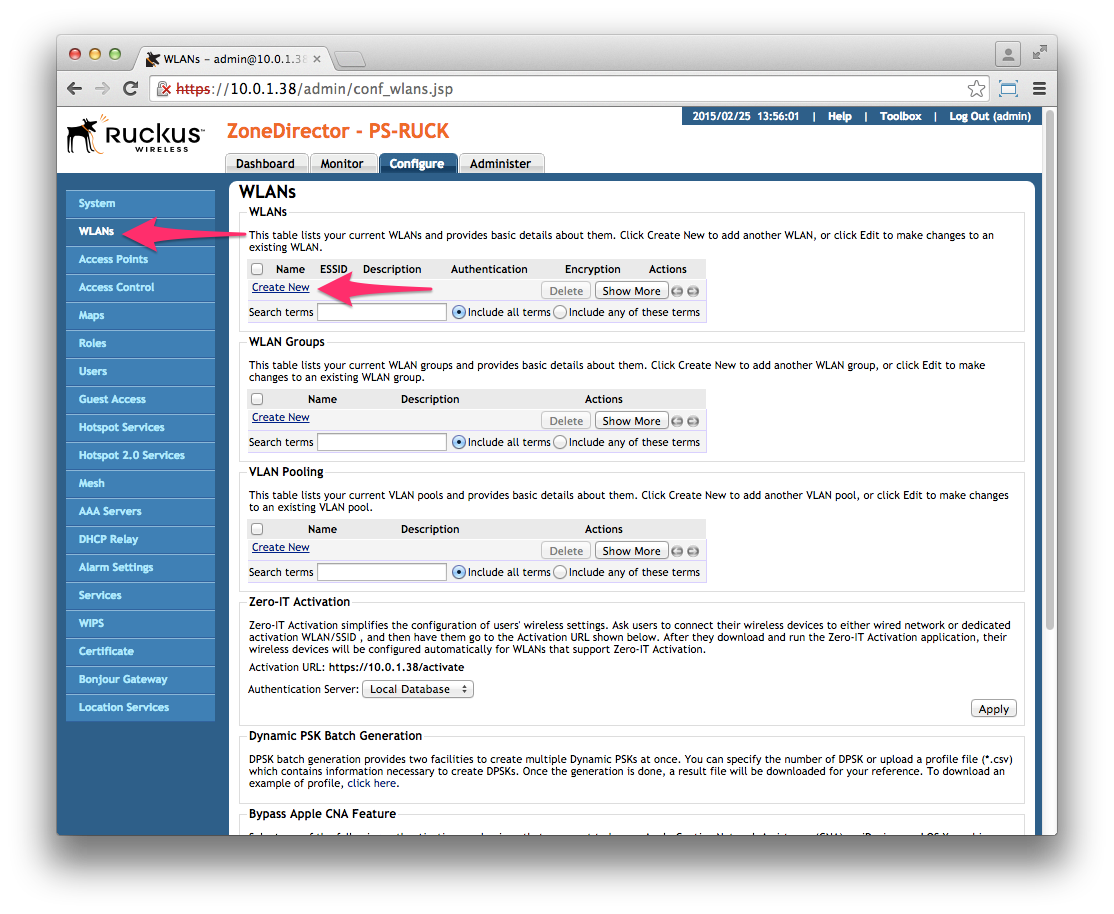
Click WLANs on the sidebar, and under WLANs click Create New
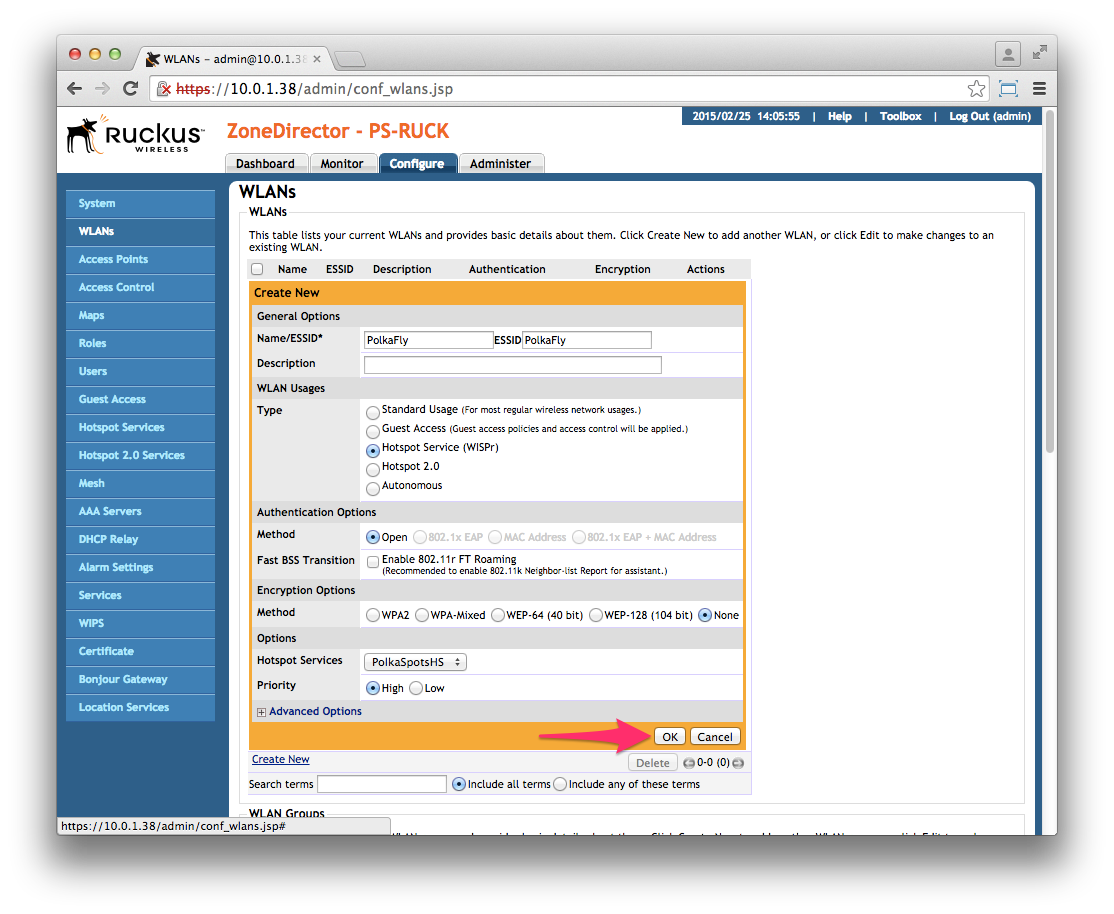
A selection of fields will now have appeared which will need to be filled with the following information:
- Name/ESSID: e.g PolkaFly
- ESSID: e.g PolkaFly
- Type: Hotspot Service (WISPr)
- Hotspot Services: PolkaSpotsHS (the Hotspot Service created in step 6)
Then save your changes by clicking OK
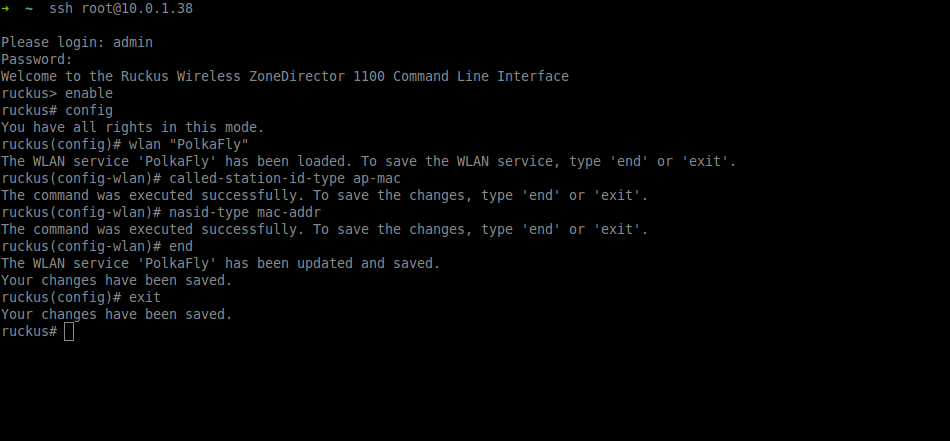
Because there are no options to change these settings in the GUI, you will need to SSH in to the Ruckus ZoneDirector, which is done by entering the following:
ssh root@DEVICE_IP
Replace DEVICE_IP with the IP of your zone director, and login with your username and password that you used to log into the ZoneDirector.
Once you have established an SSH connection, enter the commands below, one by one:
enable
config
wlan "PolkaFly" (name of essid in step 10)
called-station-id-type ap-mac
nasid-type mac-addr
end
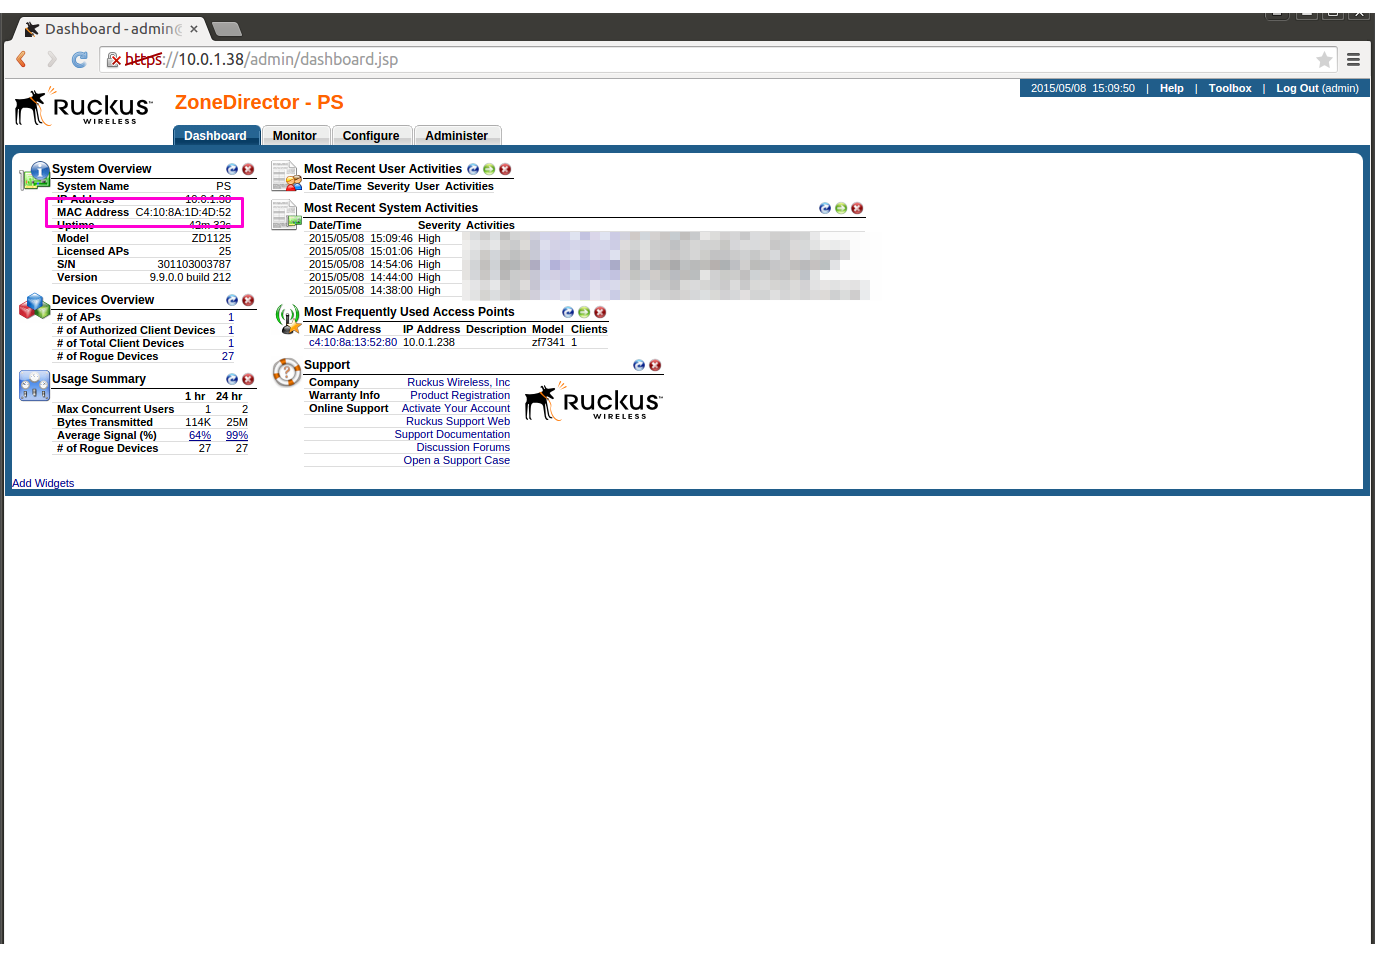
Get MAC address of zonedirector from the zonedirector dashboard
Change the box from a PolkaSpots box to a Ruckus box
This will update the icon for you and activate the radius settings.
Head to your boxes in CT WiFi and go into their settings.
Then scroll down under Advanced Settings, and click on edit advanced settings.
In the NAS field, enter the MAC address of the ZoneDirector that you collected earlier.
It is important the MAC is separated with hyphens because that’s what Ruckus send us. e.g 11-22-33-44-55-66</b>
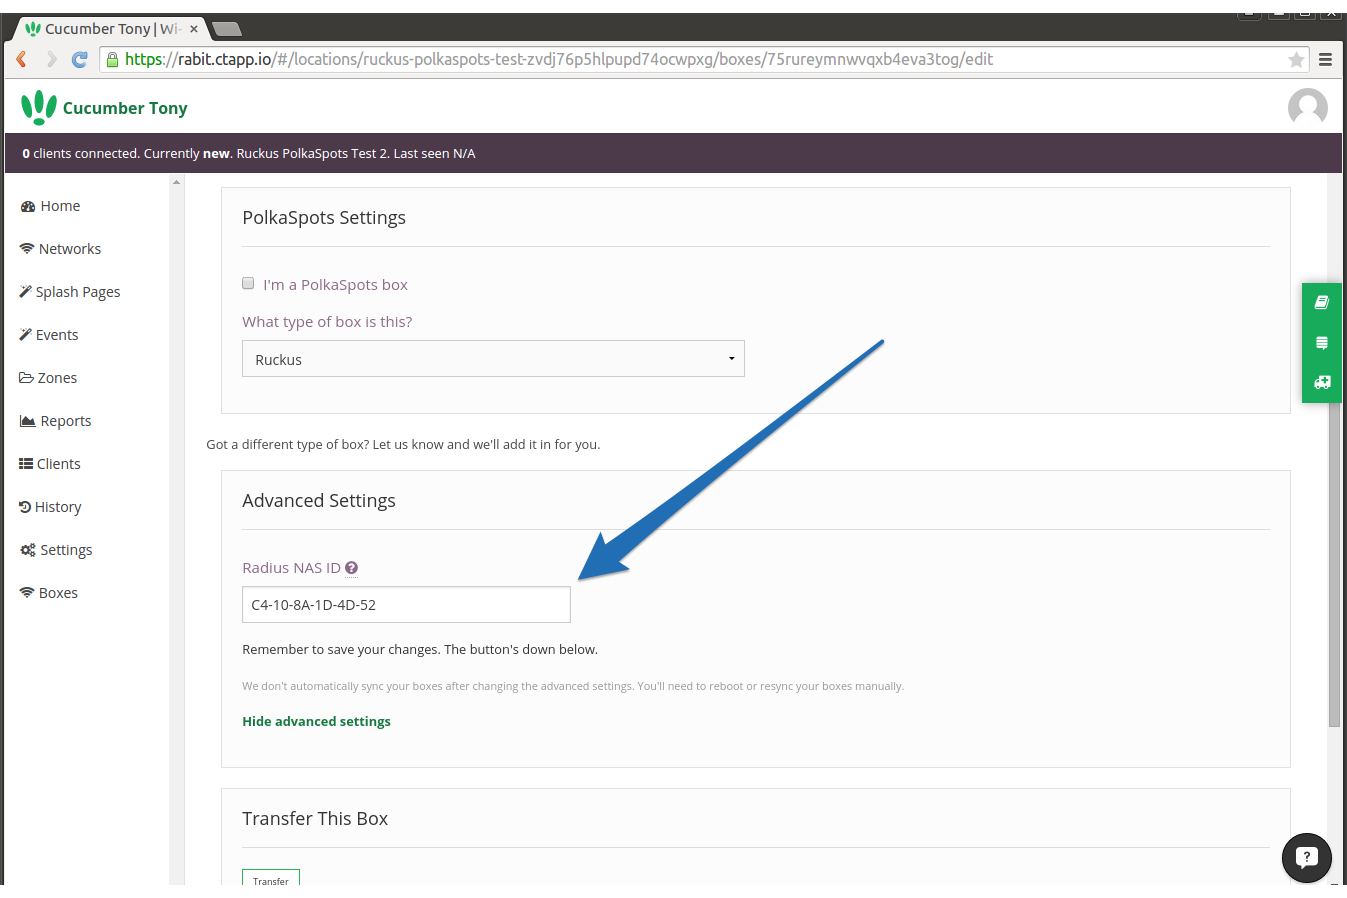
Then scroll to the bottom of the page and click update.
Do this for all of your Ruckus Access Points.
##Troubleshooting & Questions ###Can’t login - Stuck in a Loop <hr> You can see the login page but when you login, it sends you back to the login page. Here’s what you can do:
- • Swap the access type to clickthrough to rule out password issues
- • Ensure your radius secrets match the ones in your zone director radius settings
- • Ensure your Nas-Id from your CT Wi-Fi account matches the one in your zone director
- • Make sure that your SSID entered through SSH matches the one you entered into your zone director
If you do connect with an incorrect secret/nas_id then our servers will lock you out as a security measure.
If this happens to you, just drop us a message.
###Can I use multiple splash pages? <hr> Yes you can, and there are three ways to do it in CT.
1. Tags
We can intercept the tags sent in the url and present a page depending on them. This is currently in alpha.
2. Hard coded url
You can hardcode the specific splash pages to your Splash Page URLs.
To do this you will need your splash page’s unique ID from CT. You can find this in Location > Settings > Scroll down to Address Details > Unique ID
Then, add this to the Splash URL you entered in the ZD:
http://app.my-wifi.co/long-id-of-the-splash
3. CT Zones
This is the quickest of the options, simply create two zones in CT and add an SSID to each zone (which will have the splash page you want assosciated with it).
Then assign your boxes to the right zone.
This way you don’t have to change anything in the ZD.
CT WiFi is a cloud based WiFi management platform for businesses. The firmware gives consumer-grade WiFi access points enterprise-like capabilities.Or you can utlise the captive portal solution with your existing infrastructure. Create a free account and check it here ct-networks.io