Setting up a splash page for a MikroTik network
Sep 24, 2015
This doc is outdated. Please view our new documents here:
docs.ct-networks.io
Note: you may lose internet connectivity during some stages of this process if the MikroTik is your only uplink. It will return once you have finished the process.
1. Download the resources needed:
Winbox:
Windows
Mac
HTML File:
microtik.zip
2. Connect to your MikroTik device via ethernet cable
3. Launch winbox and find your device in the neighbours tab and double click the MAC address, then click connect

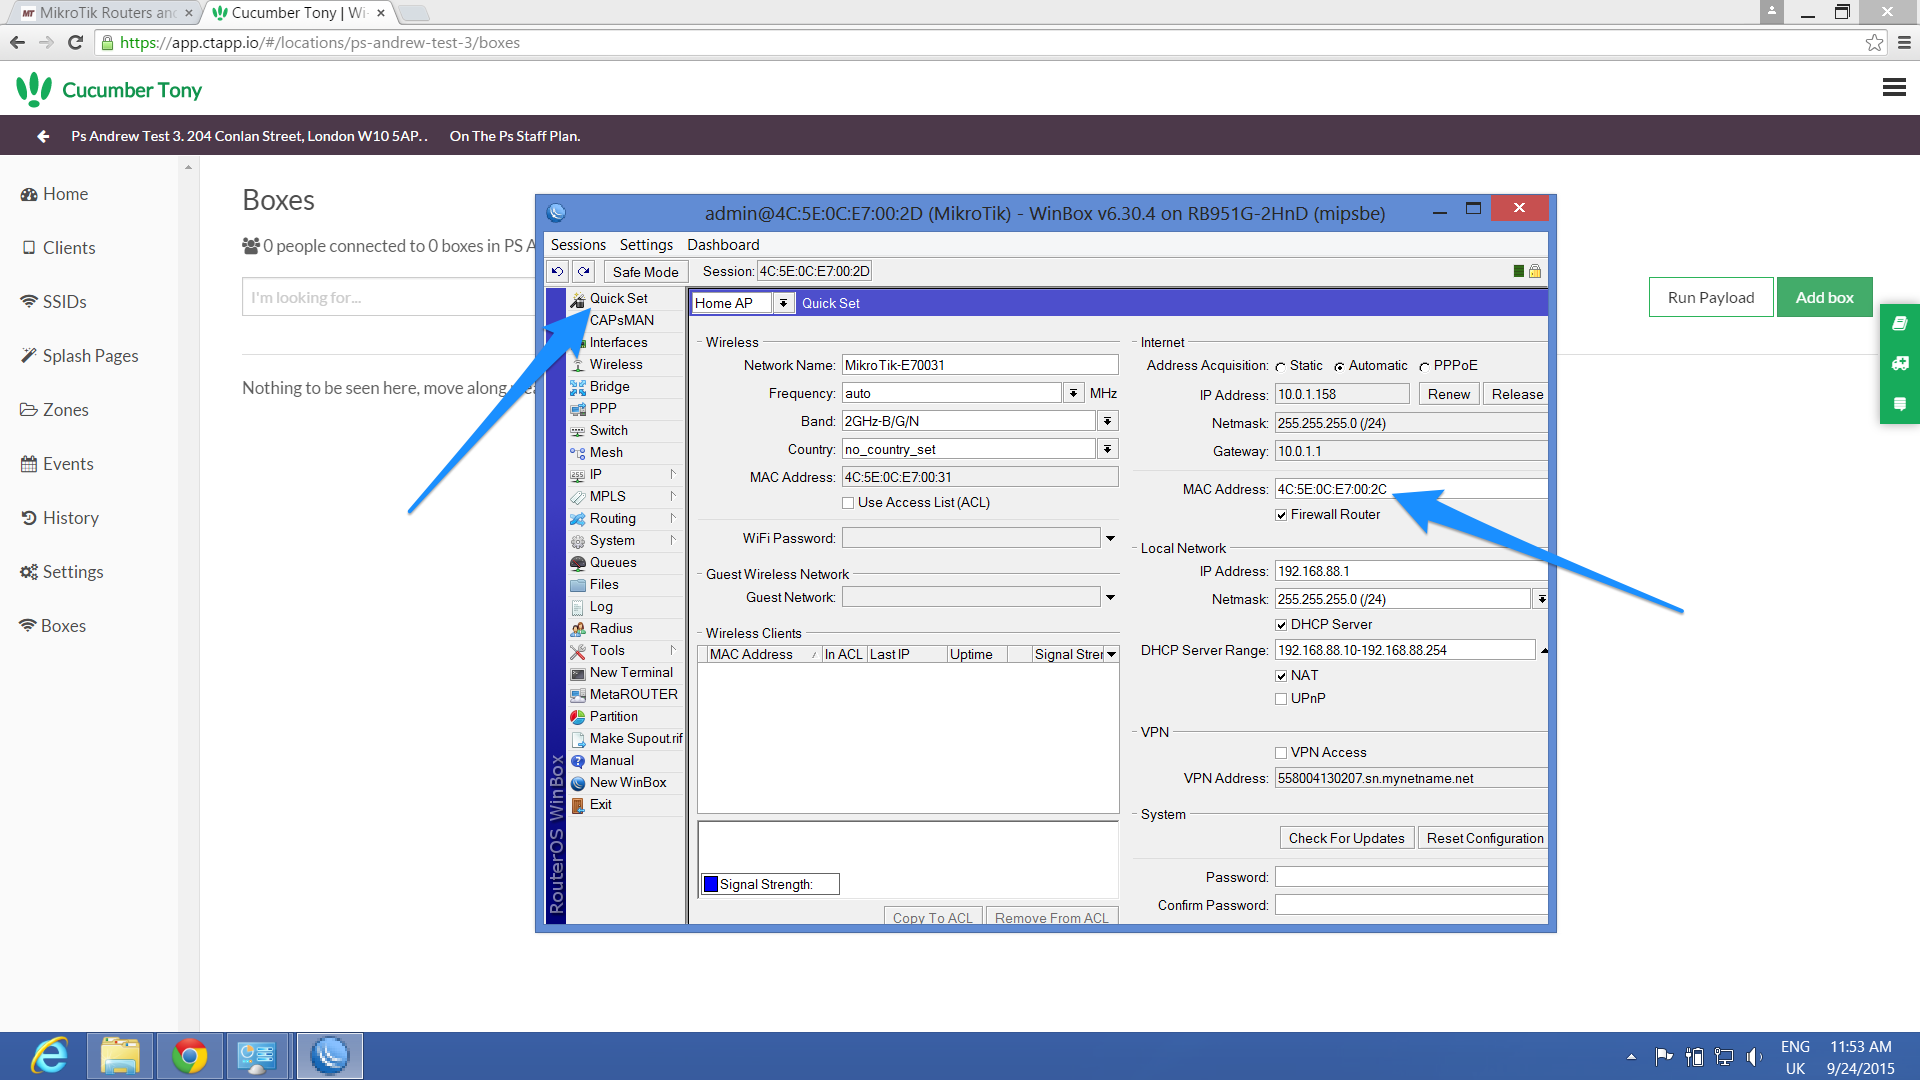
4. Go to quick setup on the left sidebar and retrieve the MAC address under internet
5. Then using a web browser, go into your CT WiFi dashboard and add the box in using the MAC address you retrieved
6. Click on the radius settings button on your box page in CT and keep note of the information

7. Locate the .zip file you downloaded in Step 1, and then extract it to retrieve the microtik-login.html file
Rename the file to login.html
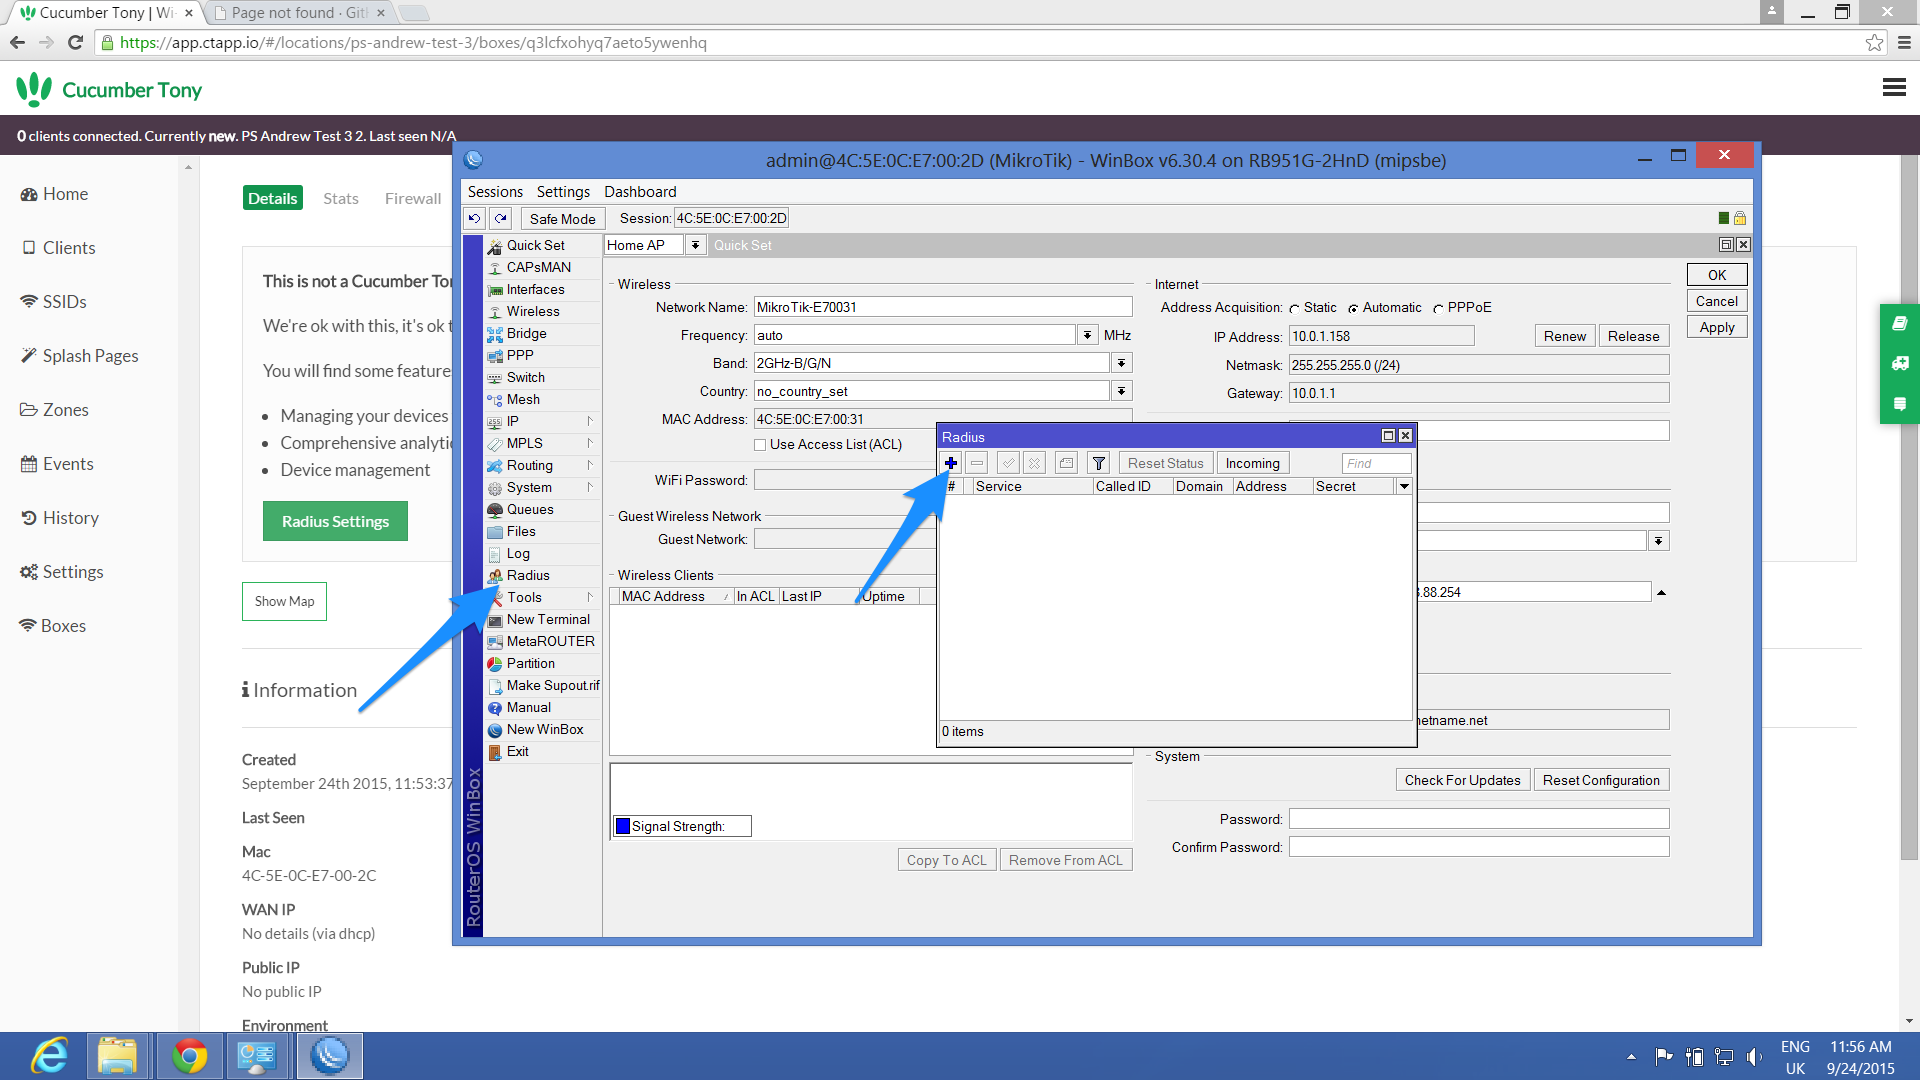
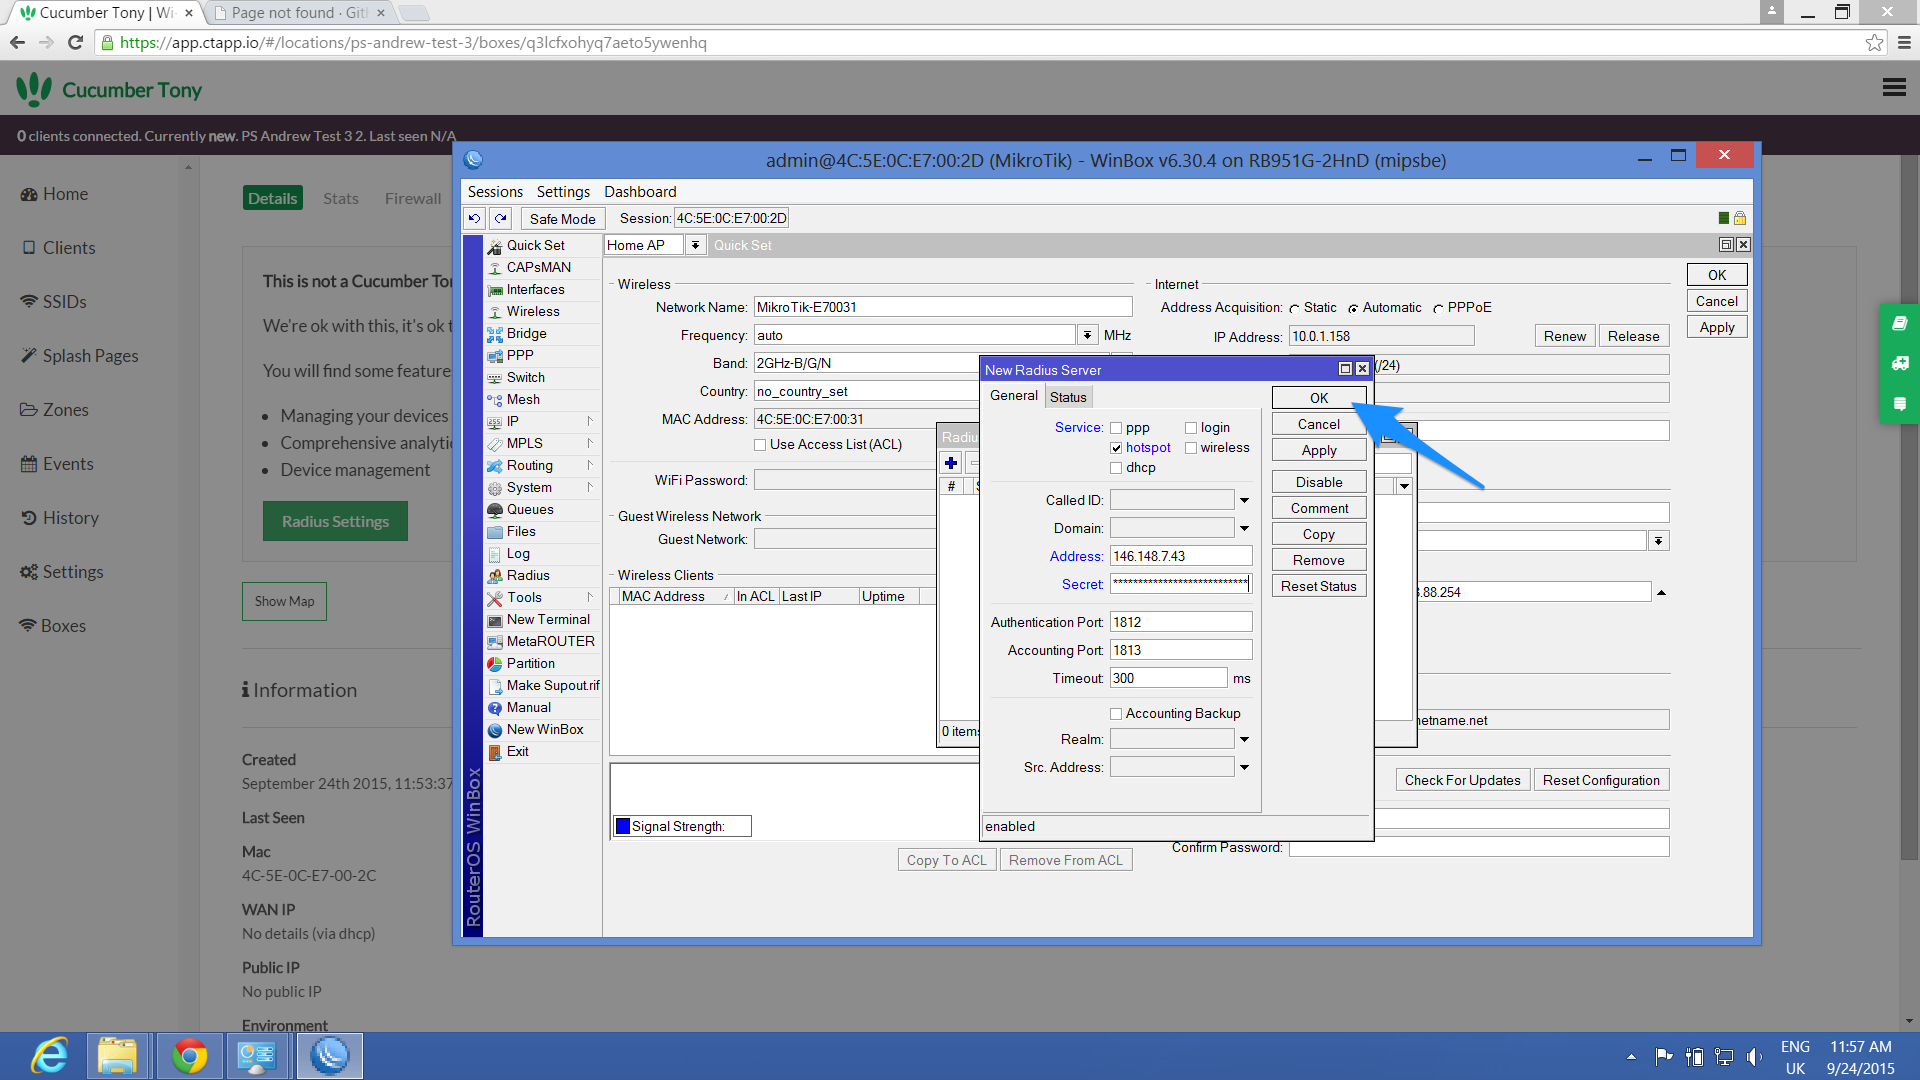
8. In winbox, go to the radius section on the left sidebar, and add a new radius setting using the radius info you retrieved earlier from CT WiFi in step 6
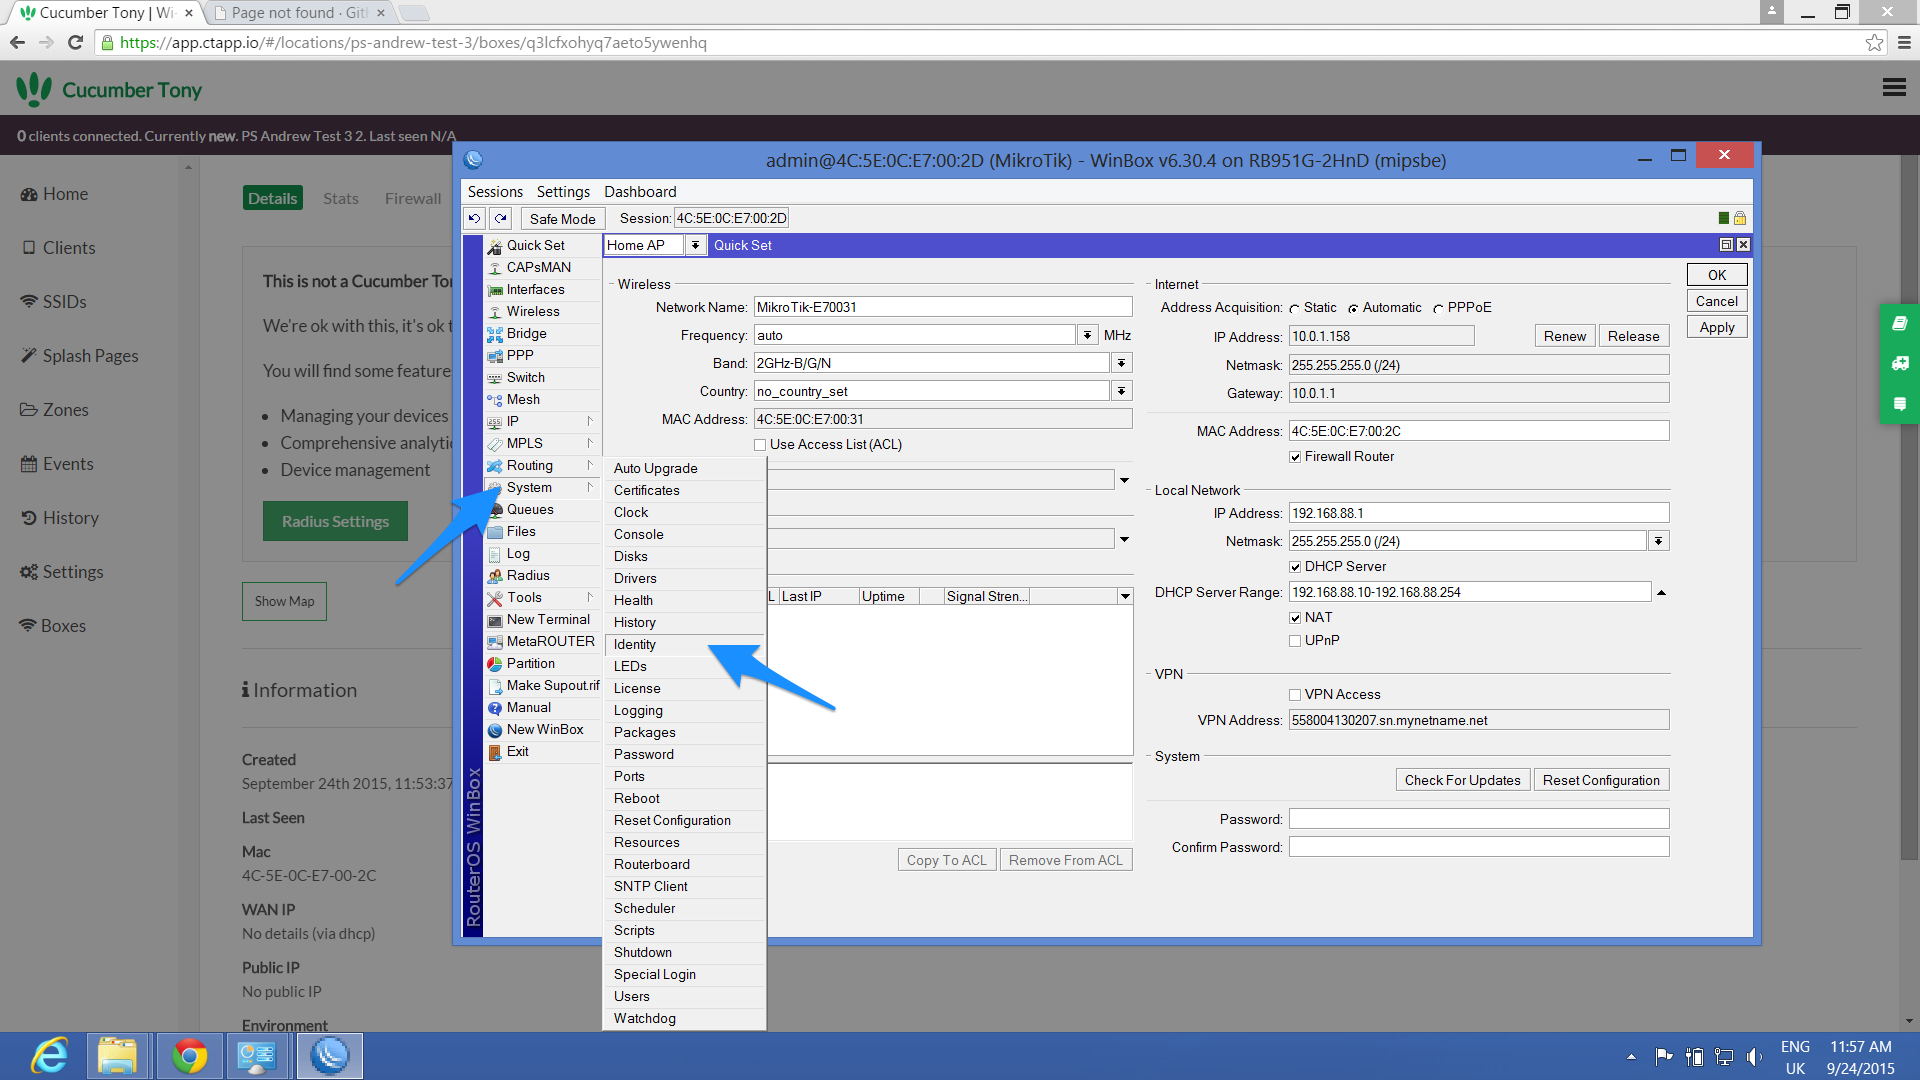
9. Copy the MAC address that you added into CT and go to System > Identity and paste in the MAC address as your identity and click OK
10. Go back into your box page on CT and go into your box settings at the top of the page.
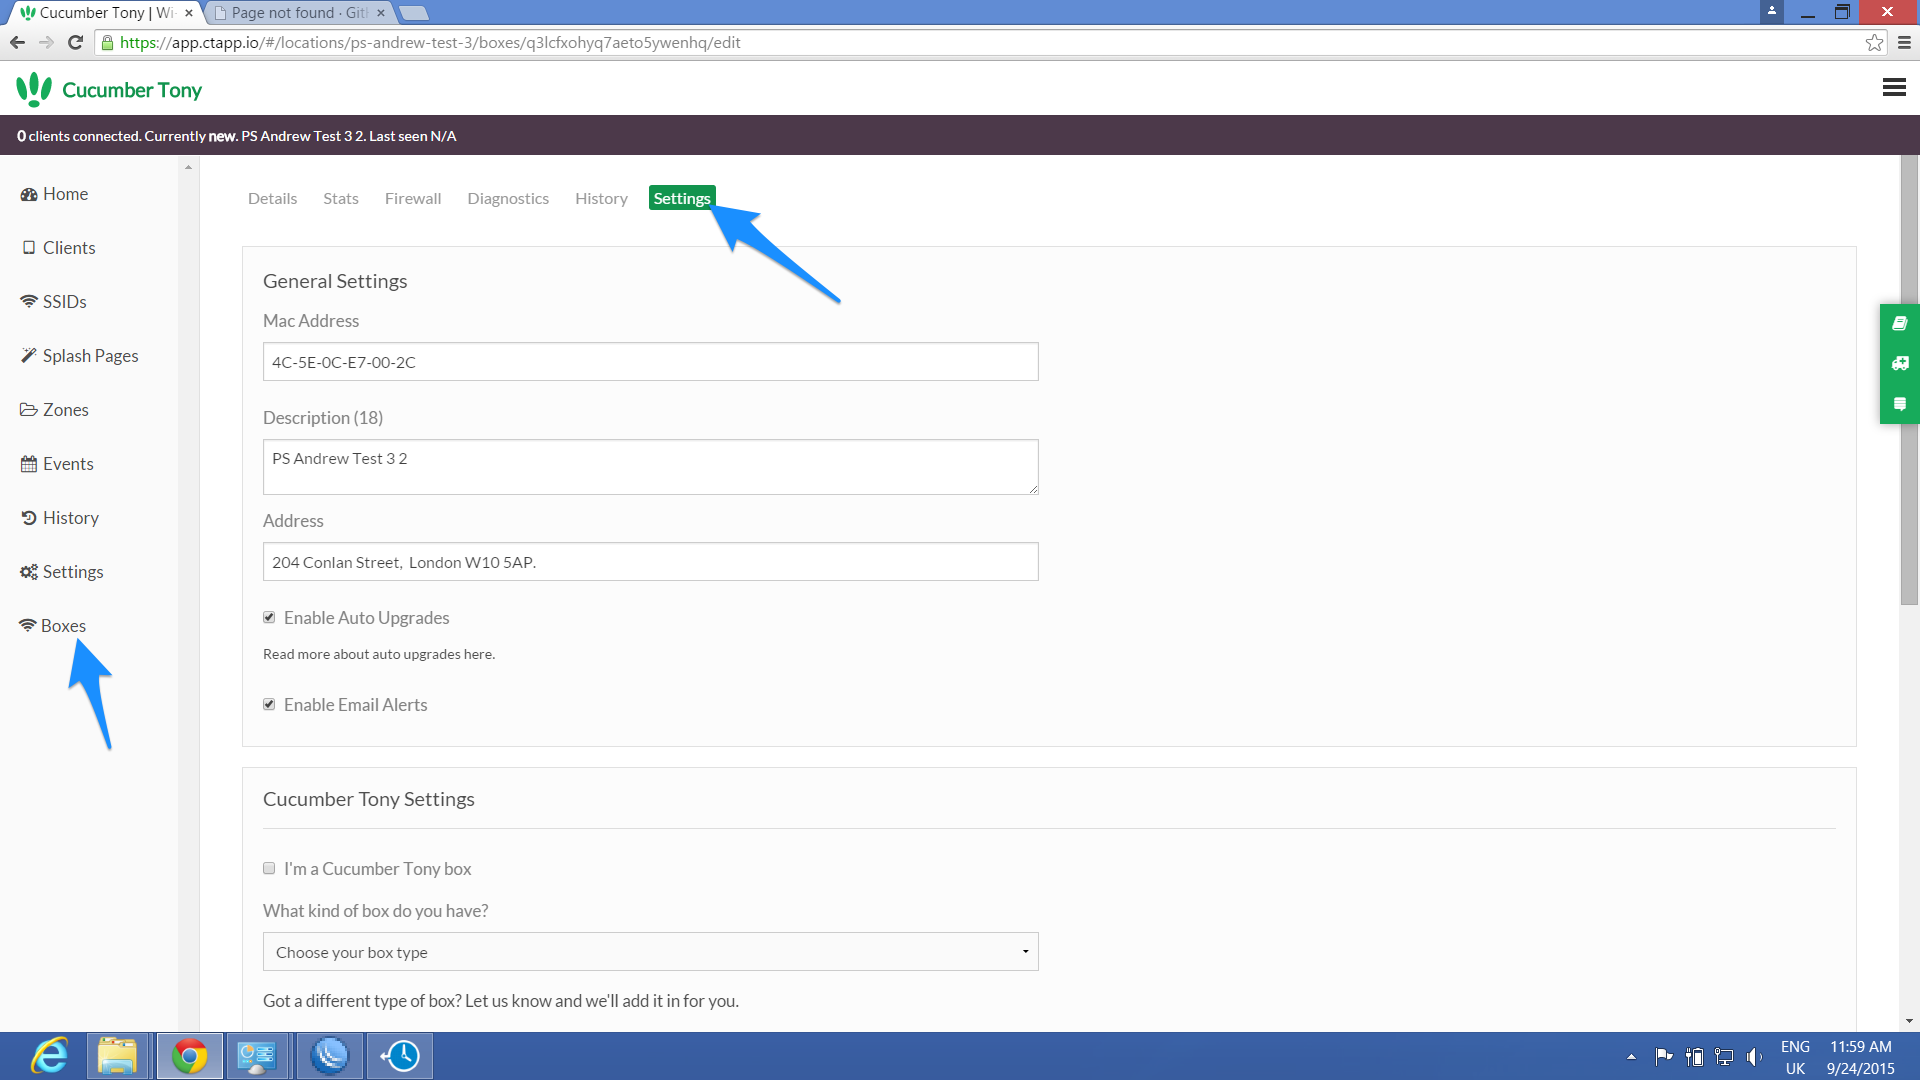
Scroll down to advanced settings, and replace the radius NAS ID with the same MAC address from before and click update

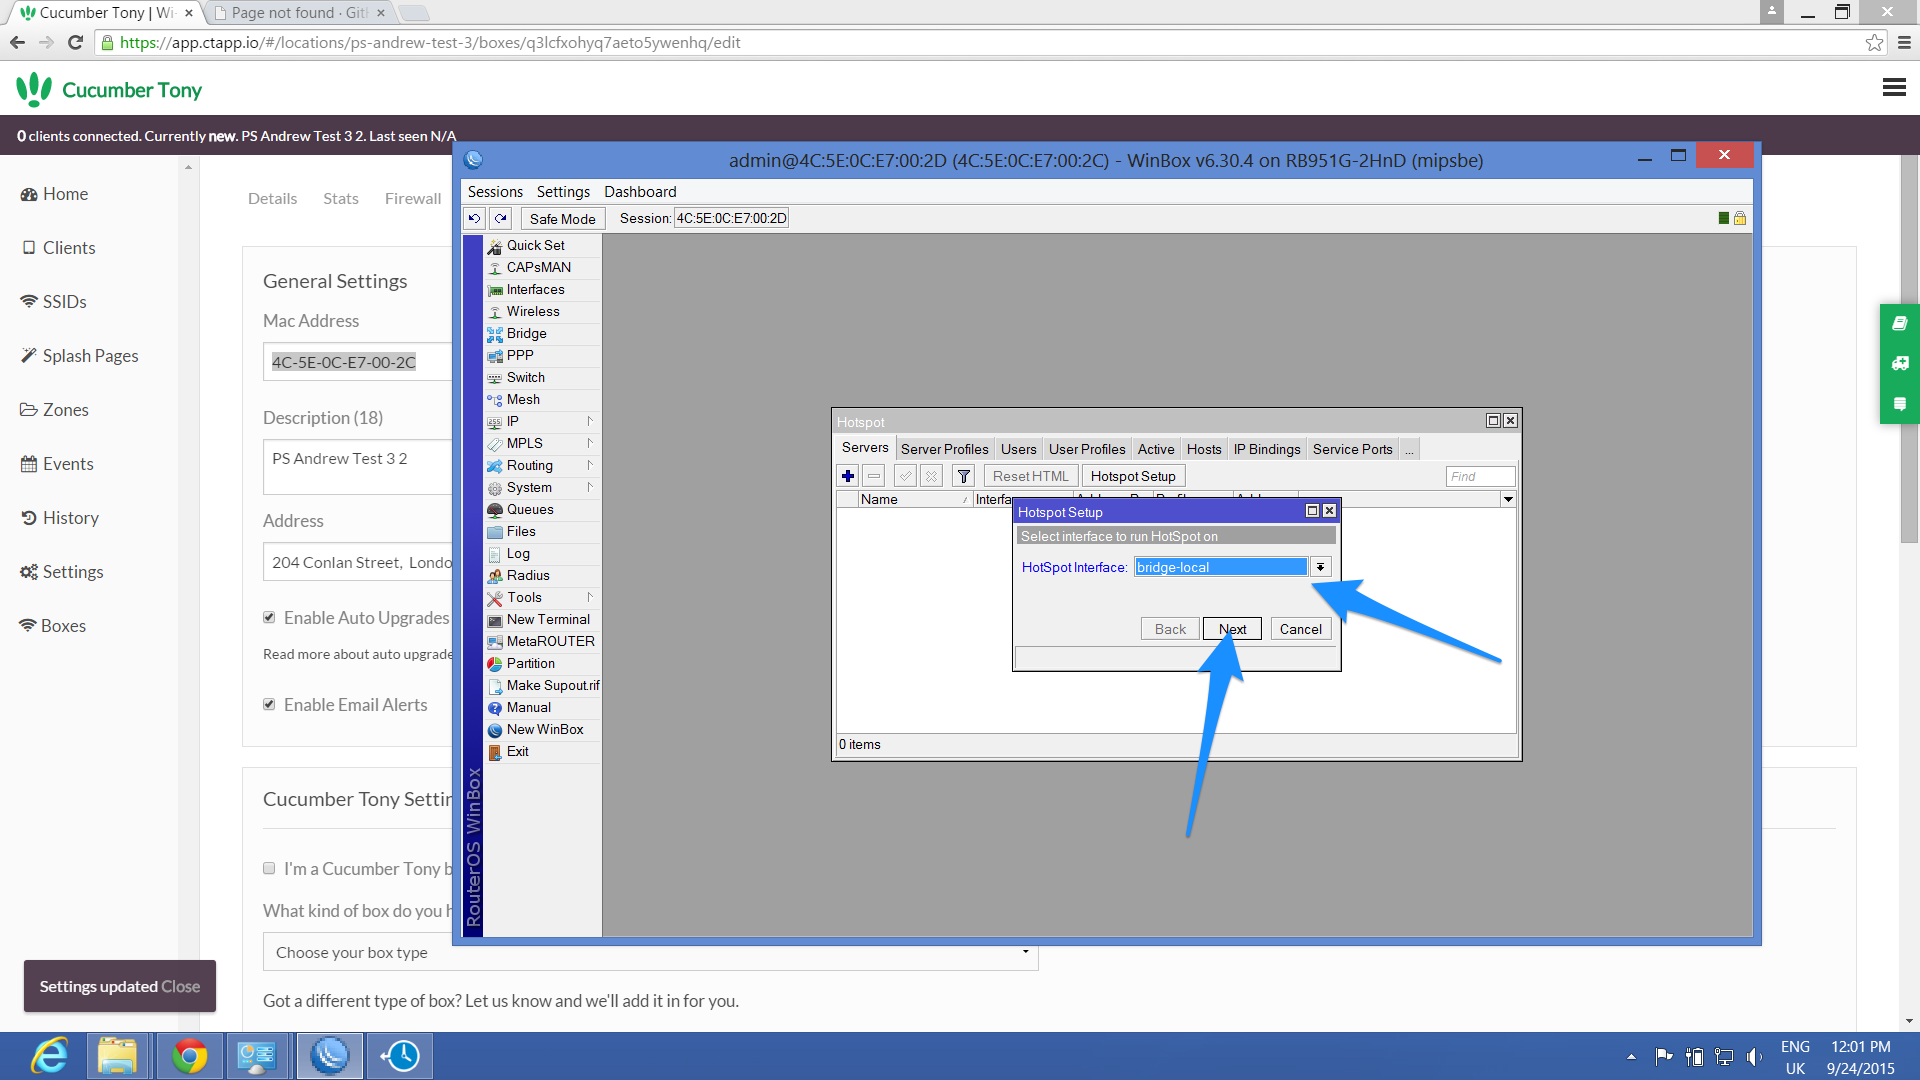
11. Back in winbox, go to IP on the left sidebar and then select Hotspot.

Click on hotspot setup and you will only need to change the following:
Hotspot interface: bridge-local
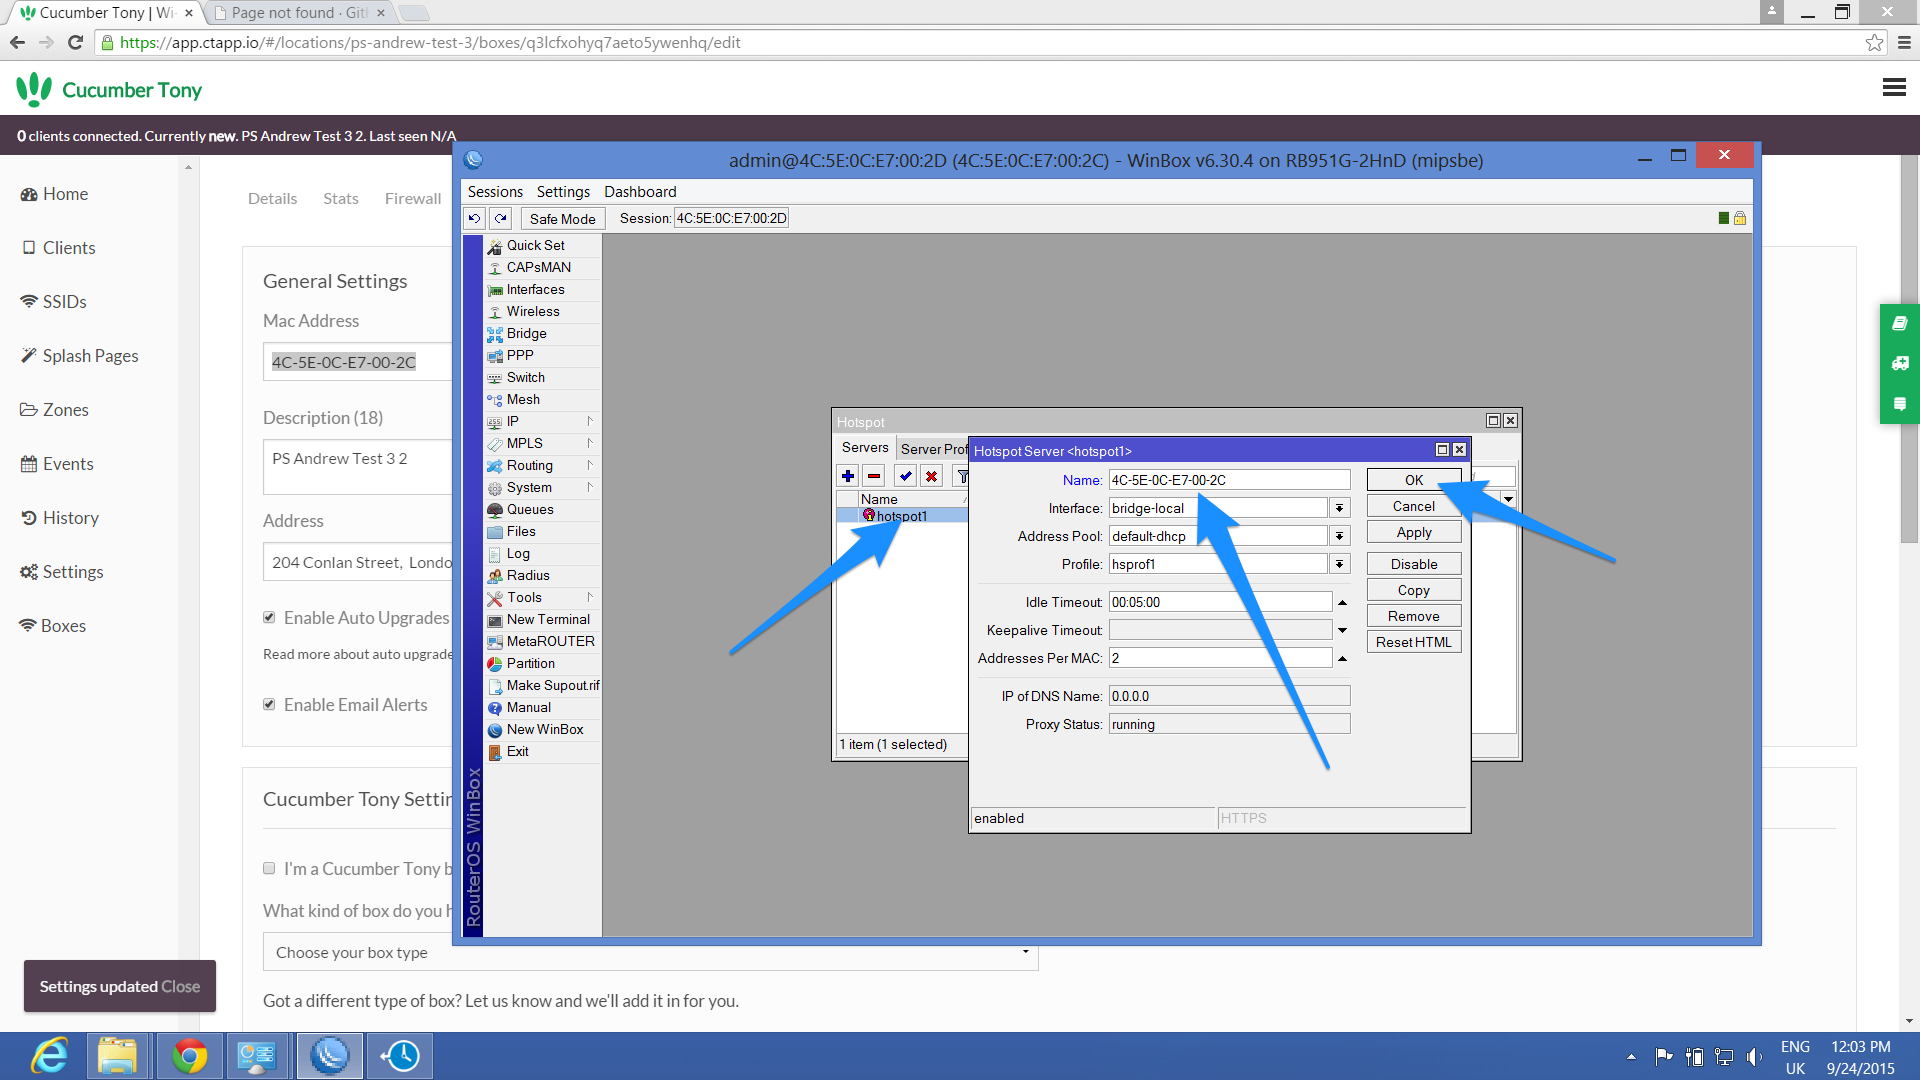
12. Under hotspot servers, double click on hotspot 1 and change the name to the mac address used previously, then click OK
13. Under server profiles, select hsprof1 and change the name to the mac address used previously, then click ok
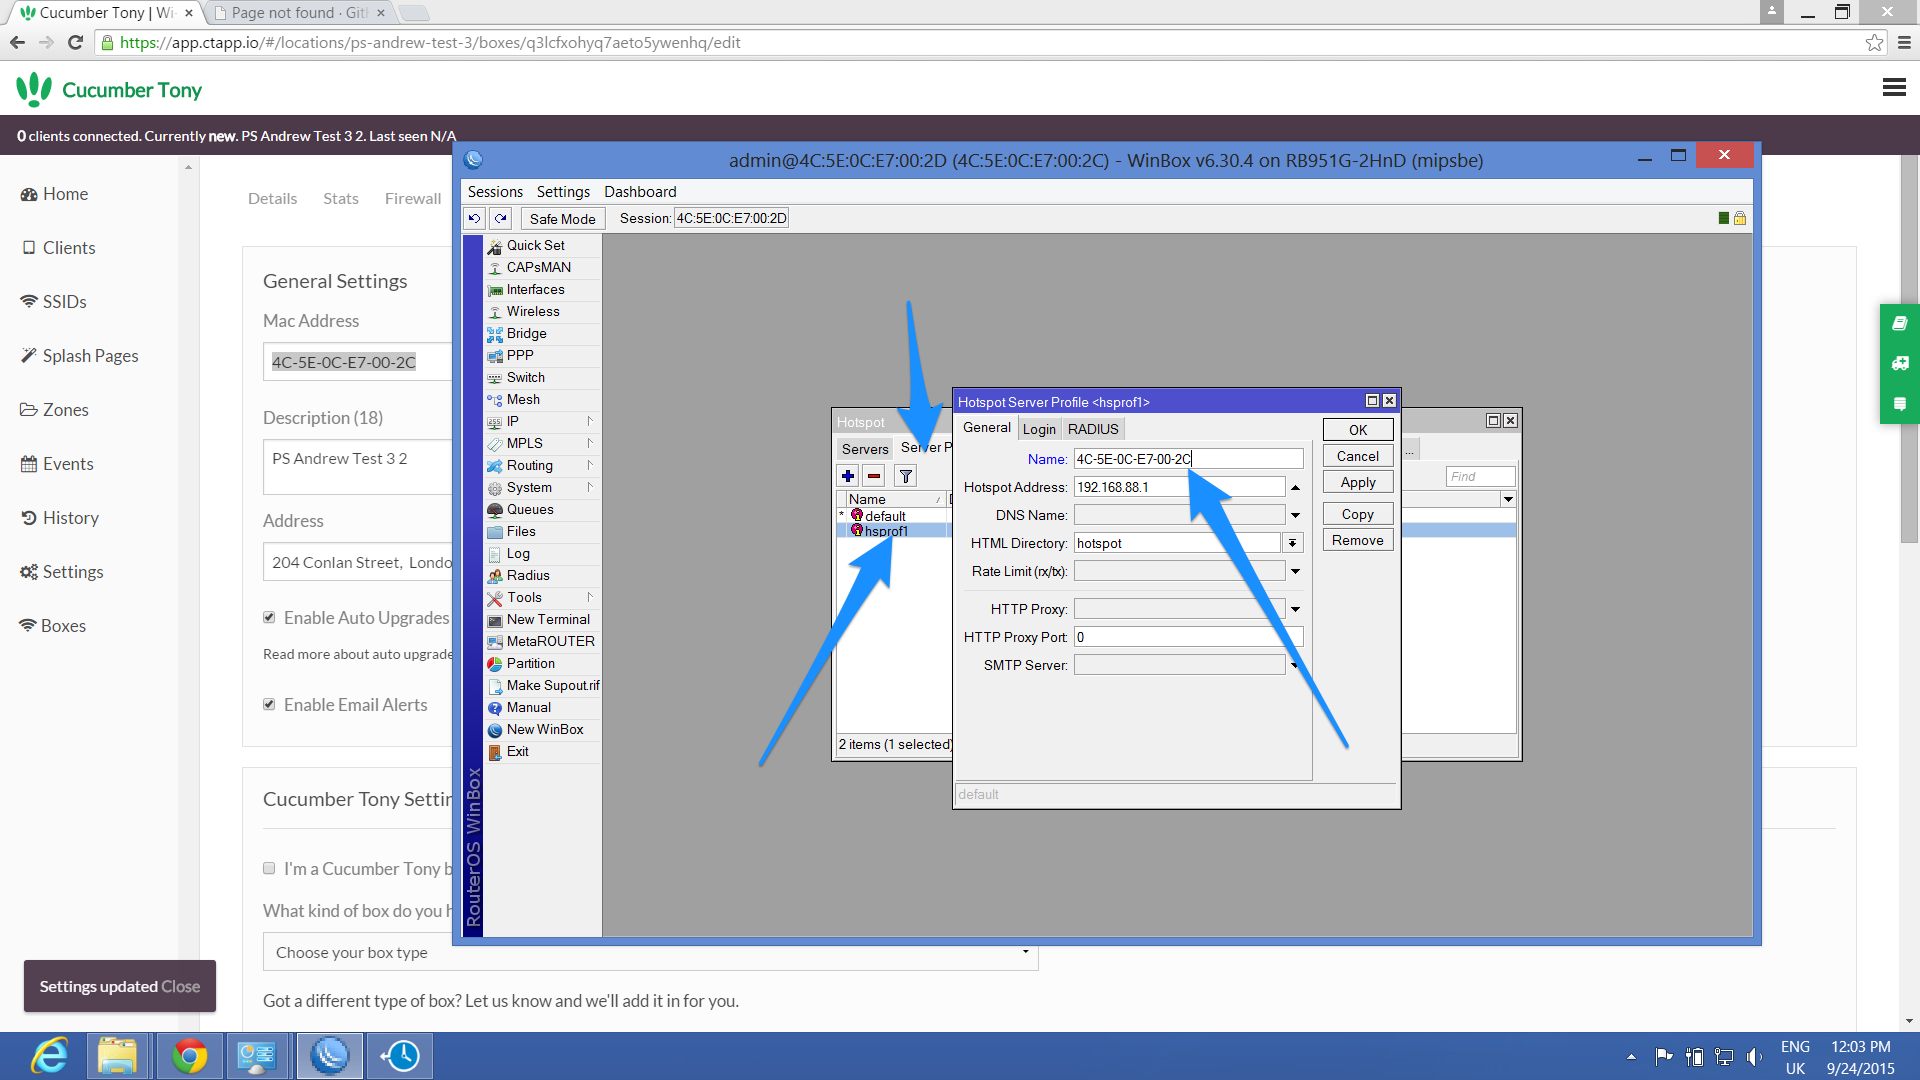
Then under the Logins tab, make sure that HTTP PAP is the only option enabled next to Login By.
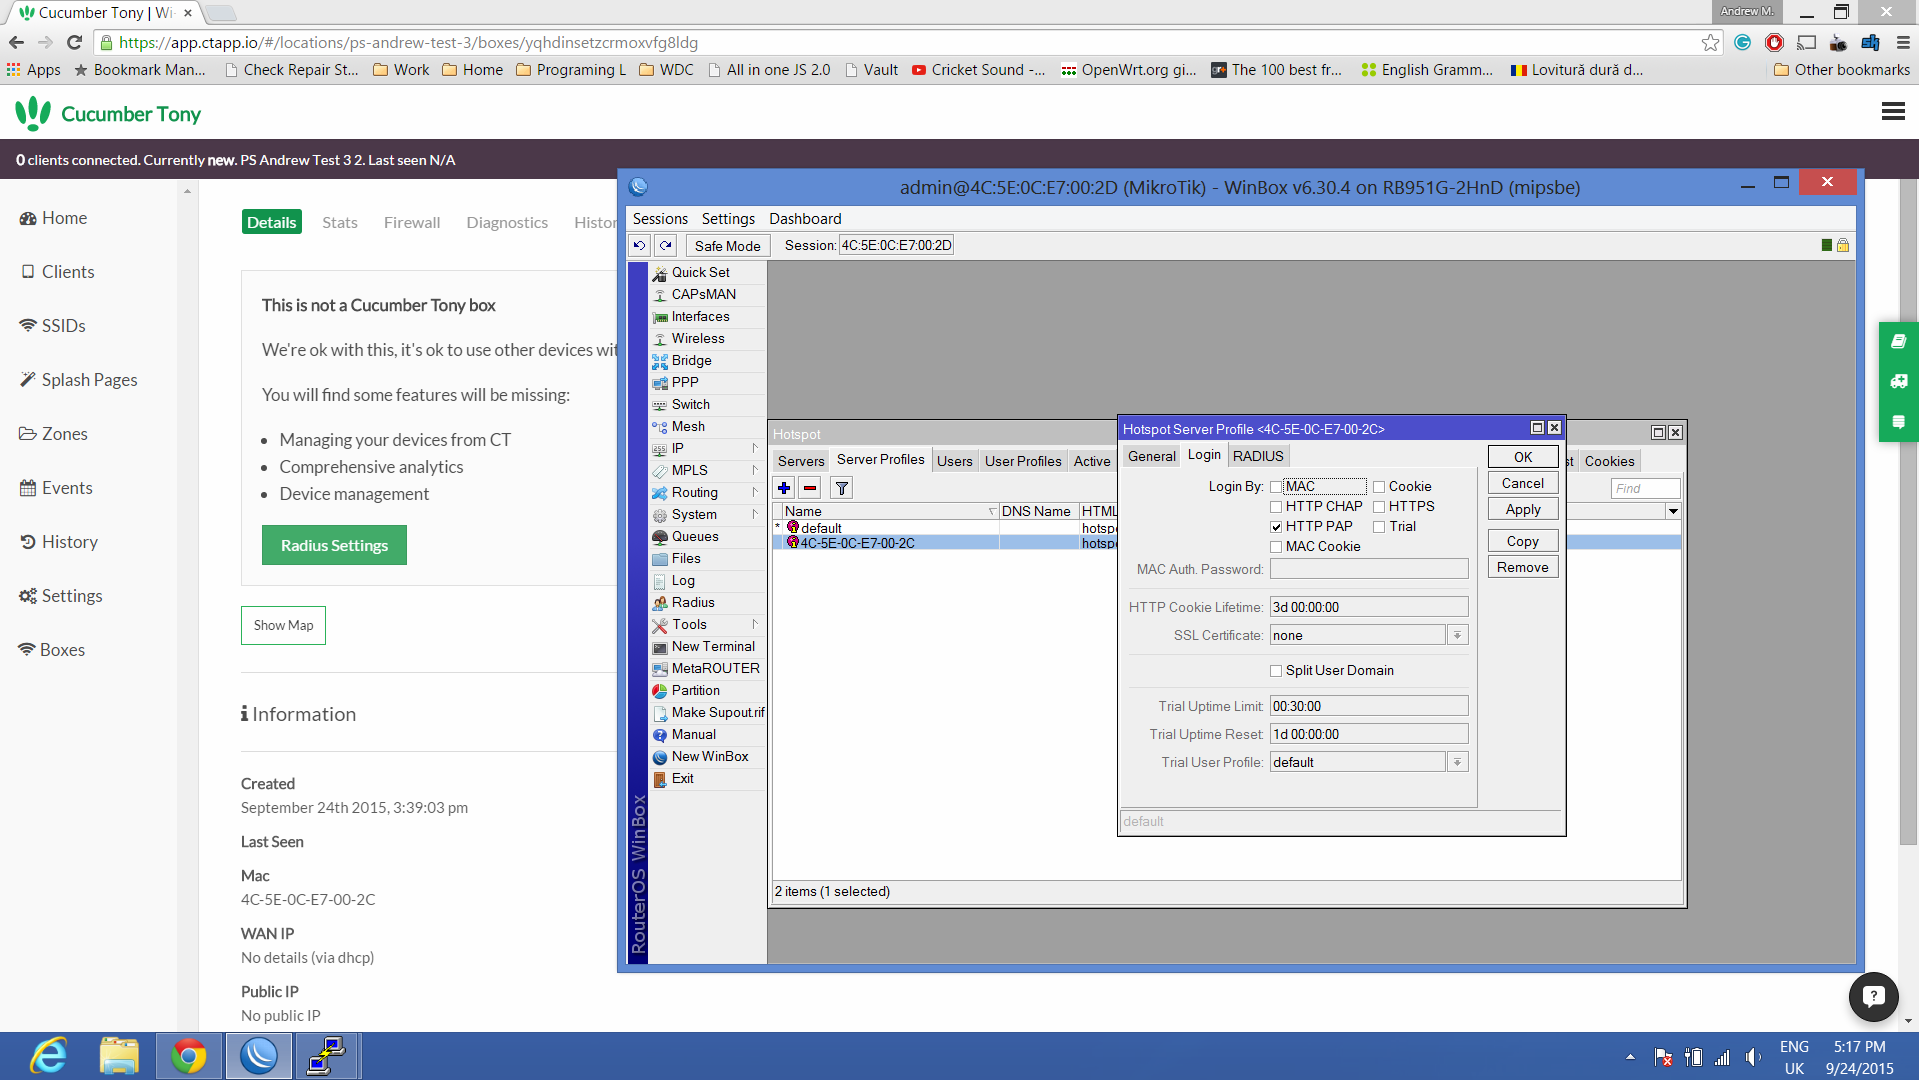
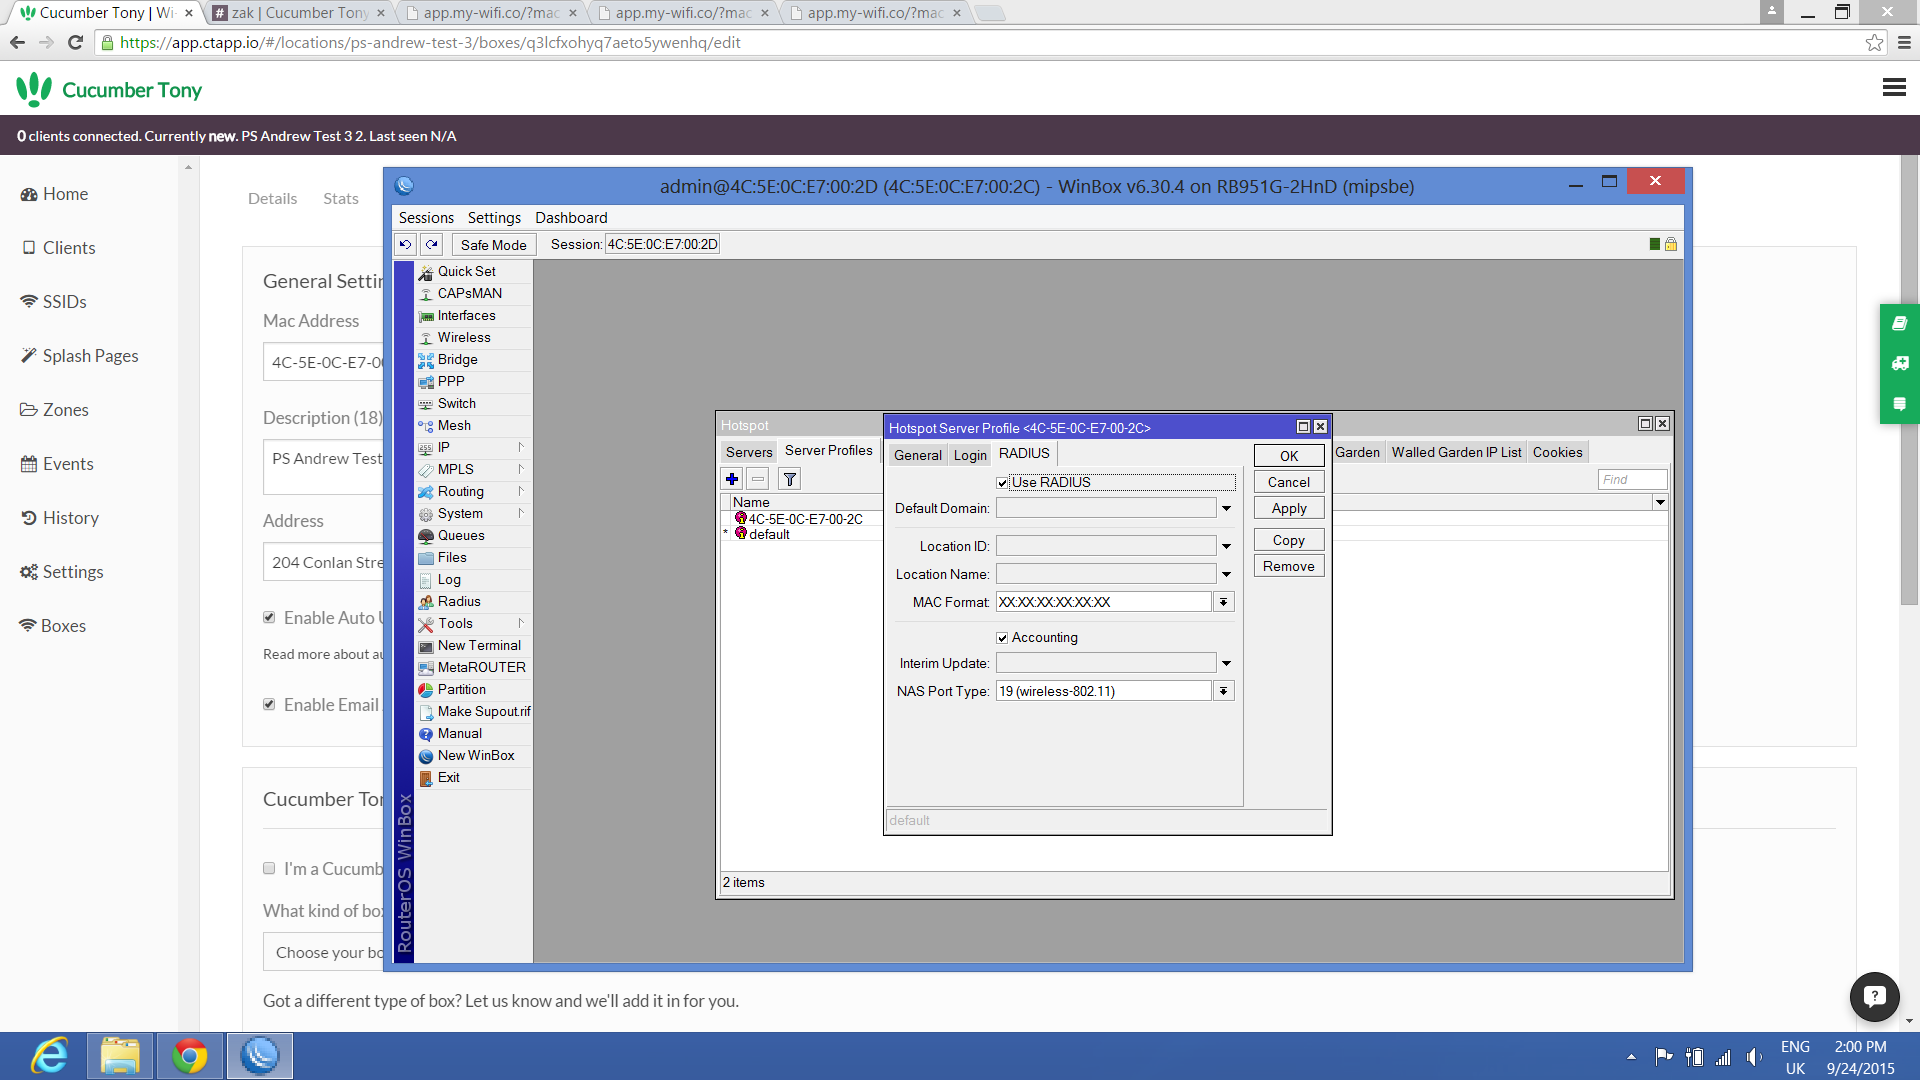
Then under the radius tab, enable radius. The mac format must be XX-XX-XX-XX-XX-XX and accounting should be enabled. Otherwise you’ll get no datas.
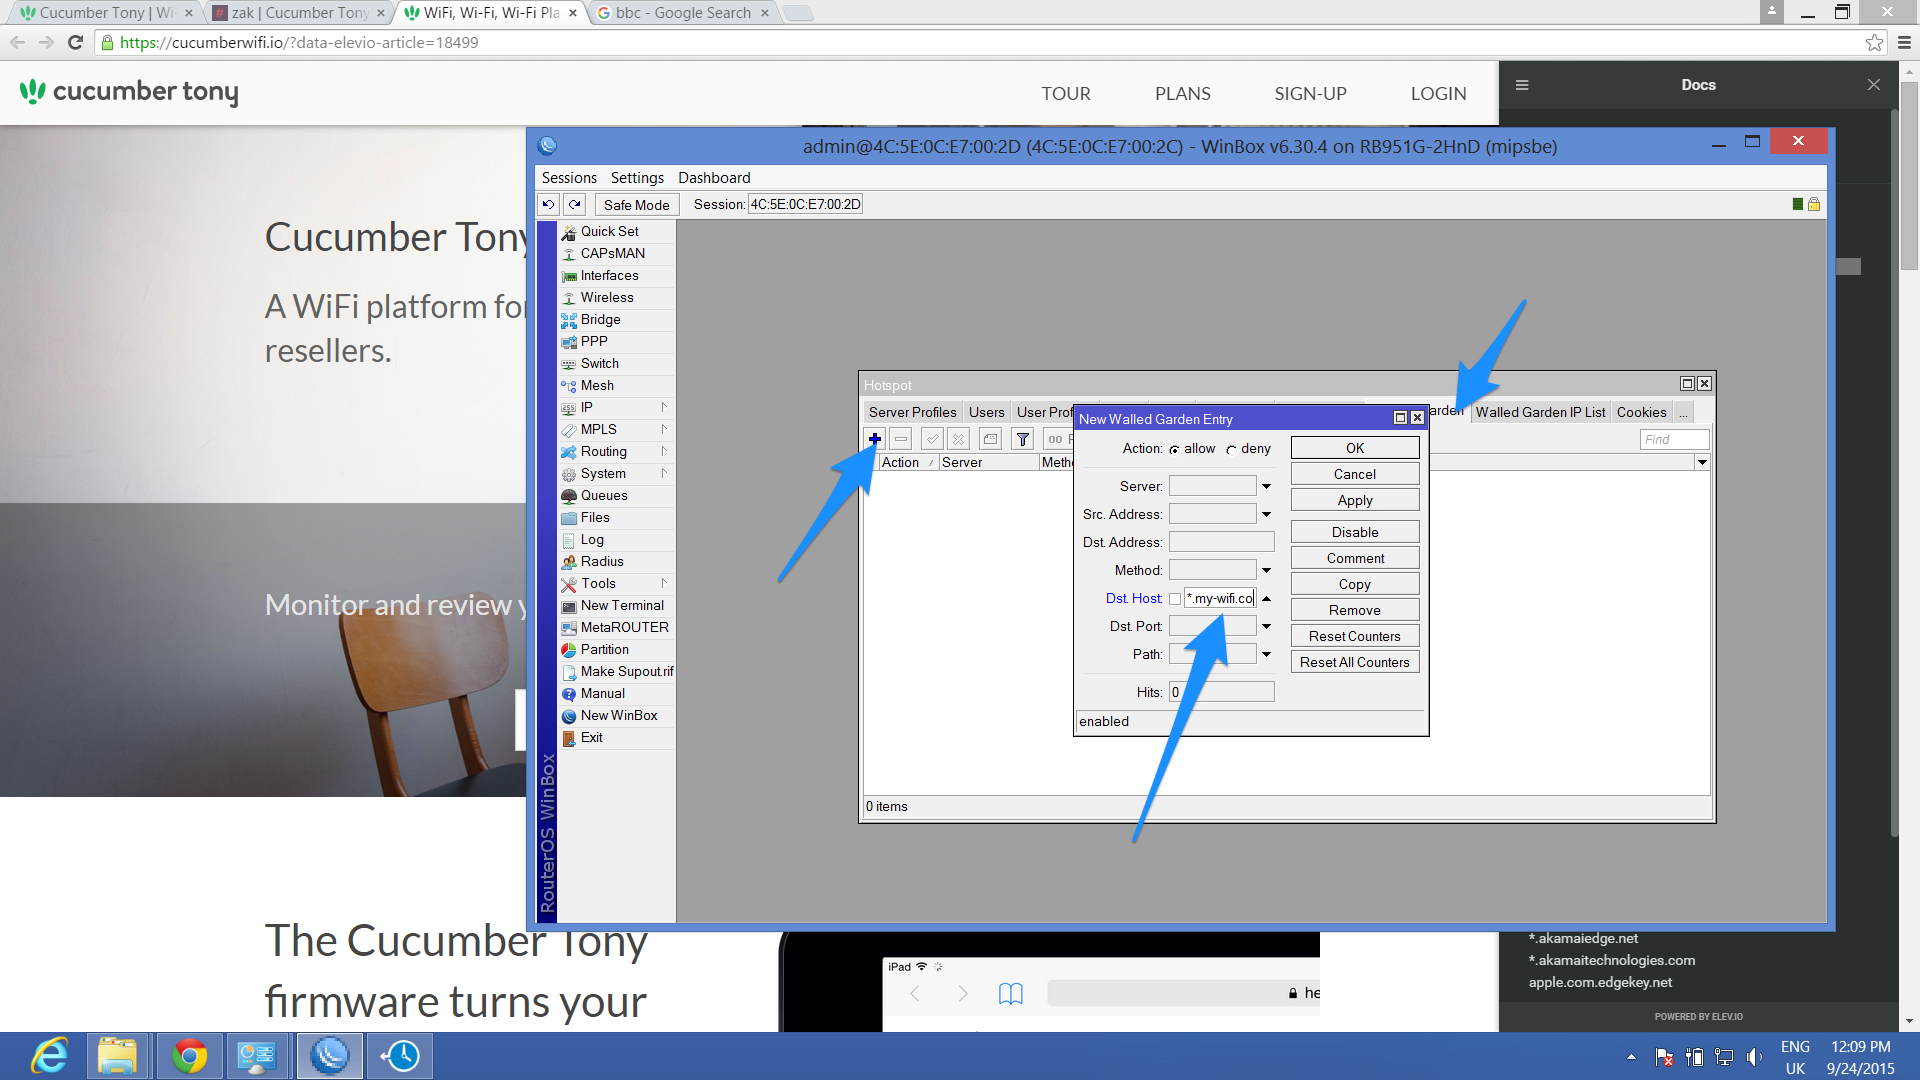
14. Then under walled garden, click the + to add, and add the walled garden entries.
You can find the most up to date list of Walled Gardens here.
Enter the walled garden domains under Dst. Host.
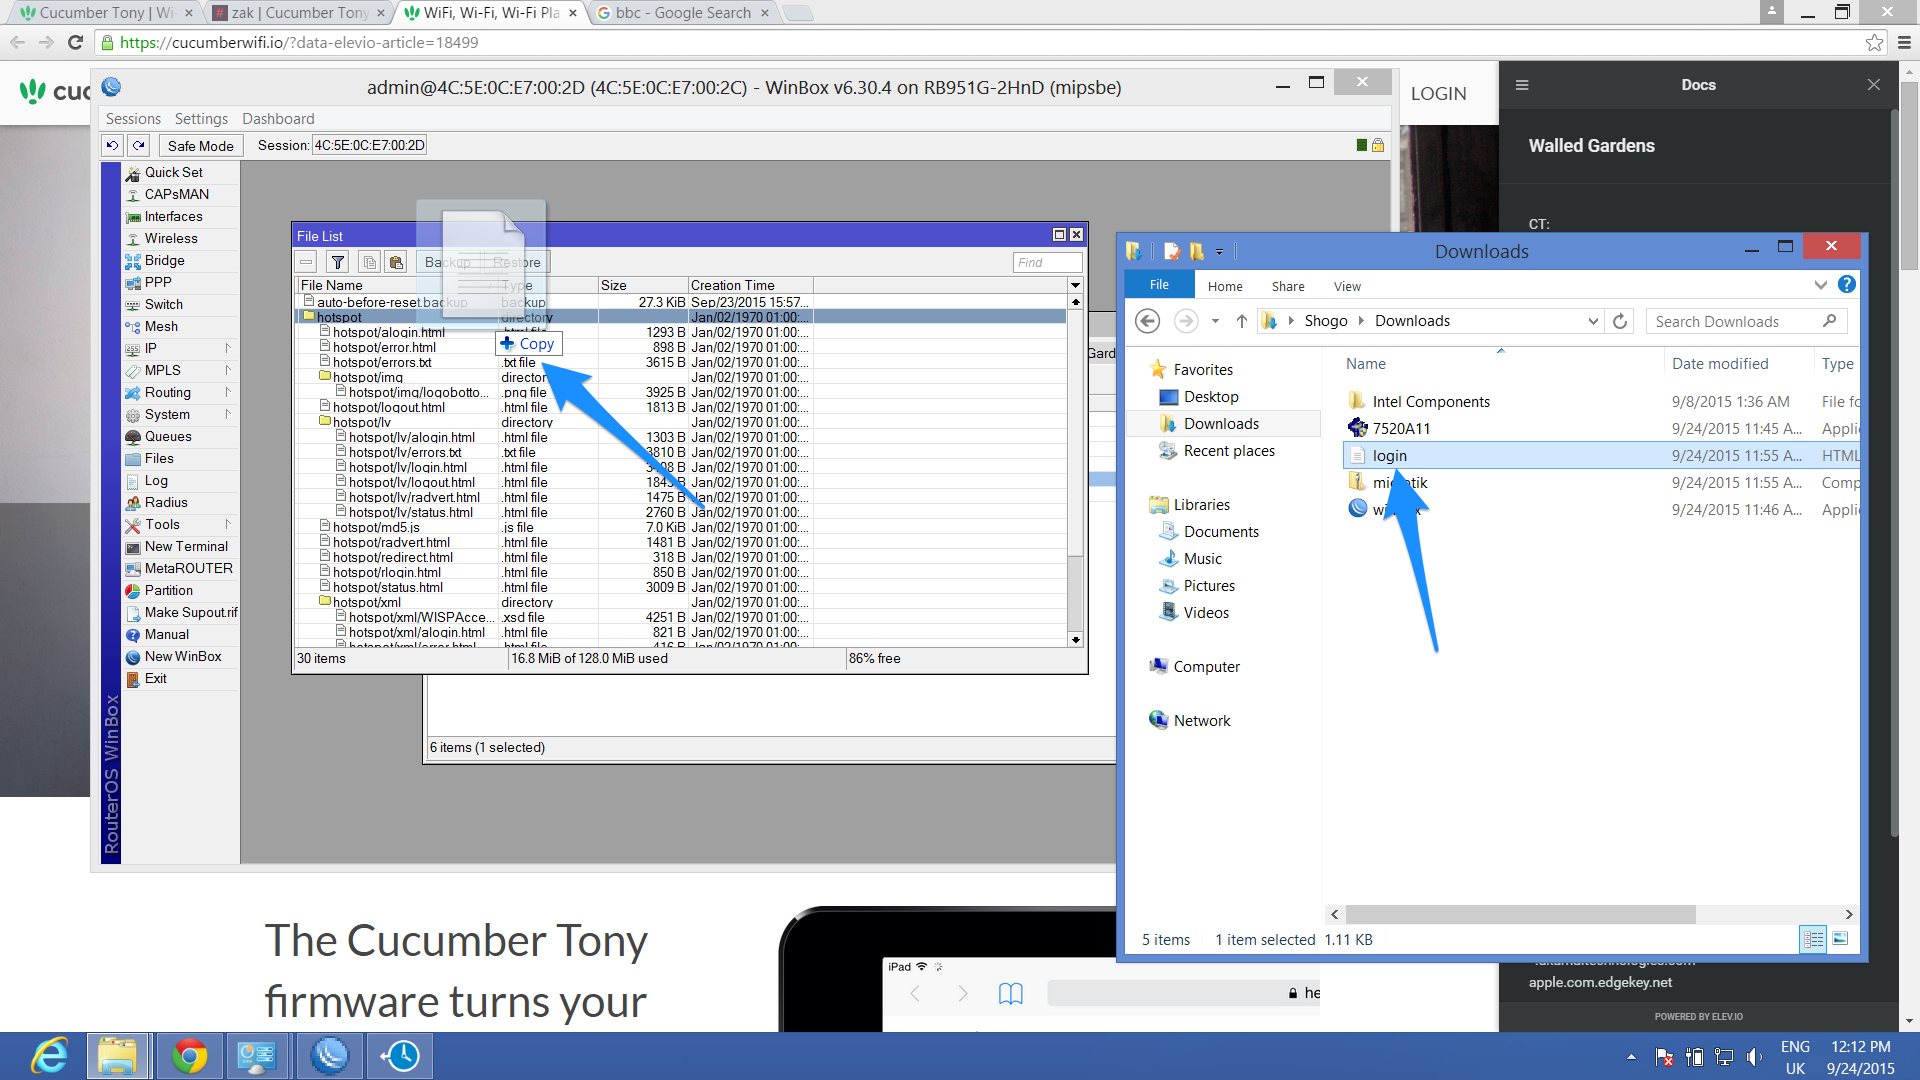
15. Go into Files, and find the file named hotspot/login.html and remove it.
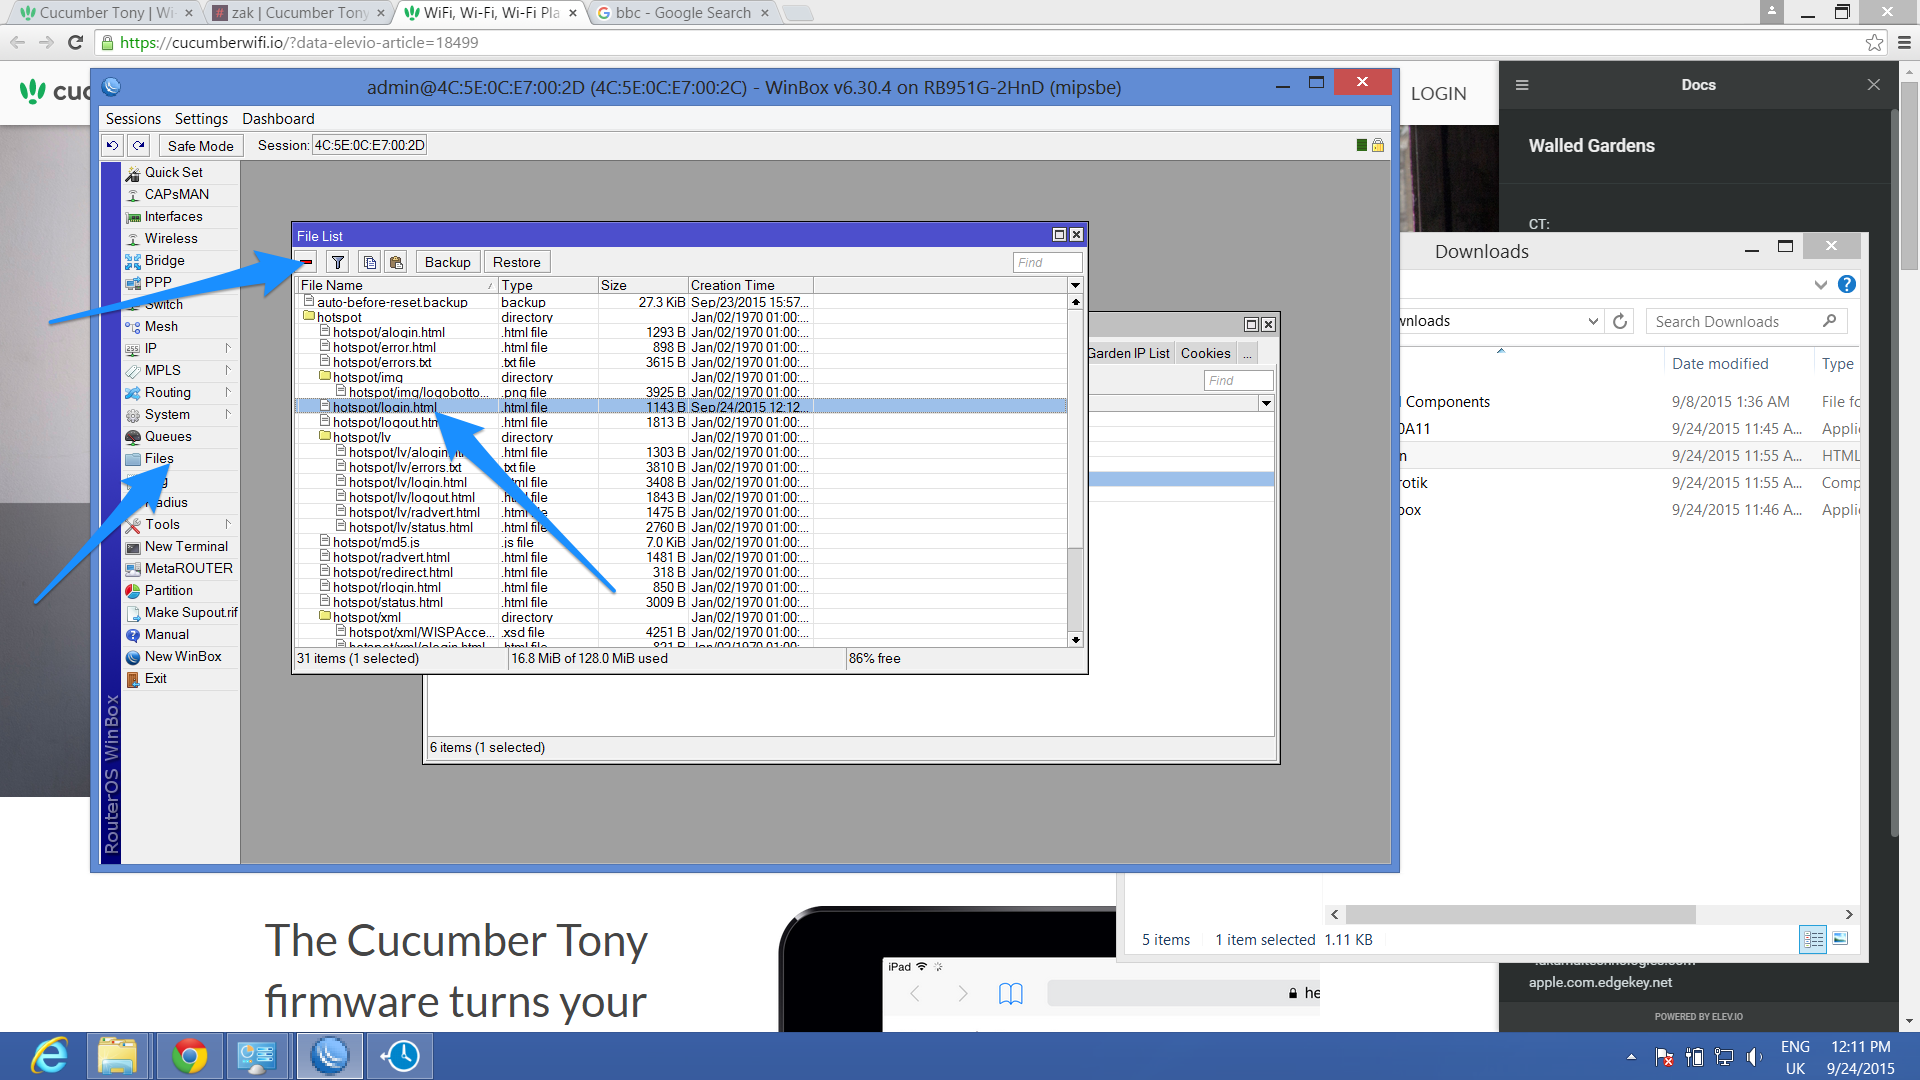
Then find the file you downloaded previously, and drag and drop it into the hotspot directory where you removed the previous file.
At this point you are now set up and can log in through the splash page.
When things go wrong
Can’t login - in a loop
This is usually caused by incorrect radius settings. If you’ve entered the details incorrectly, sometimes Mikrotik refuse to update and won’t even try and log you in. You’ll go round in circles.
If you’re sure your settings match the ones in CT, the only way (we know about) to get the device to authenticate is to delete the radius and add it in again.
If you happen to know how to fix this, tell us and we’ll give you 50% off for three months! No joke.
On a Mac or Linux Puter
This is really sucky. We’re 50/50 mac and Linux users over here and we’ve found the clients to be aweful.
Even so, there are two issues with these (the mac and Linux version):
- Can’t drag and drop the files.
- Can’t access the interface if splash is running
The first we can’t solve. The second you can resolve by creating another network (sometimes) and or logging in via the splash.
Sign-up, Cucumber is free for unlimited access points
Sign-up for CT WiFi, it’s free for unlimited access points. Some awesome is also included.