Setting up a splash page for an Aruba network
Aug 11, 2015
This doc is outdated. Please view our new documents here:
docs.ct-networks.io
Using a web browser, go into your CT WiFi dashboard and add the box in using the MAC address of your Access Point.
When you have added these to CT WiFi, go into the settings page of your box, scrolling down for the section labelled CT WiFi Settings
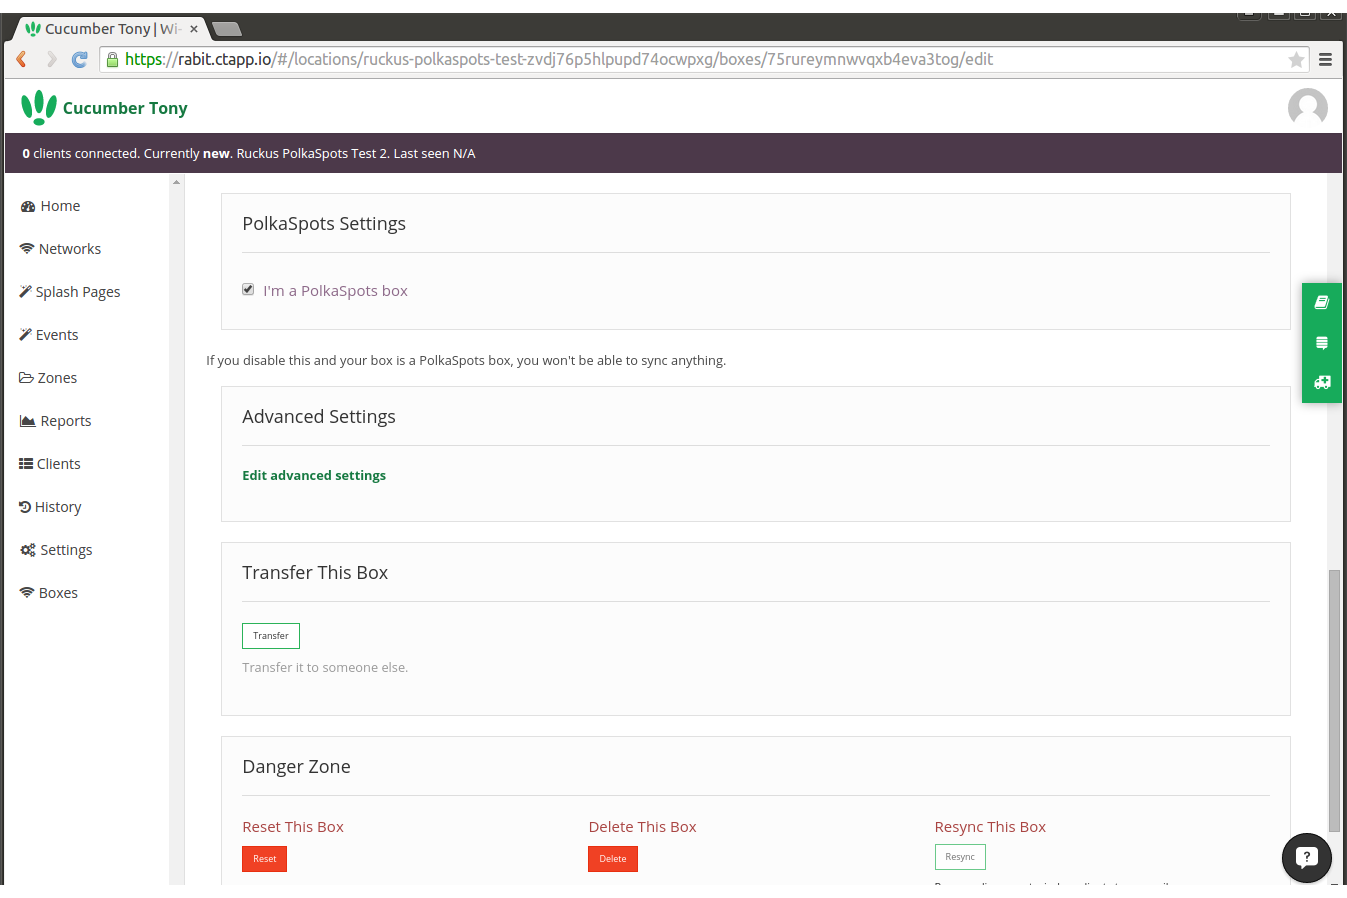
Untick I’m a CT WiFi Box, and select your box type from the droplist then update your changes
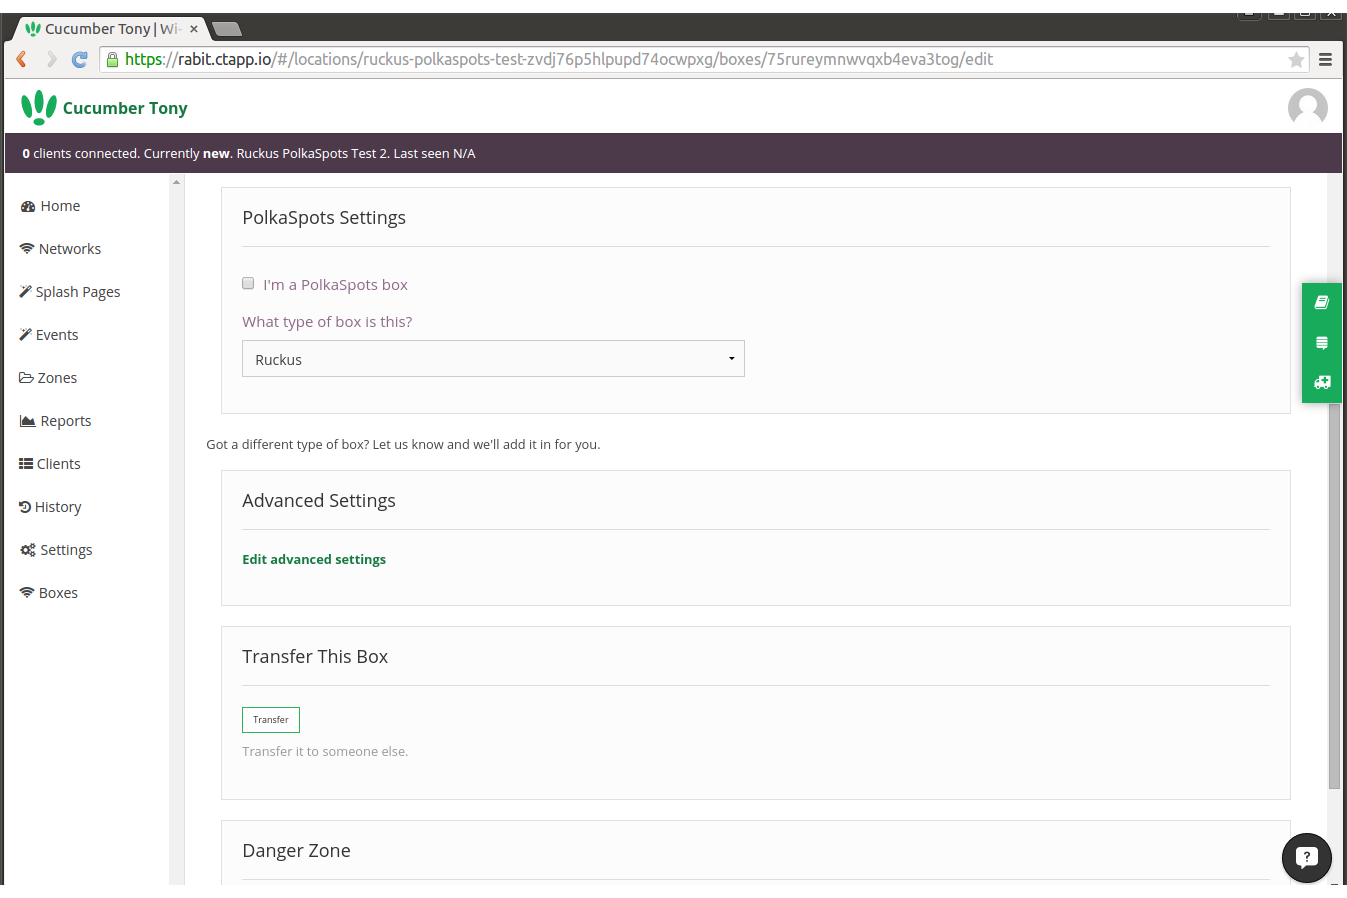
Head back to boxes and click on the box you just set to a non CT WiFi Box. You should now see a green Radius Settings button.
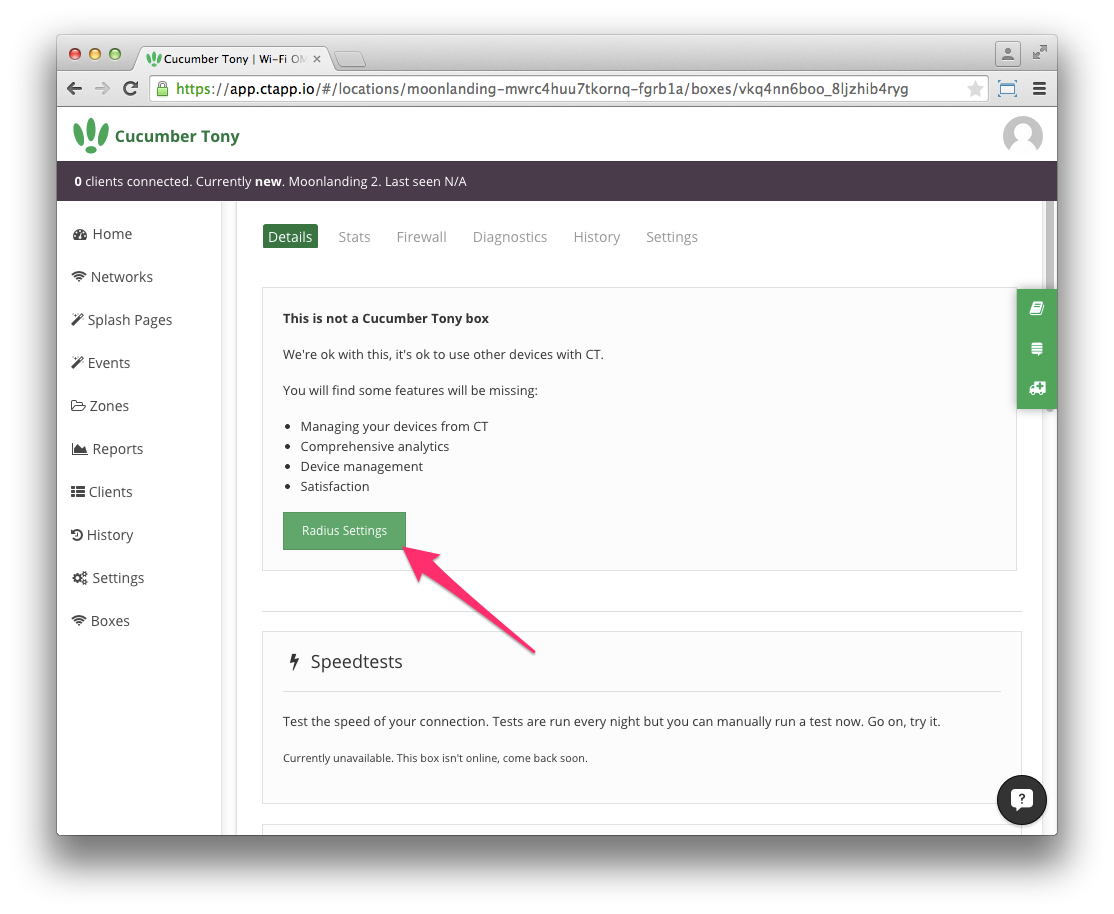
Clicking this will open a box with details that you will need to refer back to at later stages.
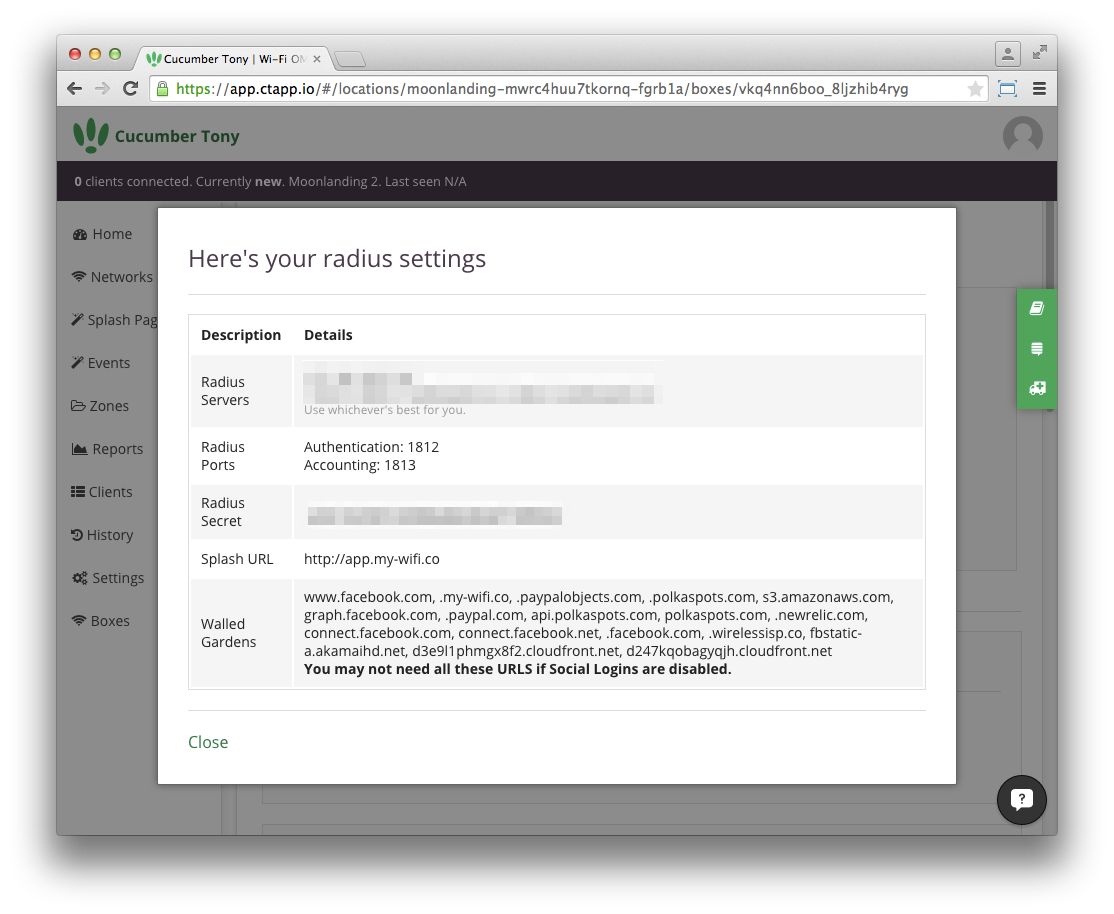
Double Check your NAS ID If you do not enter a NAS, or you enter a wrong NAS, you will be blocked out and will not be able to authenticate, and will need to contact support.
Open your Aruba network portal and under Networks, click new.
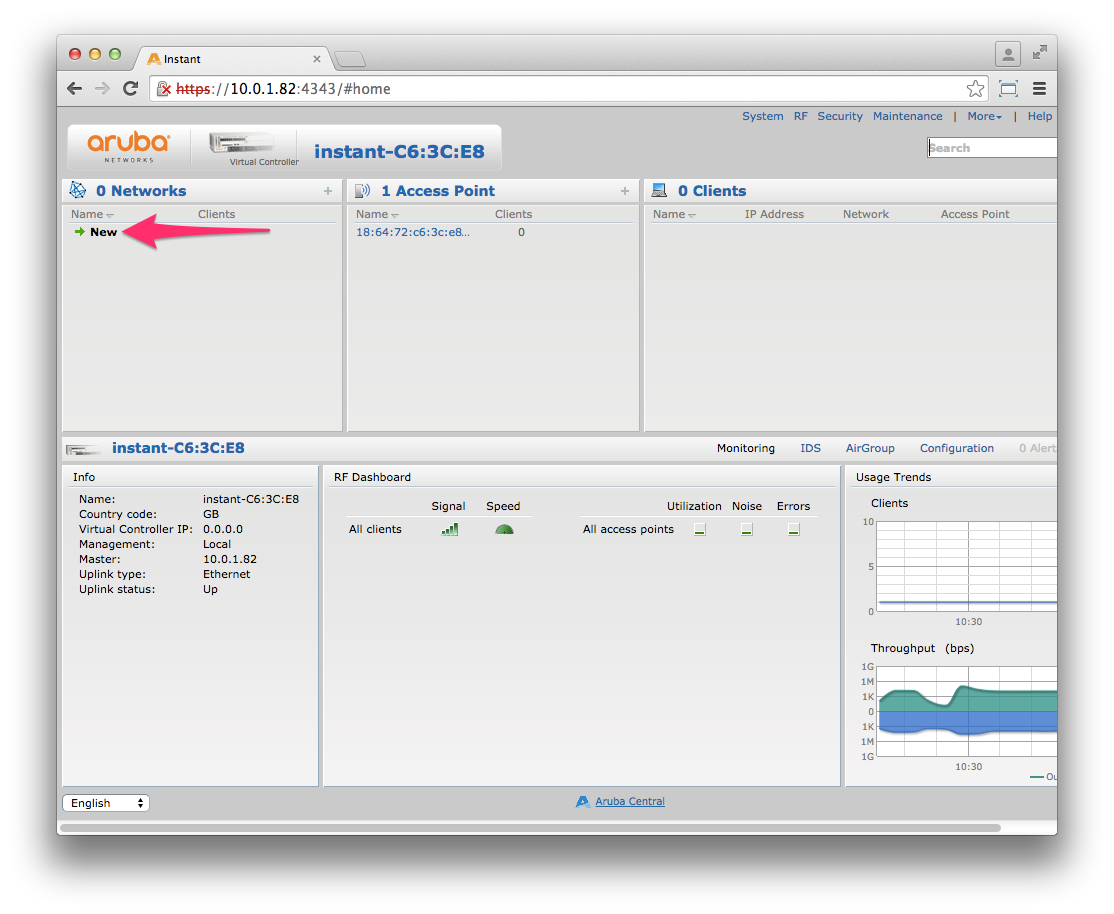
Enter the following settings:
- Name - e.g Polkaspots Wi-Fi
- Usage - Guest
</ul>
Once this is done, click Next to continue.
Continue to the VLAN tab, and set the following:
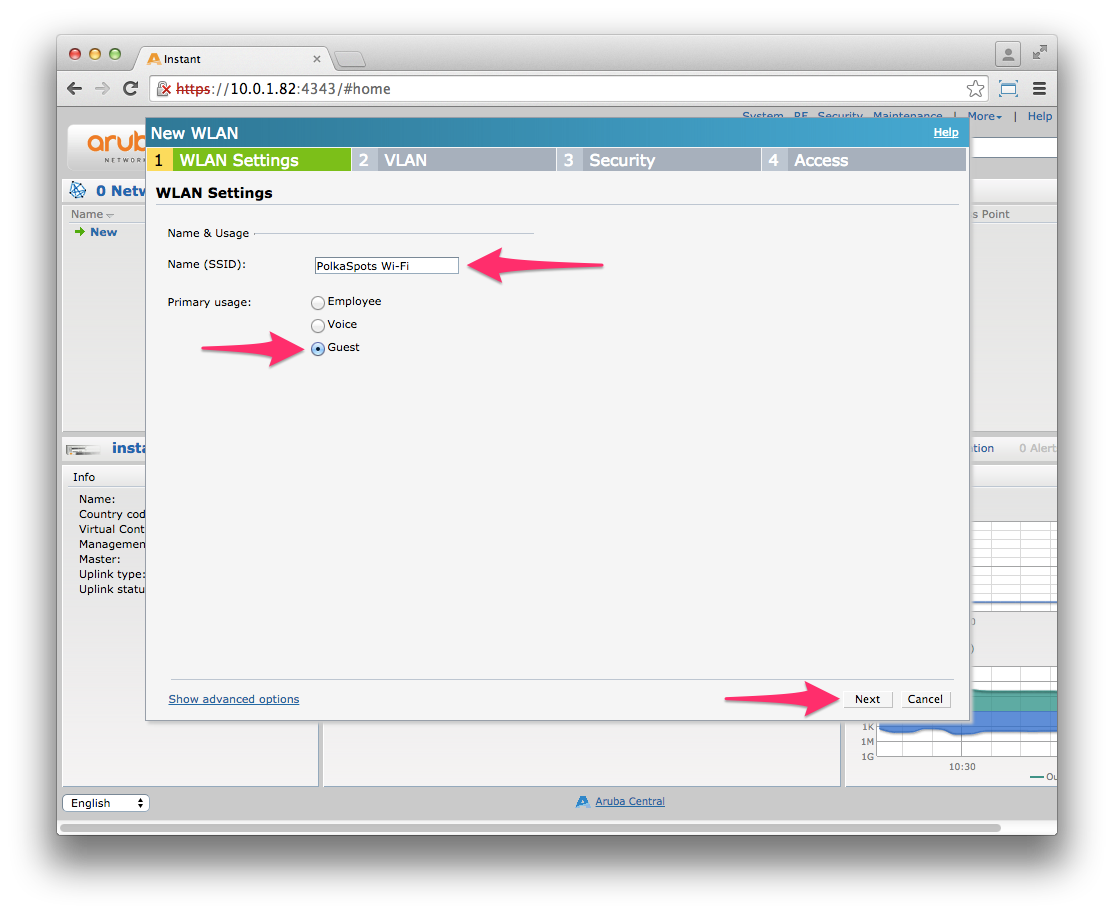
- Client IP assignment - Virtual Controller Managed
- Client VLAN assignment - Default
</ul>
Once this is done, click Next to continue.
Continue to Security, and set the splash page type to External
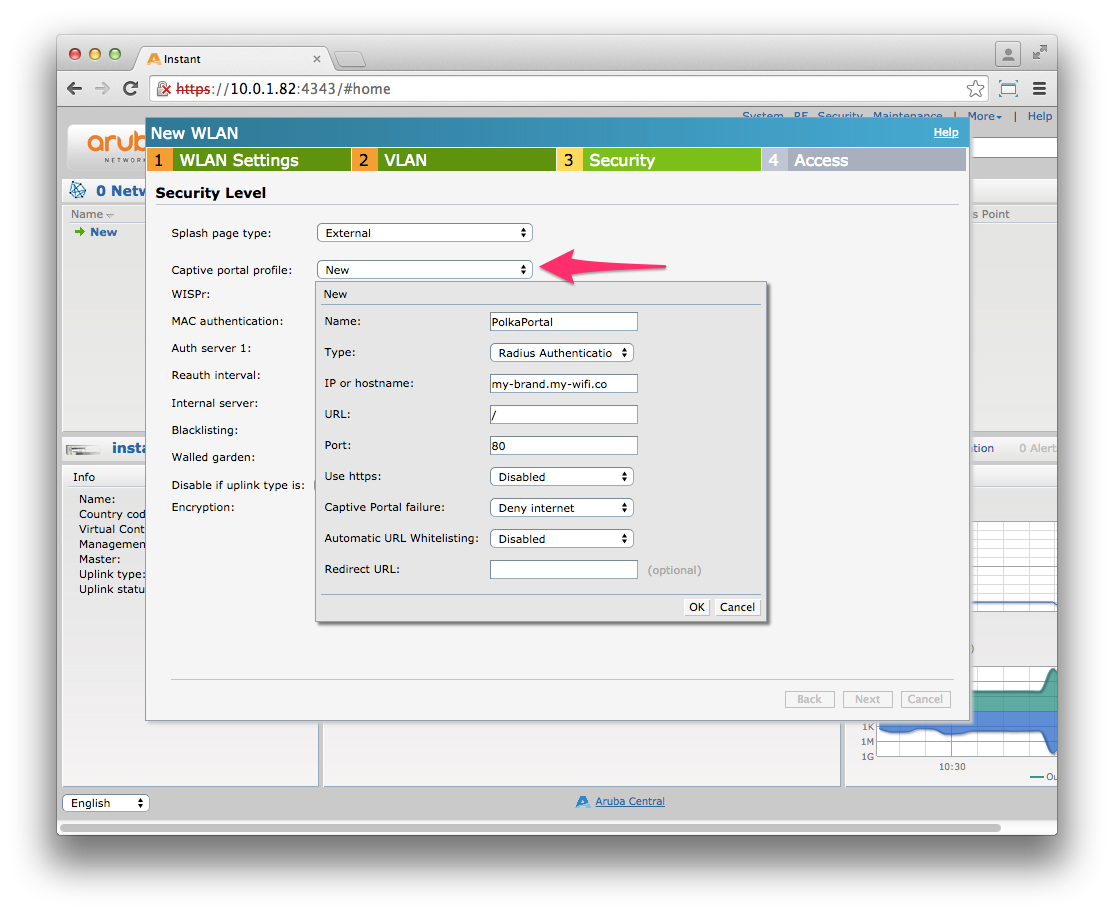
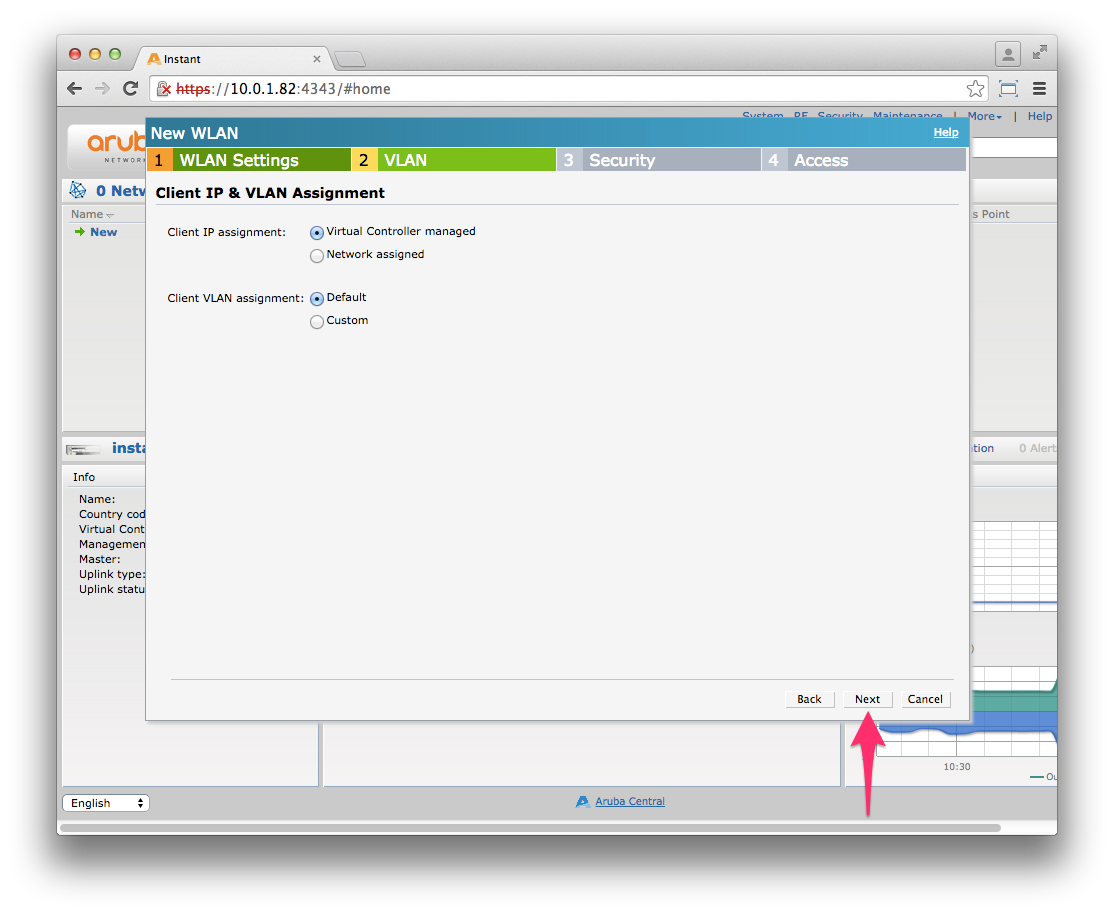 Under Captive Portal Profile, select new, and use the following configuration:
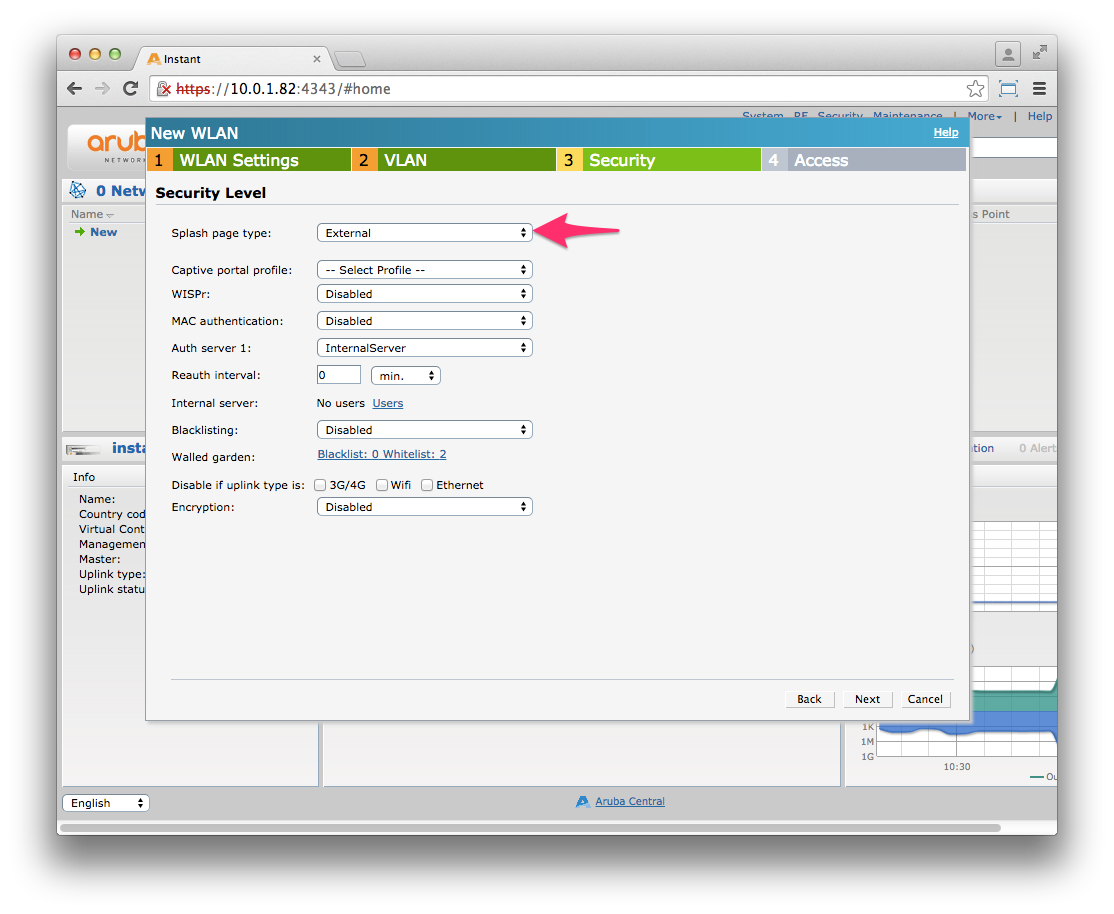
- Name - e.g PolkaPortal
- Type - Radius Authentication
- IP or hostname - my-brand.my-wifi.co ( replace “my-brand” with your
- specific brand name )
- URL - /
- Port - 80
- Use https - Disabled
- Captive Portal Failure - Deny internet
- Automatic URL Whitelisting - Enabled
- Redirect URL - Optional
</ul>
Once that is done, click OK to save.
Create a new profile in Auth server 1 using the following settings:
- Type: RADIUS
- Name: e.g PolkaAuth1
- IP address: (Refer to radius settings previously)
- Auth port: 1812
- Acct port: 1813
- Shared key: (Refer to radius settings previously)
- Retype key: (As above)
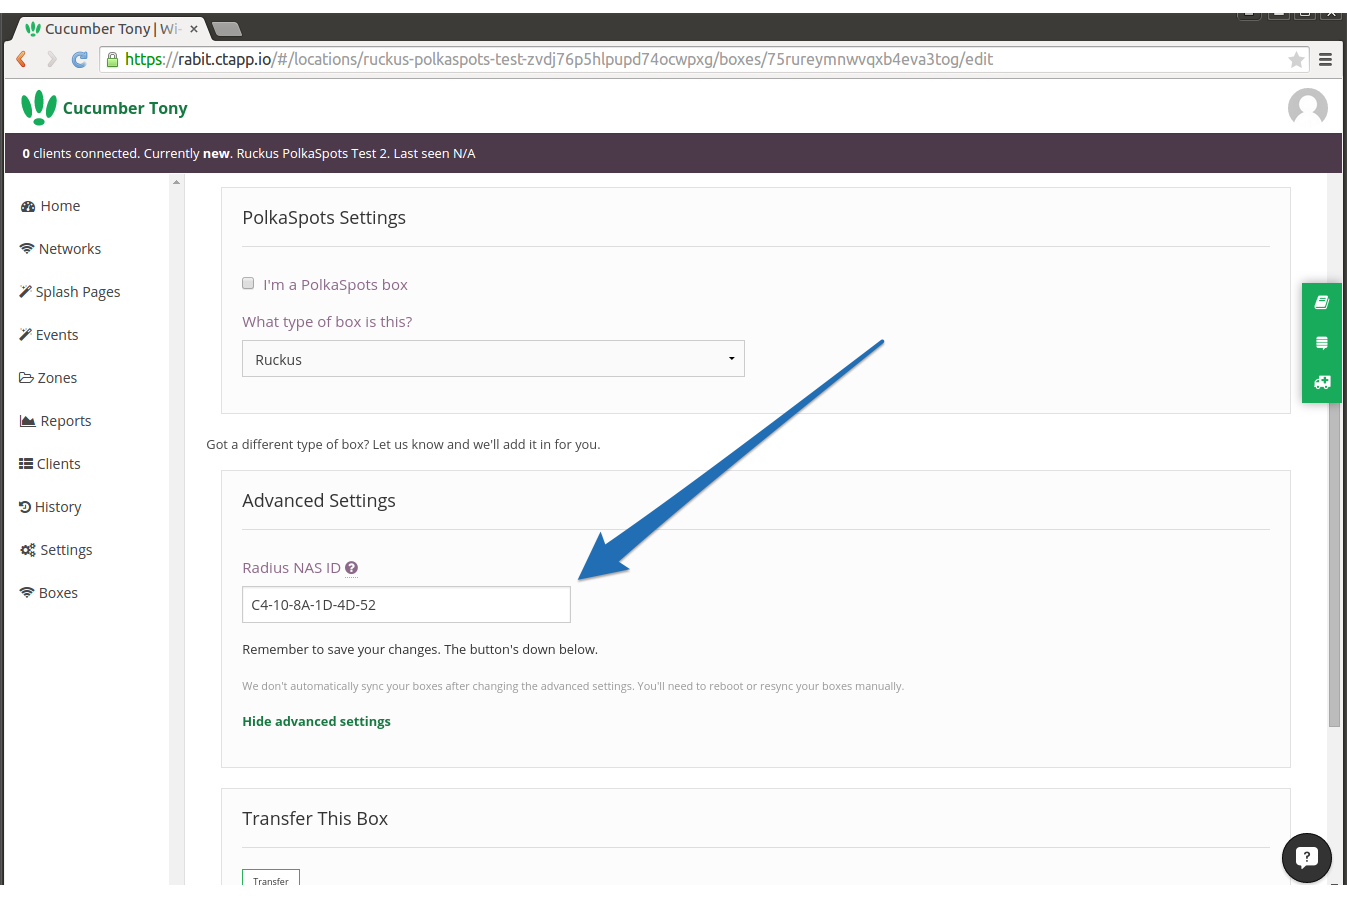
- NAS Identifier: Head to your boxes in CT WiFi and go into their settings.Then scroll down under Advanced Settings, and click on edit advanced settings. Click into Radius NAS ID and retrieve this
</ul>
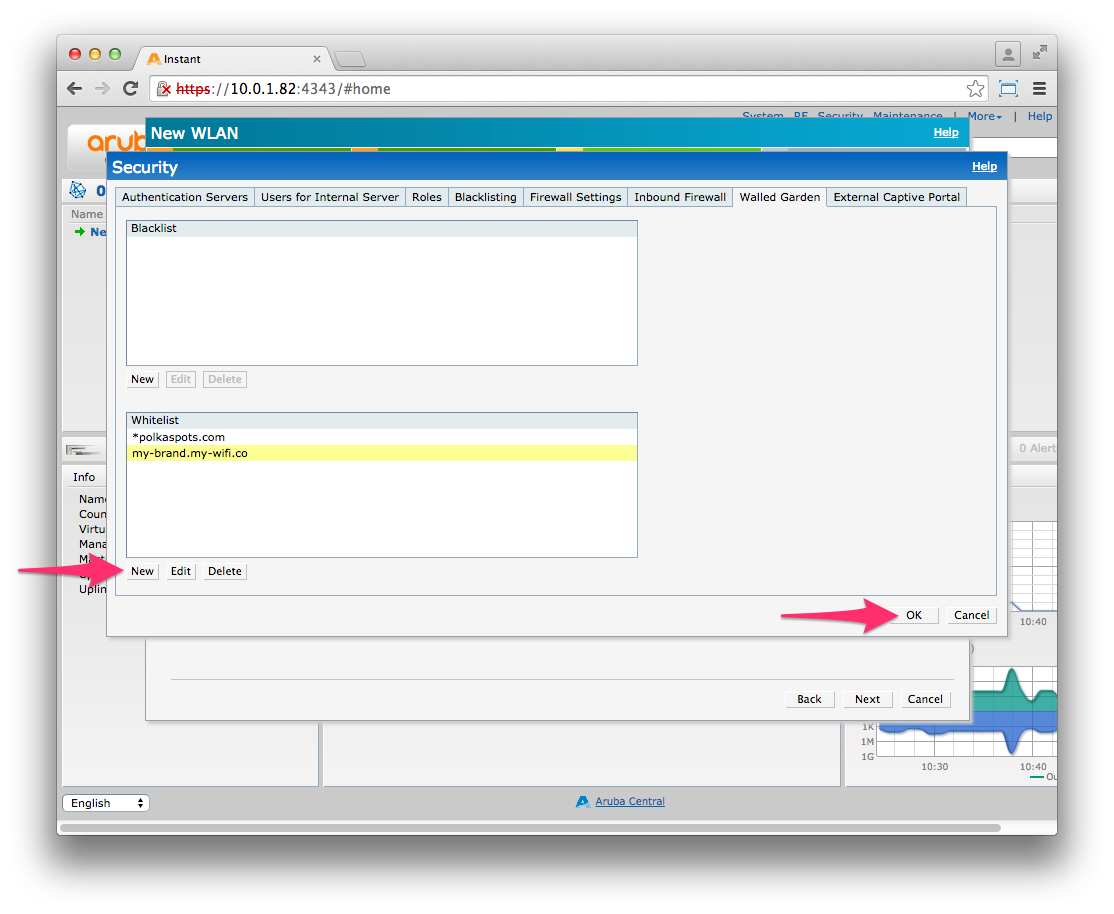
Once this is done, click OK to save. To change the whitelist click on "Blacklist: 0 Whitelist: 0" and the below screen will open up. Click New and enter the Walled Garden URLs as listed here: You can find the most up to date list of Walled Gardens here. Once that is done, click OK to save.
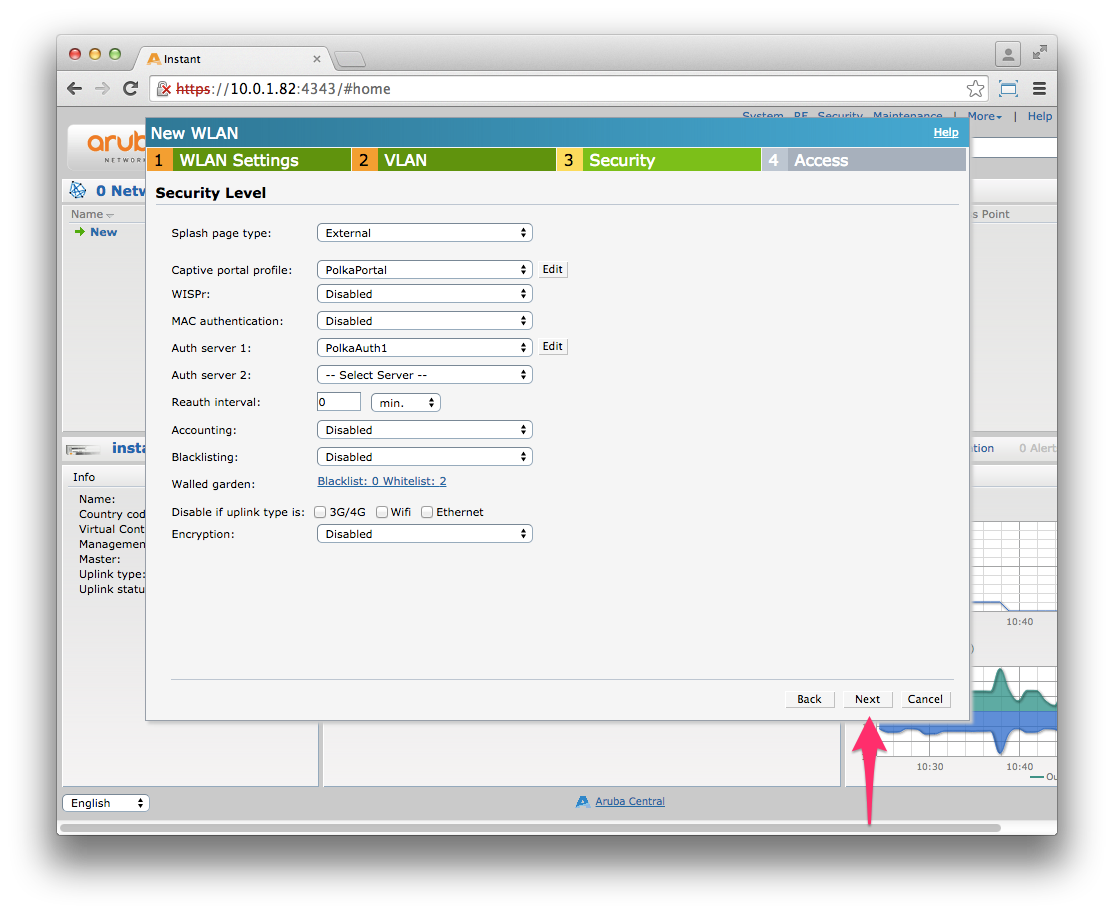
 After completing these settings, you should be left with the following screen. Progress by clicking Next
 Set access rules to Role-Based, select the default role (should be automatically created matching your SSID), and click New under Access rules.
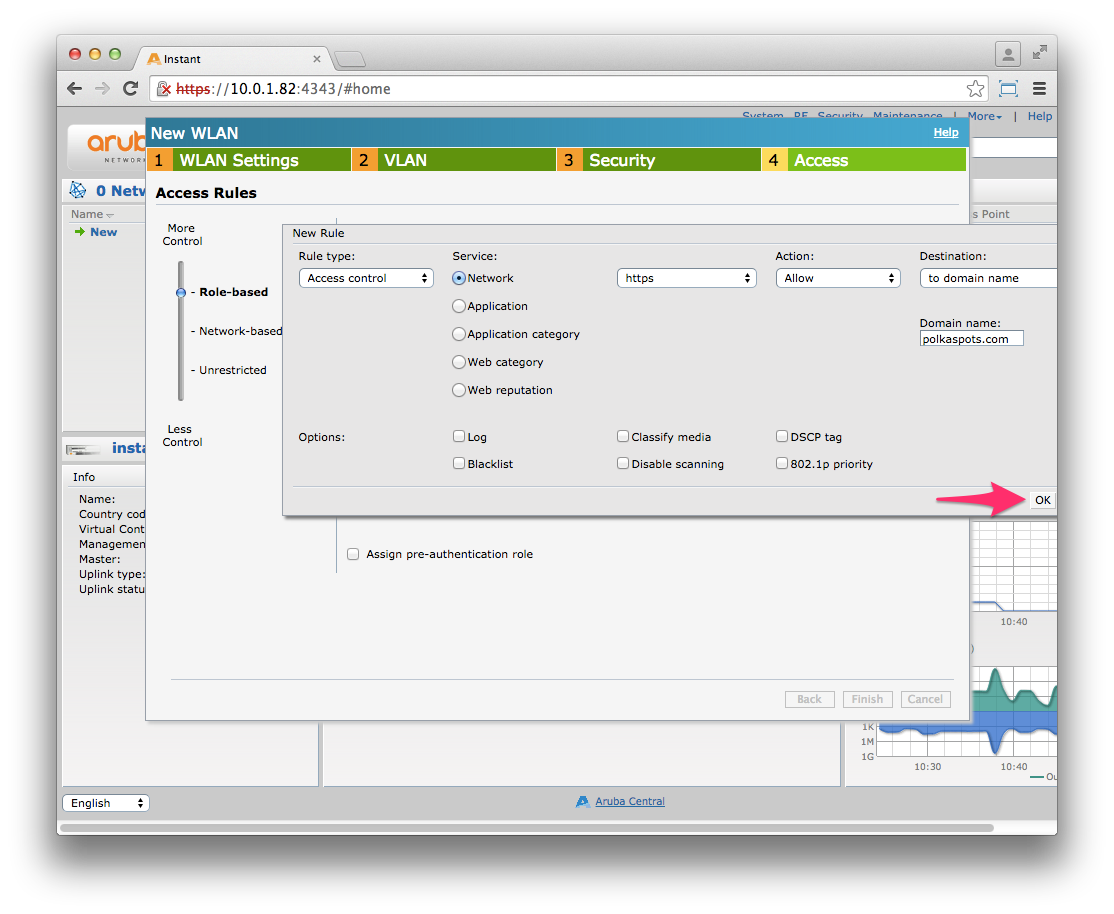
 Using the fields provided, create the following two rules:
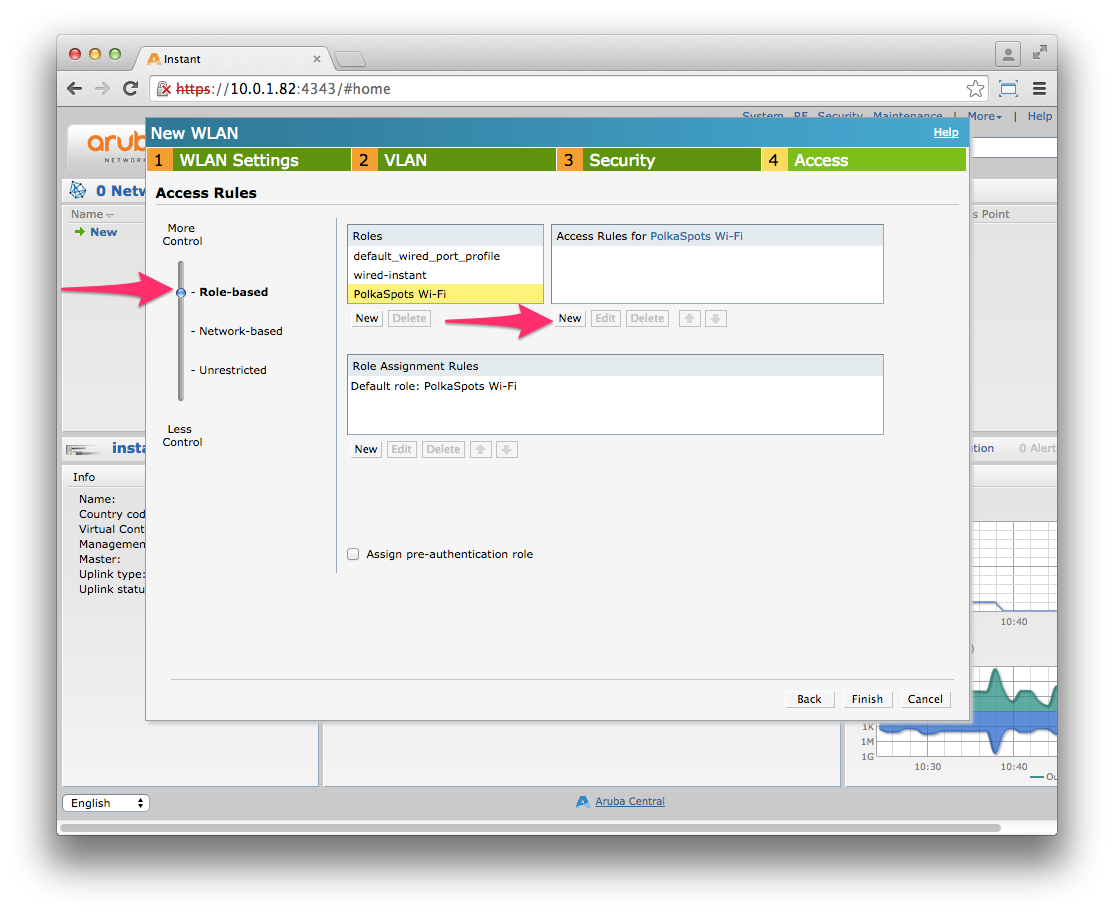
- Access Control > Network > https > allow > to domain name > polkaspots.com
- Access Control > Network > any > allow > to all destinations
</ul>
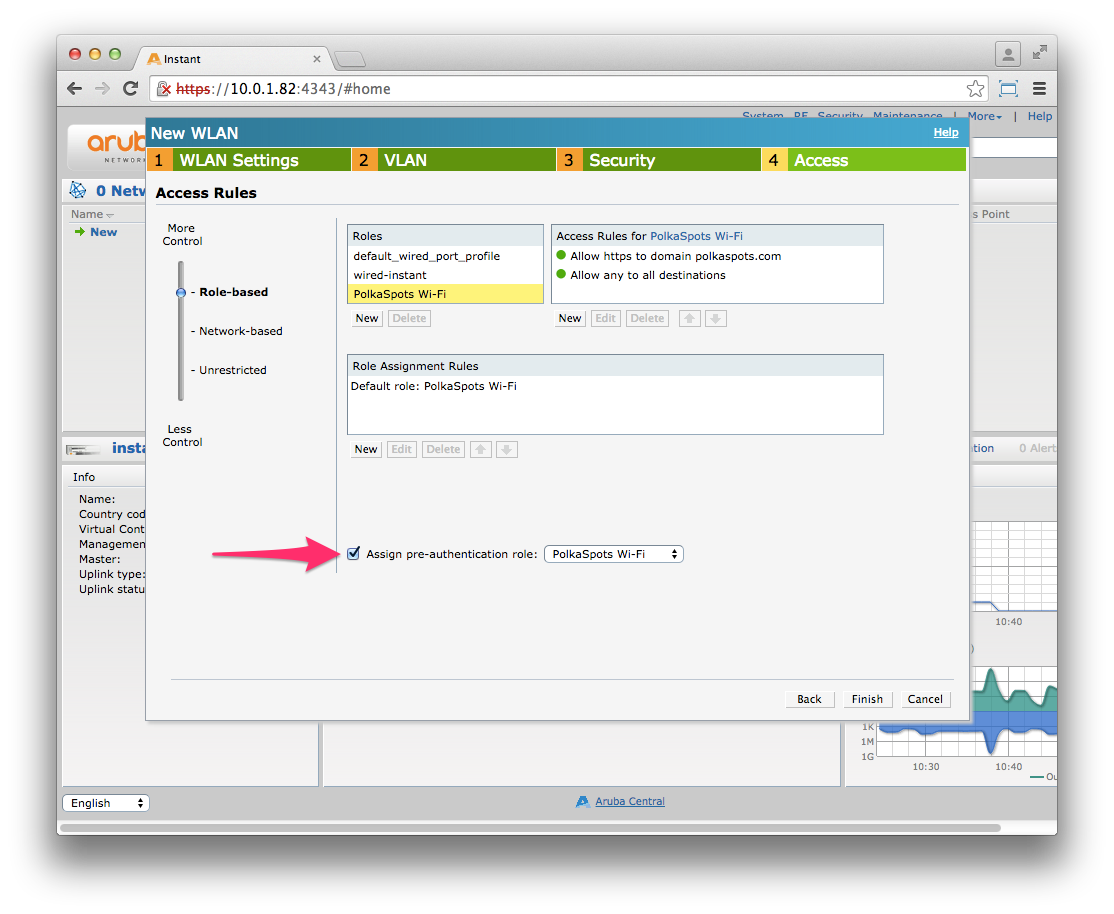
Once you have created the rules, tick the pre-authentication box and make sure that it has your Role selected, and then select finish.
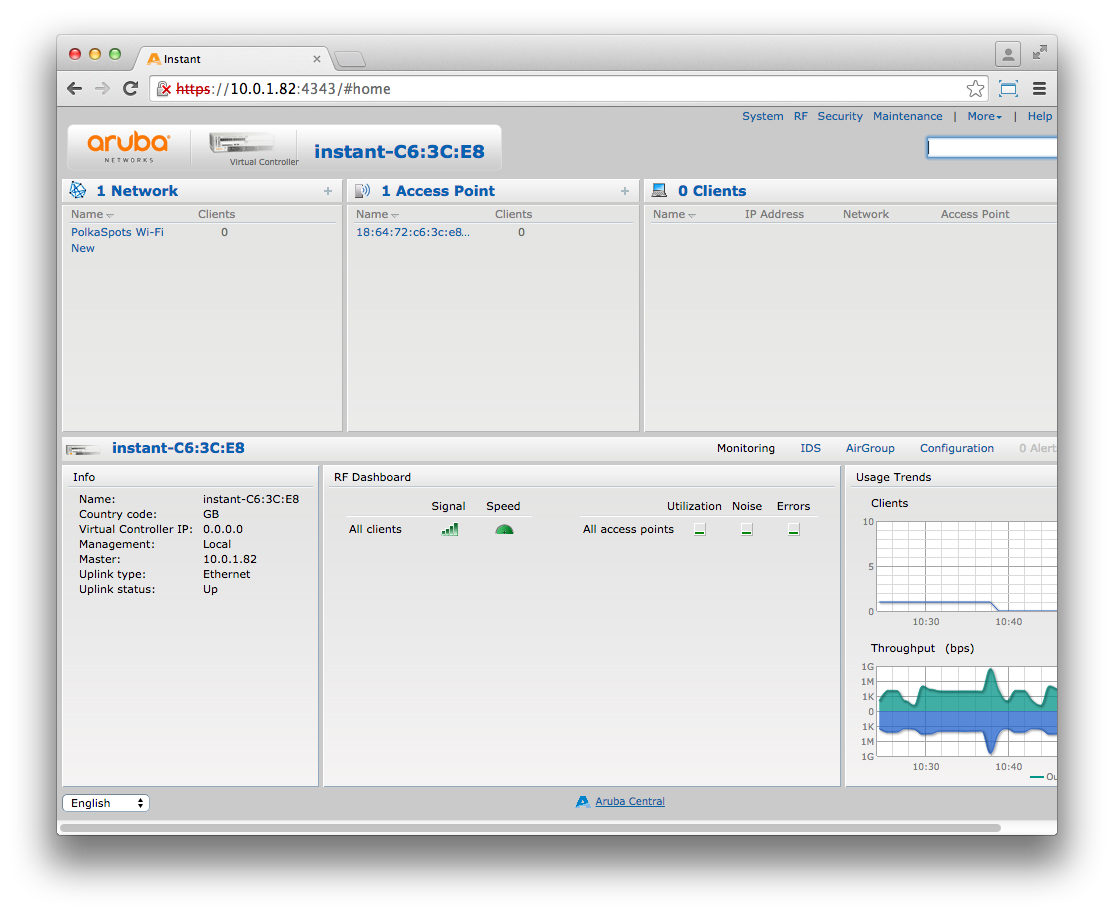
 You should now be left with the following screen, which means you have configured your device.
*CT WiFi is a cloud based WiFi management platform for businesses. The firmware gives consumer-grade WiFi access points enterprise-like capabilities.Or you can utlise the captive portal solution with your existing infrastructure. Create a free account and check it here ct-networks.io*
